.
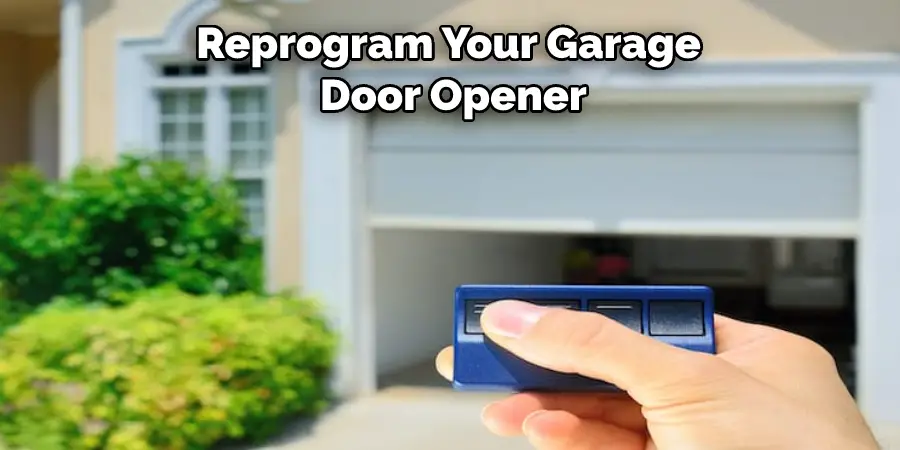
How often have you arrived home only to find that you couldn’t get into the house because you forgot to close the garage door? Even worse, how many times have you fumbled with your keys in the dark while trying to open the garage door? If either of these scenarios sounds familiar, then it’s time to reprogram your garage door opener. This post will show you how to reprogram the garage door opener in just a few easy steps. Keep reading for all the details.

What Causes a Garage Door Opener to Stop Working?
There are several reasons why your garage door opener might stop working. The most common reason is that the opener’s battery has died. If this is the case, then simply replacing the battery should do the trick. Another common reason is that the opener photo eye sensor is dirty or misaligned. This sensor is responsible for detecting obstacles in the door’s path, and if it’s not working properly, then the opener won’t work either. The other two possible causes are a loose connection between the opener and the wall button or a problem with the opener’s circuit board. Again, this is because both of these components are responsible for sending the opener’s signal.
Why It’s Important to Reprogram Your Garage Door Opener
If your garage door opener stops working, then you won’t be able to open or close your garage door. This can be a major inconvenience, especially if you use your garage door as your home’s primary entry and exit point. However, reprogramming your garage door opener is a relatively simple process that can be done in just a few minutes. By taking the time to reprogram your opener, you can ensure that it will work when you need it to. Additionally, reprogramming your opener can also improve the security of your home. If someone has access to your old opener code, they could potentially gain entry to your home. By changing the code, you can prevent this from happening.
Here is a complete guide on How to Reprogram the Garage Door Opener:
1. Locate the Opener’s “Learn” Button
The first step is to locate the opener’s “learn” button. This is because this is the button you will need to press to reprogram the opener. This button is usually located on the opener’s motor unit and may be labeled with the word “learn” or a picture of a light bulb. If you’re having trouble finding the button, consult your owner’s manual for guidance. The manual should also contain information specific to your particular model of opener.

2. Press and Hold the Learn Button
Once you’ve found the learn button, press and hold it for approximately six seconds. This will put the opener into “learn mode.” If the opener has an LED light, it will usually begin flashing when it is in learning mode. This is important to note because the flashing light indicates that you are ready to reprogram the opener. It’s also important to note that the exact method for putting your particular opener into learn mode may vary slightly, so be sure to consult your owner’s manual if you’re unsure.
3. Activate the Wall Control
With the opener in learn mode, activate the wall control by pressing the button. The opener should now be programmed and ready to use. If the opener doesn’t work, you may need to press the learn button again. You can also refer to the opener’s manual for specific instructions on how to reprogram it. It’s also important to note that some openers may require a different reprogramming process, so always refer to the manual for your specific model.
4. Test the Opener
After you’ve programmed the opener, it’s a good idea to test it out to ensure it’s working properly. To do this, press the button on the wall control. The door should open and close smoothly. You may need to adjust the opener’s sensitivity if it doesn’t. Refer to the manufacturer’s instructions for how to do this. You should also test the remote control to make sure it is working as well. It may need to be reprogrammed separately.
5. Adjust the Opener’s Sensitivity
If the opener isn’t opening or closing the door properly, you may need to adjust the opener’s sensitivity. This can be done by pressing the “up” and “down” arrows on the opener’s control panel. The opener’s sensitivity determines how much force is required to open or close the door. If the opener is too sensitive, it may open or close the door when there’s an obstacle. Conversely, if the opener is not sensitive enough, it may not open or close the door. Adjusting the sensitivity can help ensure that the opener works properly.
6. Clean the Photo Eye Sensor
If the opener isn’t opening or closing the door, then the problem may be with the photo eye sensor. This sensor is responsible for detecting obstacles in the door’s path. If the sensor is dirty or misaligned, then it may not be able to detect obstacles properly. To clean the sensor, wipe it with a clean cloth. If the sensor is misaligned, then you can try to realign it yourself. However, if you’re not confident in your ability to do this, then you may need to call a professional. It’s important to keep the photo eye sensor clean and aligned to ensure that your garage door opener works properly.
7. Check the Wall Button
If the opener isn’t responding to the wall button, then the problem may be with the connection between the opener and the button. Hold the button on the opener unit to check this and see if the door opens and closes. If it does, the opener receives power, and the button works. If the opener doesn’t respond, then there may be a problem with the opener itself, and you’ll need to call a professional for help. You can also check the wiring between the opener and the wall button to make sure it’s securely connected.
8. Test the Opener’s Circuit Board
If the opener isn’t responding to the wall button or the remote, then the problem may be with the opener’s circuit board. You’ll need to disconnect the opener from the power supply to test the circuit board. Once it’s disconnected, use a multimeter to test the continuity of the circuit board. If there is no continuity, then the circuit board will need to be replaced. If there is continuity, then the problem may be with the opener’s motor. In this case, you’ll need to call a professional for help.
9. Replace the Opener’s Battery
If the opener still isn’t working, then the problem may be with the opener’s battery. To check the battery, press the “learn” button on the opener unit. If the LED light doesn’t flash, then the battery is most likely the culprit. You’ll need to replace the battery with a new one. After replacing the battery, you may need to reprogram the opener using the steps outlined above. You should also check the battery regularly and replace it as needed to prevent future issues.
10. Tighten the Chain or Belt
The problem may be with the chain or belt if the opener makes noise. These components can become loose over time, which can cause the opener to make noise. To fix this, tighten the chain or belt. If the problem persists, then you may need to replace the chain or belt. The process of tightening or replacing the chain or belt may vary depending on the type of opener you have, so it’s best to refer to your user manual for specific instructions. It’s important to keep these components in good condition as they are responsible for lifting and lowering the door.
11. Adjust the Force Setting
If the opener still has trouble opening or closing the door, you may need to adjust the force setting. This setting determines how much force the opener will use to open or close the door. The door may not open or close properly if the setting is too high. Conversely, the door may open or close too quickly and forcefully if the setting is too low. First, disconnect the opener from the power supply to adjust the force setting. Then, locate the “force” setting on the opener unit and adjust it as needed. If you’re unsure how to do this, you may need to consult the opener’s manual.
12. Lubricate the Moving Parts
If the opener is still making noise or having trouble opening or closing the door, you may need to lubricate the moving parts. This will help reduce the friction between the parts, making them move more smoothly. Most hardware stores can purchase a lubricant specifically designed for garage door openers. First, disconnect the opener from the power source. Next, locate the moving parts on the opener. The two main areas you will want to lubricate are the chain or screw (depending on the type of opener you have) and the hinges on the door itself. Apply a liberal amount of lubricant to these areas, using a brush or rag to work it into the crevices. Wipe away any excess lubricant before reconnecting the opener to the power source.
How Often Should I Reprogram My Garage Door Opener?
It would be best if you reprogrammed your garage door opener every few months to ensure that it is working properly. Additionally, it would help if you reprogrammed the opener any time you changed the batteries in the unit. If you find that your garage door opener isn’t working as well as it used to, then you may need to reprogram it. Reprogramming the opener is a relatively simple process that can be done in just a few minutes.
It’s also a good idea to regularly check and maintain your garage door opener, even if it seems to be working fine. This can help prevent any potential problems and prolong the lifespan of your opener. Regularly cleaning and lubricating the moving parts can also help keep it functioning smoothly.
In addition, always follow the manufacturer’s instructions when reprogramming or maintaining your garage door opener. If you’re unsure about any steps or procedures, it’s best to consult a professional for assistance. Keeping your garage door opener in good working condition will not only save you time and frustration but also ensure your safety and that of your family. So make sure to regularly check and maintain your garage door opener to keep it functioning properly. Don’t neglect this important task, as it can save you from costly repairs in the long run.

Tips and Warnings on How to Reprogram the Garage Door Opener:
Tips:
- Check your garage door opener’s manual for specific instructions on reprogramming.
- Be sure to have your new garage door opener’s information on hand, including the model number and any specific instructions.
- Follow all instructions included with your new garage door opener.
- If you’re unsure about any steps, consult a professional for assistance.
- Regularly perform maintenance on your garage door opener to prevent future issues.
Warnings:
1. Reprogramming your garage door opener should only be done if necessary.
2. Incorrectly reprogramming your garage door opener could result in the door opening or closing unexpectedly, which could cause serious injury or property damage.
3. Always disconnect the power to your garage door opener before beginning any work on the unit.
4. Do not attempt to reprogram your garage door opener if you are not confident in your ability to do so correctly. Contact a professional for assistance if needed.
5. Be sure to test your garage door opener after reprogramming to ensure that it is working properly.
Frequently Asked Questions:
Q: Why is My Garage Door Opener Not Working?
A: There could be several reasons why your garage door opener isn’t working. Some common causes include a power outage, dead battery, dirty or misaligned photo eye sensor, faulty circuit board, loose chain or belt, and incorrectly set force setting. It’s essential to troubleshoot the problem and try different solutions before resorting to calling a professional.
Q: How Do I Troubleshoot My Garage Door Opener?
A: To troubleshoot your garage door opener, you should first check if there is power going to the unit and if the batteries are working correctly. If those are not the issue, you can try testing the opener’s sensors, adjusting the force setting, lubricating moving parts, and reprogramming the unit. If none of these solutions work, then it may be a more significant issue that requires professional help.
Q: Can I Reprogram My Garage Door Opener Myself?
A: Yes, but only if you are confident in your ability to do so correctly. Reprogramming your garage door opener incorrectly can be dangerous and cause the door to open or close unexpectedly, potentially causing serious injury or property damage. If you are unsure, it is best to seek professional assistance. You should also follow all instructions and safety precautions outlined in your garage door opener’s manual.
Q: How Often Should I Replace My Garage Door Opener?
A: On average, a garage door opener should last around 10-15 years. However, the lifespan can vary depending on usage and maintenance. It’s essential to keep an eye out for any signs of damage or malfunctions and replace the opener if necessary. Regular upkeep and maintenance can also help extend the life of your garage door opener.
Q: Is it Better to Repair or Replace My Garage Door Opener?
A: It depends on the age and condition of your current opener. If it is relatively new and only has minor issues, then repairing it may be a more cost-effective option. However, if it’s an older unit or has significant damage, it may be more practical to replace it entirely. Consider consulting a professional for their opinion and weighing the cost of repairs versus replacement before making a decision.
Overall, regular maintenance and proper use can help prolong the life of your garage door opener and save you from having to replace it sooner than necessary. So don’t forget to follow our tips for reprogramming and maintaining your garage door opener! Happy opening and closing!
Conclusion:
This article provides a detailed guide on how to reprogram the garage door opener. You can quickly and easily reprogram your garage door opener by following these simple steps. Once you have completed the process, you can open and close your garage door using the remote control. If you experience problems with your garage door opener, write down the model number and refer to the user manual for further instructions. Thanks for reading!

