The rubber seal on a garage door plays a crucial role in maintaining your garage’s insulation and cleanliness. Over time, this seal can become brittle, crack, or wear down, reducing its effectiveness at keeping out drafts, rain, dirt, and pests. Replacing it is a straightforward task that can be completed with a few tools and some basic know-how.
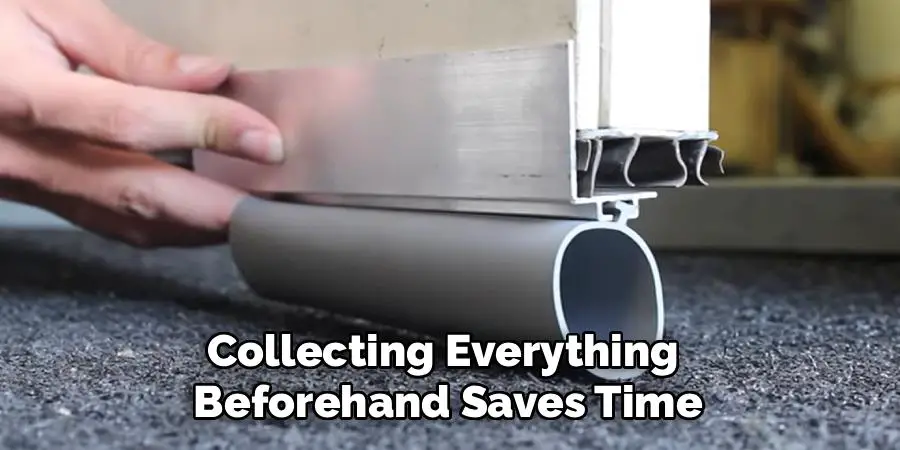
Before beginning, gather the necessary tools and materials. You will need a replacement rubber seal that matches your garage door model, a screwdriver, a utility knife, and a tape measure. It’s also helpful to have a cloth and soapy water on hand for cleaning the track where the seal will be installed. Ensuring you have everything ready will save time and make the process smoother.

If you’re wondering how to replace rubber seal on garage door, this guide will provide a clear, step-by-step process to help you maintain your garage’s weatherproofing. Whether you’re a DIY enthusiast or tackling this for the first time, replacing the seal isn’t as intimidating as it seems. A little effort will go a long way in keeping your garage energy-efficient and clean.
Why It’s Important to Replace a Garage Door Rubber Seal
A worn-out rubber seal may not seem like a significant issue, but it can cause several problems if left unaddressed. Cracks and gaps in the seal allow rainwater and dirt to seep in, potentially damaging stored items or encouraging rust on your garage floor. Additionally, a faulty seal lets in drafts that can increase heating or cooling costs in attached garages.
Replacing the rubber seal not only improves the appearance of your garage but also enhances its functionality. It adds an extra layer of weatherproofing while keeping pests and unwanted debris at bay. A small investment in time and materials can save you from larger expenses down the line.
Step-by-Step Guide: How to Replace Rubber Seal on Garage Door
Step 1: Gather Your Tools and Materials
To start the process, prepare all the tools and materials you’ll need. Most hardware or home improvement stores sell replacement garage door bottom seals, and it’s worth checking for a seal compatible with your specific garage door model.
You’ll need a utility knife for cutting the replacement seal to size, along with a flathead screwdriver to remove the old seal. Gloves can protect your hands from sharp edges or splinters on the door track. If replacing a T-style seal, ensure the replacement features matching ridges to slide into the track grooves neatly. Collecting everything beforehand saves time and helps the job run smoothly.
Step 2: Remove the Old Seal
Next, focus on safely removing the worn-out seal. Begin by opening the garage door completely so its bottom edge is at a comfortable working height. This makes it easier to access the seal without straining your posture.
Check the seal’s condition to understand its attachment method. Some designs slide out of grooves on the garage door track, while others are nailed or stapled into place. For sliding seals, use a flathead screwdriver to loosen stuck edges if necessary. For nails or staples, gently pry them out using pliers, taking care not to damage the door or track. Once loosened, pull the old seal off completely, ensuring no scraps are left behind.
Step 3: Clean the Track or Surface
With the old seal removed, inspect the track or attachment surface for dirt, rust, or adhesive residue. Accumulated grime can prevent the new seal from fitting securely, making thorough cleaning essential.
Use a damp cloth or gentle cleaning solution to wipe down the metal track, removing any oil or dirt. If rust is present, lightly sand it off and repaint the area with rust-inhibiting primer. Allow enough drying time to ensure the surface is clean and dry before installing the new seal. Proper preparation here ensures a snug, lasting fit for the replacement.
Step 4: Measure and Cut the New Seal
Take precise measurements of the garage door’s width to determine the length of the replacement seal. Accurate cutting is crucial for preventing gaps. If the replacement seal is longer than the required width, use a utility knife to trim it down to size carefully.
Before cutting, double-check the measurements to avoid wasting material. It’s worth erring on the side of slightly longer, as you can always trim more if necessary. Straight, clean cuts help ensure the seal aligns perfectly along the bottom edge of the door for optimum results.
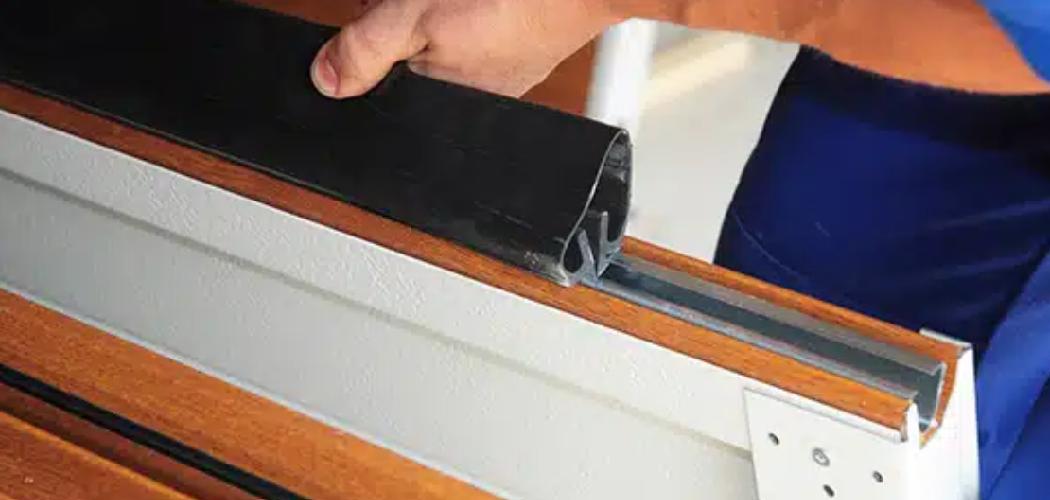
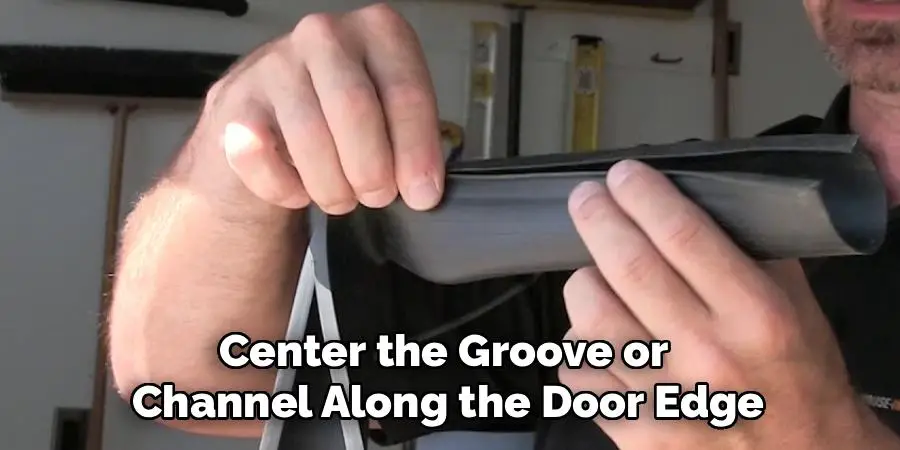
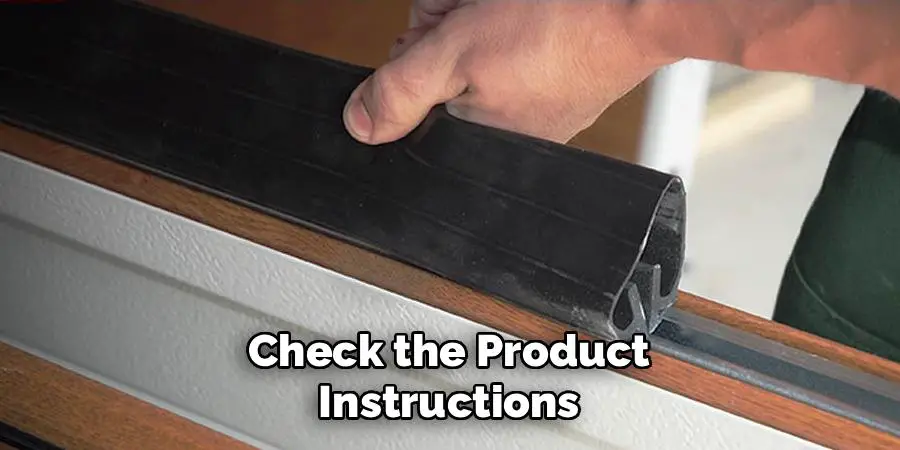
Step 5: Insert the New Seal
Begin fitting the new seal by gently sliding or attaching it to the prepared track or surface. If using a T-style seal, guide its ridges into the grooves on the garage door bottom track. With U-shaped seals, center the groove or channel along the door edge, pressing it into place firmly.
Work methodically from one end of the door to the other, easing the seal into alignment as you go. If the seal feels too tight, applying a small amount of lubricant to the track can make sliding smoother. Take your time to ensure the seal fits evenly to prevent irregularities affecting its performance.
Step 6: Secure the Seal
After positioning the new seal correctly, check that it’s seated snugly along the door’s entire width. For nails or staple-based designs, secure the seal along the original attachment points. For sliding seals, press them firmly into place to lock into the grooves without shifting.
Ensure the entire length of the seal makes consistent contact with the garage floor when the door closes. Adjustments may be needed to achieve a perfect fit. A secure installation helps the seal function effectively and stay in place over time.
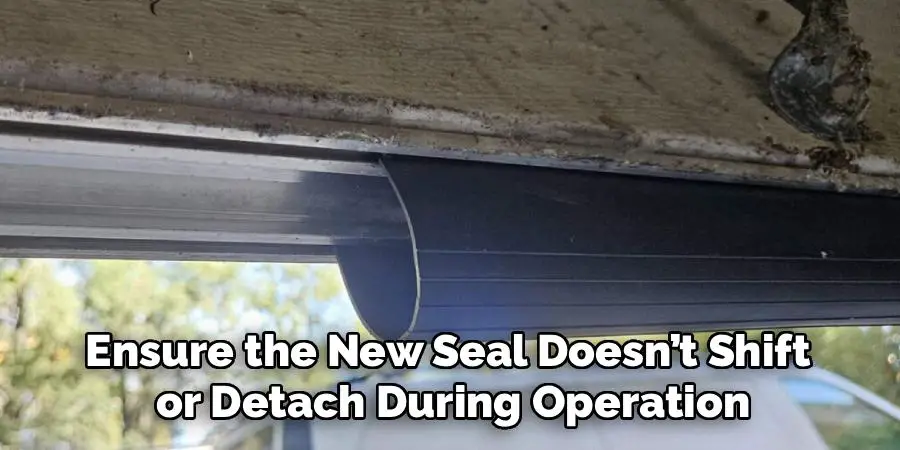
Step 7: Test the New Seal
Once installed, test the seal by lowering the garage door completely. Check for visible gaps or uneven contact with the ground, as these may indicate alignment issues. If needed, make small adjustments until the seal sits flush against the floor consistently.
Close and open the door several times to ensure the new seal doesn’t shift or detach during operation. Confirm that it adequately blocks light and airflow as intended. Proper testing guarantees long-term effectiveness, protecting your garage from external elements.
Step 8: Maintain the Seal
To extend the life of your new rubber seal, establish a regular maintenance routine. Inspect it periodically for signs of wear, especially after harsh weather conditions. Cleaning the seal to remove dirt, debris, and salt helps prevent premature deterioration.
Applying a protective lubricant occasionally preserves the seal’s flexibility and elasticity, preventing cracks. With consistent care, your garage door seal can provide years of reliable weatherproofing, reducing the frequency of future replacements.
Seal Types and Selection
When selecting a rubber seal for your garage door, it’s essential to understand the different types available and their specific benefits. The most common types include T-shaped, U-shaped, and Bulb seals. T-shaped seals are versatile and fit into most standard tracks, offering effective sealing against weather and pests. U-shaped seals, often used for uneven surfaces, provide an excellent barrier against water and drafts. Bulb seals, recognized by their rounded shape, are ideal for gaps that require a snug fit and offer superior insulation.
When choosing a seal, take into account factors like your garage door’s design, gap dimensions, and the climate in your region. Opt for a seal made from durable, weather-resistant materials like EPDM rubber, which can withstand temperature fluctuations and resist cracking. Proper selection ensures the seal fits securely and delivers optimal performance, protecting your garage from the elements.
Frequently Asked Questions
1. How often should a garage door seal be replaced?
Garage door seals typically last from five to ten years, depending on weather conditions and usage. Inspect your seal regularly for cracks, gaps, or brittleness. If you notice drafts or dampness in the garage, it may be time for a replacement.
2. Are all garage door bottom seals the same size?
No, garage door bottom seals come in various dimensions and styles, such as T-shaped or U-shaped designs. Measure your garage door and check the manufacturer’s specifications before purchasing a replacement to ensure compatibility.
3. Can I use adhesive to install a garage door seal?
Adhesive can be used on certain seal types, especially in cases where tracks are unavailable. However, most seals are designed to slide into place or be mechanically attached. Check the product instructions for recommended installation methods.
4. What type of rubber seal is best for extreme weather conditions?
For regions with extreme temperatures or heavy rain, opt for high-quality EPDM rubber seals. These are highly durable and resistant to cracking, making them ideal for prolonged exposure to harsh weather.
5. Is replacing a garage door seal a DIY-friendly job?
Yes, replacing a garage door seal is relatively straightforward and suitable for DIYers. With basic tools like a utility knife and flathead screwdriver, most homeowners can complete the task in under an hour. Follow this guide for optimal results.
Conclusion
Knowing how to replace rubber seal on garage door is an essential skill for maintaining your garage’s integrity. Replacing the seal maximizes weatherproofing, reduces energy loss, and keeps your garage clean and secure.
Regular maintenance of your garage door seal is crucial to ensure its longevity and effectiveness. Inspect the seal periodically for signs of wear, cracking, or damage, especially after extreme weather conditions. Prompt replacement of a compromised seal prevents larger issues, such as water damage or increased energy costs, helping you preserve the functionality and value of your garage.
By following these step-by-step instructions, you’ll ensure a smooth replacement process and long-lasting results. Don’t wait until drafts or pests invade your garage—replace the rubber seal today to enjoy a more efficient and comfortable space!
I am Rick. I grew up helping my dad with his handyman service. I learned a lot from him about how to fix things, and also about how to work hard and take care of business. These days, I’m still into fixing things- only now, I’m doing it for a living.
I’m always looking for new ways to help people grow and develop. That’s why I have created this blog to share all my experience and knowledge so
that I can help people who are interested in DIY repair.