Are you struggling to get your garage door to open and close properly? If the problem is a broken cable, read on for some helpful advice. Reattaching a garage door cable isn’t a complicated process, but it is important to ensure that you are following all safety instructions.

If you’ve ever had to fix a broken garage door cable, then you know how frustrating the experience can be. Detaching and reattaching cables are no easy tasks, especially when your only tool is brute force.
With this comprehensive guide on how to reattach a garage door cable, you’ll have your system running smoothly in no time.
By the end of it all, not only will you have mastered an essential home repair skill – but who knows? Maybe this newfound knowledge will even inspire other projects around the house!
What Will You Need?
To begin, you will need the following materials:
- A new garage door cable or roller
- Cable clips to attach it to the opening mechanism
- A pair of pliers or channel locks for installation
- One set of safety glasses and gloves
It’s always a good idea to have extra supplies on hand in case you run into any trouble.
10 Easy Steps on How to Reattach a Garage Door Cable
Step 1. Prepare the Space:
First, make sure the area around your garage door is clear of any debris that could interfere with the job. Put on your safety glasses and gloves to protect you from any loose parts or sharp edges. It is also a good idea to prop the door open with a piece of wood or other stable objects during this process.
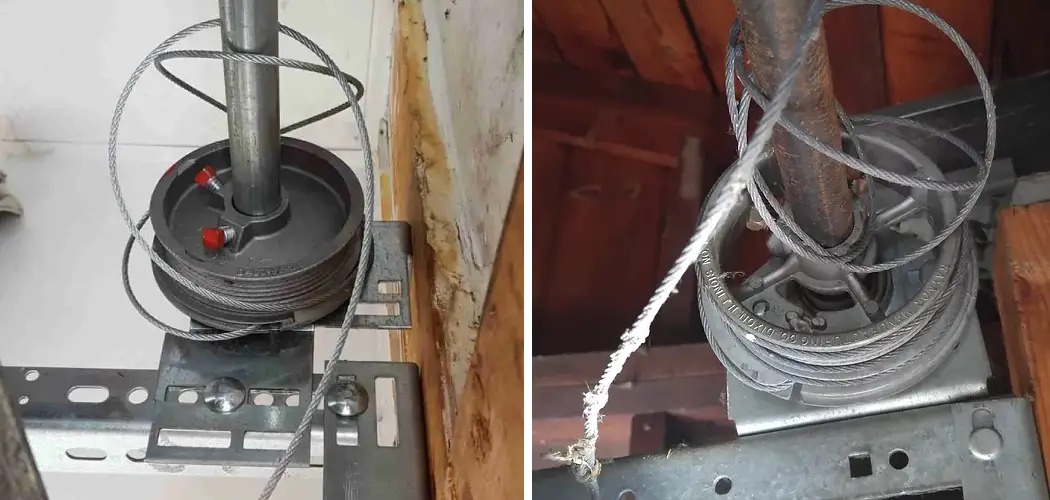
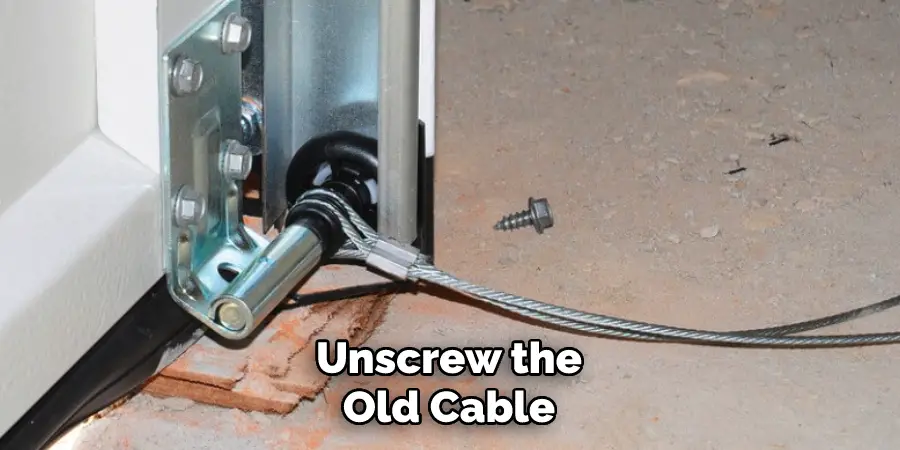
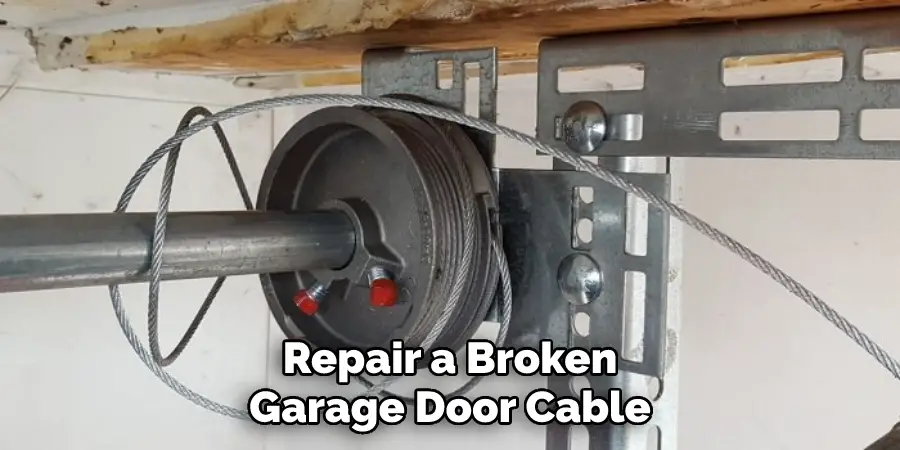
Step 2. Remove Old Cable:
Unscrew the old cable from the opening mechanism and pull it from its pulley wheel. Be sure to keep all the parts carefully organized so that you can easily identify them later on. Don’t forget to clear away any broken pieces of the old cable.
Step 3. Install New Cable:
Attach one end of the new cable to the opening mechanism and then thread it through the pulley wheel. Make sure that the cable is securely fastened to the opening mechanism. You can use a pliers or channel locks for this step.
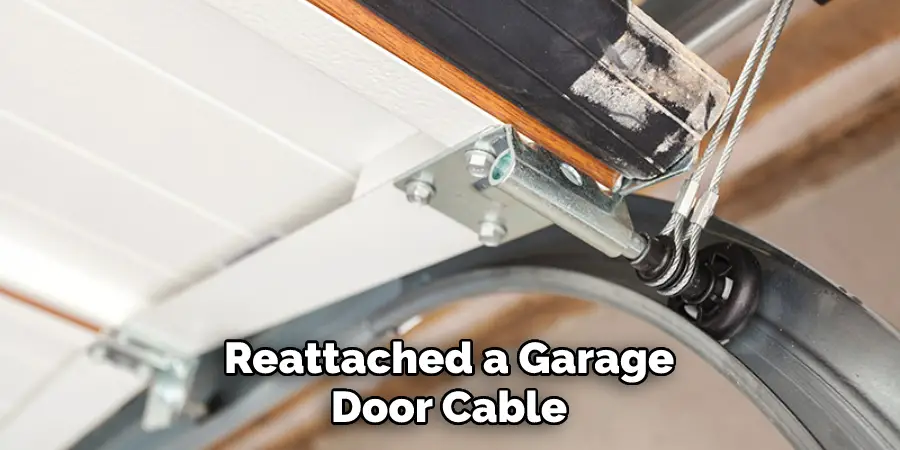
Step 4. Secure Cable With Clips:
Clip both ends of the cable with clips so that it remains in place when you open and close your garage door. You can get these clips at most hardware stores. Ensure that the cable is fitted snugly in place.
Step 5. Verify Proper Tension:
Once you have reattached your new cable, be sure to check how tight it is by manually lifting and releasing your door several times to ensure proper tension. Adjust as needed so everything runs smoothly without sticking points or jerky movements. If the cable is too tight, you may need to loosen it a bit.
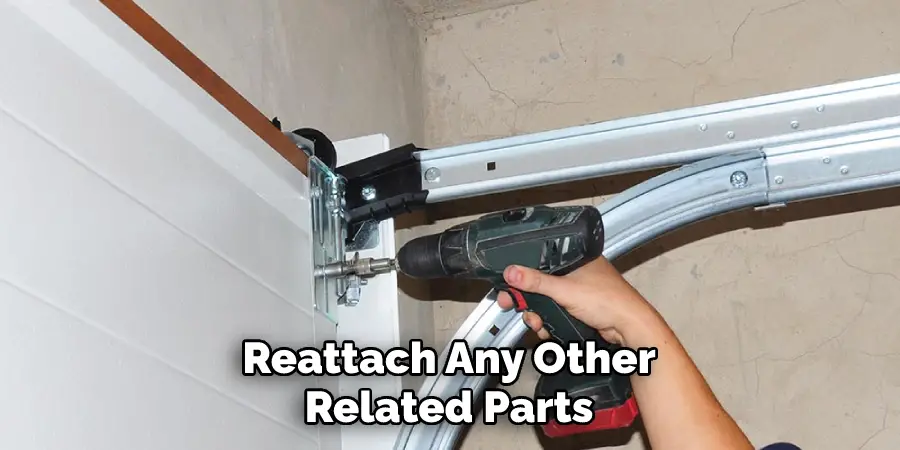
Step 6. Reattach Other Parts:
Reattach any other related parts, such as the springs or pulleys. This step is important for ensuring that your door operates correctly and safely. Additionally, it will help to prevent any further damage or wear and tear in the future.
Step 7. Test Your Door:
Now it’s time to test out how well your repairs have worked! Open and close the garage door a few times to ensure everything works smoothly and without sudden jerks or sticking points. As a safety precaution, always make sure to keep your hands and feet away from the moving parts.
Step 8. Check Tension Again:
Check the tension on your cable one more time before you consider the job done. If necessary, adjust as needed so that all components remain in balance. Make sure not to overtighten the cable either – otherwise, it could cause damage to the system over time.
Step 9. Clean Up Space:
Once you have finished, be sure to clean up the workspace and dispose of any extra parts or debris. This will help to make sure that your repair job is successful and that everything works as it should. Moreover, it will keep your garage area looking neat and tidy.
Step 10. Enjoy Your Fixed Garage Door System:
Congratulations! You’ve successfully reattached a garage door cable – how satisfying! Now go out there and show off your newly acquired skills with pride! Don’t forget to test how well the system regularly works for optimal performance.
By following these easy steps, you can confidently reattach a garage door cable no matter how old or broken it may be. With a bit of patience and some basic knowledge, anyone can take on this task – even if their DIY experience is minimal. So don’t be intimidated – just dive in and get the job done!
5 Additional Tips and Tricks
- When reattaching a garage door cable, make sure that the torsion spring is properly secured with a locking clamp to avoid any potential injury.
- If you’re having difficulty fitting the new cable onto the garage door opener arm, use a pair of pliers to adjust the grooves on the arm and make it easier to attach.
- Before securing the new cable, double check its tension setting by pulling it tight and then letting go; if it springs back into place without sagging, you know its tension is correct.
- If possible, enlist a helper when reattaching your garage door cable, as this will help ensure safety and efficiency in completing the job.
- After attaching your new garage door cable, test the door opener by running it through a full cycle to ensure it is properly functioning. If you notice any issues, contact a professional for assistance.
Following these steps will help ensure your how-to reattach a garage door cable job goes as smoothly and safely as possible!
5 Things You Should Avoid
- Don’t attempt to repair a broken garage door cable without proper training and safety precautions. This can be dangerous if you do not properly handle the garage door and its cables.
- Don’t use tools or hardware not specifically designed for reattaching a garage door cable. Using incorrect tools can lead to further damage and even cause the cable to break completely.
- Don’t attempt to repair a broken garage door cable with aging parts or components, as they may be beyond their useful life and require replacement instead of repair.
- Don’t continue using a damaged cable if it has been compromised by wear-and-tear or accidental damage; this could put your safety at risk in the event of an unexpected malfunction or accident related to the garage door and its cables.
- Don’t forget to test the door after reattaching the cable to ensure it is working properly and safely; if something seems off, contact a professional for assistance.
These tips should help ensure that you are able to safely and correctly reattach a garage door cable. If in doubt, contact a professional service for assistance.
How Do You Fix a Loose Garage Door Cable?
- Gather the necessary tools and materials, including a ladder, locking pliers, adjustable wrench, safety goggles, gloves, and cable clamps.
- Locate the broken cable and inspect it for any signs of wear-and-tear or other damage.
- If needed, use the pliers to adjust the tension on the garage door springs before attempting to reattach the cable; this will help ensure that your repair is secure once complete.
- Secure the loose end of the cable to its pulley using a clamp; make sure that it is firmly attached to prevent further slippage or to loosen over time.
- Carefully lower the ladder and use it to reach the top of the garage door; use the adjustable wrench to tighten any loose nuts or bolts associated with the cable.
- Test the garage door to make sure that it is operating properly and securely, using caution when doing so.
- If needed, continue adjusting the tension on the springs until it is balanced correctly and your repair is complete.
Reattaching a garage door cable can be difficult if you don’t have experience in this type of situation, so it is always best to contact a professional for assistance and guidance. Following these steps should help ensure that your repair job goes smoothly and safely.
Conclusion
Using sturdy parts when reattaching a garage door cable is essential, as these will provide increased protection and stability. You can successfully reattach a garage door cable with relative ease by taking the right precautions, using appropriate tools, and following the steps above.
With the help of this post, you should now understand how to reattach a garage door cable yourself instead of having to hire someone else to do it for you. Though this may seem like a difficult task at first glance, it is quite simple. The only difference between gardening DIYers and experts is that experts know what things to look for and how to secure them.
Now that you are armed with information about reattaching a garage door cable, confidently take on this project and enjoy the results!
I am Rick. I grew up helping my dad with his handyman service. I learned a lot from him about how to fix things, and also about how to work hard and take care of business. These days, I’m still into fixing things- only now, I’m doing it for a living.
I’m always looking for new ways to help people grow and develop. That’s why I have created this blog to share all my experience and knowledge so
that I can help people who are interested in DIY repair.