A misaligned or detached garage door chain can disrupt the smooth operation of your entire garage door system. Whether caused by wear and tear or improper maintenance, knowing how to put garage door chain back on sprocket the sprocket is an essential skill for homeowners. Handling this repair yourself can save money and keep your garage door functioning safely and efficiently.

Before beginning, ensure you have the necessary tools on hand, such as a wrench, screwdriver, and a step ladder. Start by disconnecting the garage door opener from its power source to prevent accidental operation during the process. Locate the tension adjustment bolt on the garage door opener; this bolt is typically attached to the chain near the sprocket.
Loosen the bolt slightly to create slack in the chain, making it easier to reposition onto the sprocket. Carefully realign the chain around the sprocket, ensuring it fits evenly and securely. Once in place, tighten the tension adjustment bolt to restore proper tension, but avoid over-tightening as it may strain the system. Reconnect power to the opener and test the door’s operation to confirm smooth and efficient movement.
This guide provides clear, expert, and beginner-friendly steps to reinstall your garage door chain, ensuring smooth operation without the hassle of professional intervention. With a few essential tools and the right approach, you’ll have your garage door working like new in no time.
Why It’s Important to Learn How to Put Garage Door Chain Back on Sprocket
A garage door chain is essentially the backbone of motorized garage door openers, carrying the weight and motion required to open and close the door. When the chain comes off the sprocket, the door could become unbalanced, stop functioning, or even cause safety hazards. Learning how to fix this issue yourself gives you control in an emergency and saves you the expense of hiring a professional.
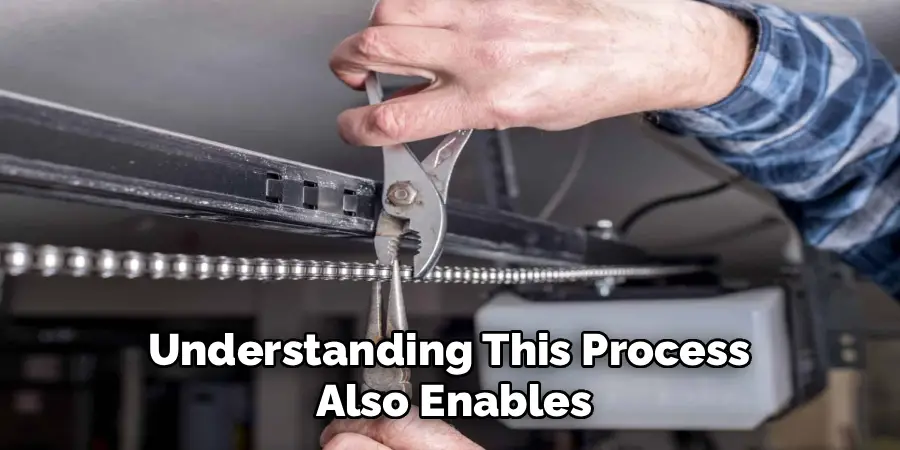
Understanding this process also enables you to maintain your garage door opener, reducing the likelihood of future problems. Regularly inspecting and maintaining the chain and sprocket system can prolong your garage opener’s life, ensuring smooth, hassle-free operation. Plus, being familiar with this simple fix makes you better equipped to handle similar mechanical challenges around the home.
With the right guidance, putting the chain back on the sprocket is easier than you might think. The following steps will walk you through the process in detail.
Step-by-Step Guide on How to Put Garage Door Chain Back on Sprocket
A detached garage door chain might seem like a daunting repair project, but these step-by-step instructions make the process simple and manageable for beginners.
Step 1: Disconnect the Power to the Garage Door Opener
Safety comes first. Before handling any part of the garage door chain or sprocket, unplug the garage door opener or disconnect the power at the breaker box. This ensures that the system won’t accidentally move while you’re working, preventing potential injuries.
Step 2: Identify the Cause of the Chain Misalignment
Take a close look at the garage door chain and sprocket system to determine why the chain came off. This could include issues like a loose chain, obstructions in the system, or worn-down components. Pinpointing the cause allows you to address any underlying issues before putting the chain back in place.
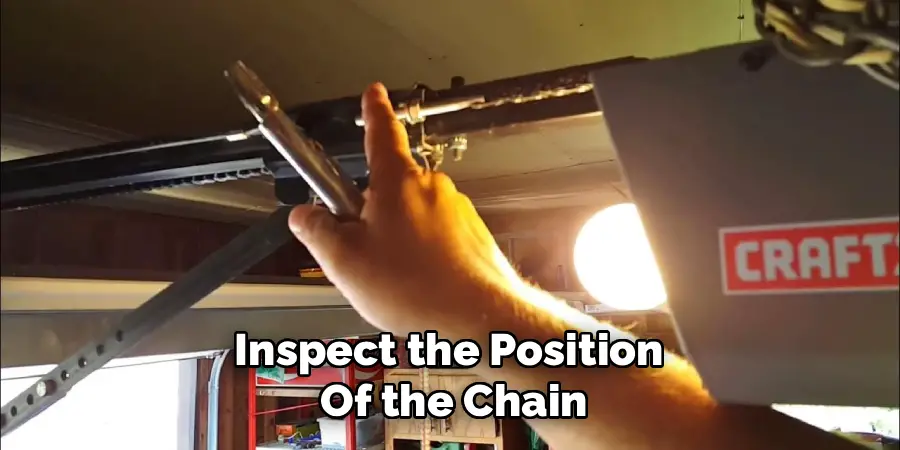
Step 3: Locate the Chain and Sprocket Position
Inspect the position of the chain and the sprocket where it rests. The sprocket, located near the motor housing at the center of the garage door opener, is the part that drives the chain. A clear understanding of the chain’s alignment and the sprocket’s operation will give you a better idea of how to proceed with the repair.
Step 4: Loosen the Tensioner
To make it easier to reposition the chain, loosen the tensioner bolt holding the chain in place. This bolt is usually located on the garage door opener’s trolley. By loosening it, you create sufficient slack in the chain, making it easier to guide back onto the sprocket.
Step 5: Reposition the Chain on the Sprocket
Carefully place the chain back onto the sprocket. Ensure it is sitting evenly along the sprocket’s teeth without any kinks or twists. This ensures that the chain will move smoothly once powered again.
Step 6: Adjust the Chain Tension
Use the tensioner bolt to tighten the chain back to its proper tension. The chain should have some flexibility but not sag too much. A correctly adjusted chain ensures smooth operation and prevents it from detaching again. Avoid over-tightening, as this can stress the motor and the chain.
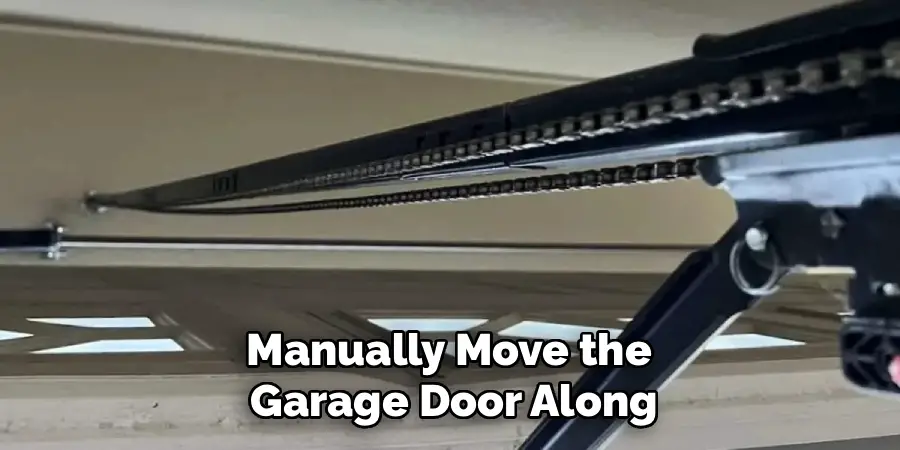
Step 7: Perform a Manual Check
Manually move the garage door along its track to confirm the chain and sprocket are functioning correctly. This test also allows you to check for any obstructions, irregular movements, or areas requiring further adjustment.
Step 8: Reconnect Power and Test the System
Plug the garage door opener back into the power source and operate the system with the remote or wall switch. Look and listen for smooth, quiet movement of the garage door. If the chain or sprocket shows any irregularities, turn off the power and recheck your work.
Step 9: Lubricate the Chain and Sprocket
To reduce wear and tear and ensure optimal performance, apply a lubricant specifically designed for garage door chains. Proper lubrication prevents rust and minimizes noise during operation.
Step 10: Schedule Regular Maintenance
Now that the chain is reinstalled, set a maintenance schedule to inspect and clean the chain and sprocket system periodically. Regular upkeep significantly reduces the chances of dealing with this problem again.
By following these detailed steps, you’ll master how to put the garage door chain back on the sprocket and maintain the functionality of your garage door for years to come.
Troubleshooting Common Issues
While maintaining and reinstalling the garage door chain, you may encounter some common issues. Here are a few potential problems and their solutions:
Chain Slipping Off the Sprocket
If the chain continues to slip off the sprocket, ensure that you have properly aligned the sprocket with the chain and that the tension is adjusted correctly. A loose chain can cause instability, so tighten it using the adjustment bolts on the garage door opener.
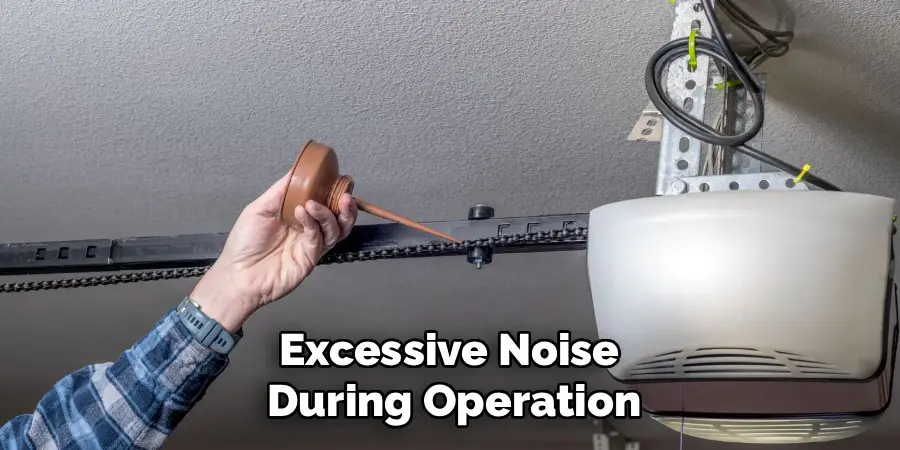
Noisy Operation
Excessive noise during operation might indicate insufficient lubrication or a misaligned chain. Apply lubricant suitable for garage door systems to the chain and the sprocket, and verify that everything is aligned and securely fastened.
Chain Too Tight or Too Loose
An improperly adjusted chain can strain the system. If the chain is too tight, it could damage the motor or sprocket. Conversely, a chain that is too loose might not function efficiently. Use the tension adjustment mechanism to fine-tune the chain until it moves with slight resistance but no sagging.
Uneven Door Movement
If the garage door moves unevenly or gets stuck, check for any obstructions on the tracks and inspect the chain for uneven wear or damage. Also, ensure the tracks are well-lubricated and the rollers are functioning properly.
Motor Fails to Operate
If the motor isn’t working, check the power supply and make sure the opener is properly connected. Inspect the motor for any overheating and ensure all wires are connected securely.
By addressing these issues promptly, you can maintain a smooth and reliable garage door operation. If problems persist, consider consulting a professional technician for further assistance.
Frequently Asked Questions
Can I fix a detached garage door chain myself?
Yes, you can. With proper tools, a clear understanding of the chain-sprocket mechanism, and following a reliable guide, anyone can reinstall a garage door chain. Just ensure to prioritize safety by disconnecting the power and following each step methodically.
What causes a garage door chain to come off the sprocket?
Several factors can cause a chain to detach from the sprocket. These include loose chain tension, worn-out sprocket teeth, obstructions in the track, or excessive door weight. Regular maintenance can help prevent these issues.
How tight should the garage door chain be?
The chain should be tight enough to move smoothly without significant sagging, but not overly tight to avoid unnecessary stress on the motor and chain. Proper tension prevents premature wear and ensures smoother operation.
How often should I lubricate the garage door chain?
It’s recommended to lubricate the garage door chain every six months using a lubricant specifically designed for garage doors. Regular lubrication keeps the chain running smoothly and reduces noise.
Are there any safety precautions I should take before beginning repairs?
Absolutely. Always unplug the garage door opener or shut off the power to avoid accidental activation. Wear gloves to protect your hands and ensure the workspace is well-lit for clear visibility.
Conclusion
Now that you understand how to put the garage door chain back on the sprocket, you’re equipped to handle this common household issue with confidence. By following these steps and maintaining your chain and sprocket system regularly, you can avoid unnecessary repairs and ensure the longevity of your garage door opener.
Regular maintenance is key to preventing future issues with your garage door system. Lubricate the chain periodically and inspect the sprocket and other components for any signs of wear or damage. Addressing small problems early can save both time and money while ensuring your garage door operates smoothly and reliably for years to come.
Don’t wait for the chain to come off again—apply these preventive tips and enjoy the peace of mind that comes with a properly maintained garage system.
I am Rick. I grew up helping my dad with his handyman service. I learned a lot from him about how to fix things, and also about how to work hard and take care of business. These days, I’m still into fixing things- only now, I’m doing it for a living.
I’m always looking for new ways to help people grow and develop. That’s why I have created this blog to share all my experience and knowledge so
that I can help people who are interested in DIY repair.