Programming your Craftsman garage door opener keypad is a straightforward process that allows you to conveniently open and close your garage door without needing a traditional remote. Whether you’ve just installed a new keypad or need to reprogram an existing one, following the right steps ensures smooth operation and enhances your garage’s security. This guide will walk you through the step-by-step process of how to program craftsman garage door opener keypad.
Benefits of Using a Keypad
Using a garage door opener keypad comes with several advantages that make accessing your garage more convenient and secure. Here are some of the key benefits:
- Enhanced Convenience: A keypad allows you to enter your garage without needing a physical remote. This is especially useful if you forget your remote inside the house or in your car.
- Improved Security: Modern keypads often feature advanced encryption technology to safeguard against unauthorized access. You can also easily update the access code if needed, ensuring security remains a priority.
- Access Sharing: With a keypad, it’s simple to provide temporary access to trusted individuals, such as friends, family members, or service workers, without handing over a physical remote.
- No Need for Batteries or Remotes: Since most keypads are hardwired or use long-lasting batteries, they eliminate the occasional frustration of misplacing or replacing a traditional garage door remote.
- Weatherproof Design: Many keypads are built to withstand various weather conditions, ensuring reliable performance even in heavy rain or extreme temperatures.
Overall, a garage door keypad adds flexibility, security, and reliability to your garage access system, making it a valuable addition for any homeowner.
Types of Craftsman Keypads
Craftsman offers a range of garage door keypads designed to cater to different needs and preferences. Here are some common types:
- Wireless Keypads: These keypads operate without the need for wiring, making them easy to install and relocate. They are ideal for those looking for convenient, hassle-free setup and excellent portability.
- Lighted Keypads: Featuring backlit keys, these keypads are perfect for use in low-light conditions. They ensure ease of access during nighttime or in poorly lit areas.
- Battery-Powered Keypads: Relying on batteries for operation, these keypads offer reliable performance without dependence on electrical wiring. They often come with long-lasting battery life to minimize maintenance.
- Universal Keypads: Designed for compatibility with various garage door opener brands, universal keypads are versatile and adaptable, making them a practical choice for multi-brand systems.
- Weather-Resistant Keypads: Built with durable materials and sealed designs, these keypads are engineered to withstand harsh weather conditions, ensuring reliability in rain, snow, or extreme temperatures.
Each type of Craftsman keypad provides unique features and advantages, allowing homeowners to choose the best option for their specific requirements.

10 Methods How to Program Craftsman Garage Door Opener Keypad
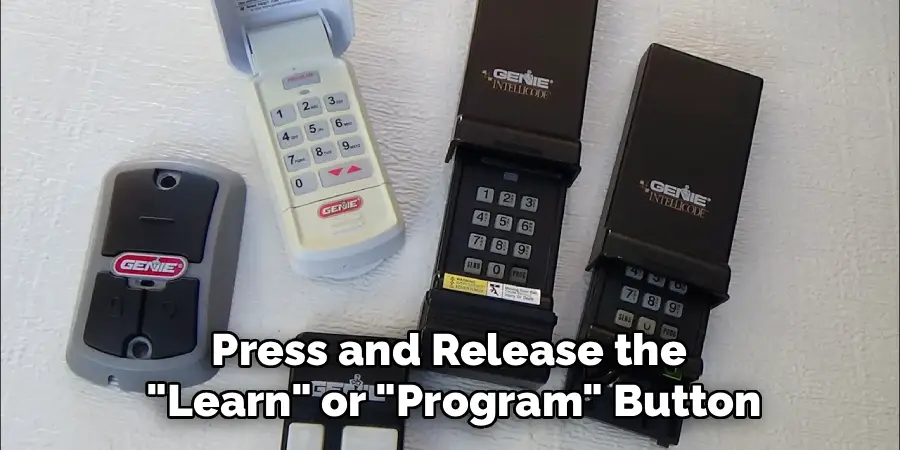
1. Locate the Learn or Program Button on Your Garage Door Opener Motor
The first step in programming your Craftsman garage door opener keypad is to find the “Learn” or “Program” button on the motor unit itself. This button is typically located on the back or side of the opener’s motor housing near the antenna wire, often under a small panel or near the light bulb socket. The button may be red, orange, purple, or yellow depending on the model. Locating this button is essential because it initiates the learning mode for your keypad to communicate with the garage door opener.
2. Prepare the Keypad for Programming
Before initiating the programming sequence on the opener, ensure your keypad has fresh batteries installed. A weak power source can disrupt the programming process. The keypad usually has a protective cover or flip-down panel where the buttons are located. Open this cover, and if there is a reset or clear button, press it to ensure the keypad is in its default state. This ensures that previous programming does not interfere with the new setup.
3. Enter the Programming Mode on the Garage Door Opener
With the keypad ready, press and release the “Learn” or “Program” button on the garage door opener motor. Once pressed, an indicator light adjacent to the button will typically illuminate or blink, signaling that the unit is in programming mode. You usually have a window of 30 seconds to complete the next steps in the keypad programming process before the opener exits this mode automatically.
4. Enter Your Desired PIN Code on the Keypad
Within the programming window, go to your keypad and enter the Personal Identification Number (PIN) you wish to use for access. Craftsman keypads typically allow PINs between 4 to 8 digits long. Choose a code that is easy for you to remember but hard for others to guess, enhancing security. After entering the code, press and hold the “Enter” or “Program” button on the keypad for several seconds until the keypad light blinks or beeps to confirm that the code has been registered.
5. Sync the Keypad with the Garage Door Opener
Following your PIN code entry, press the “Learn” button on the keypad one more time if required by your model to finalize syncing. Some Craftsman keypads require you to press and hold the “Learn” or “Enter” button on the keypad until the garage door opener light flashes or you hear a clicking sound. This confirms that the keypad has successfully communicated with the motor unit and the programming is complete.
6. Test the Programmed Keypad Code
After programming, test the keypad to ensure it opens and closes your garage door. Enter your PIN on the keypad and press the “Enter” button. The door should respond by opening or closing accordingly. If the door does not respond, wait a few moments and retry, ensuring you are pressing the buttons firmly and correctly. If it still fails, review the previous steps, especially the timing between pressing the opener’s “Learn” button and entering your PIN.
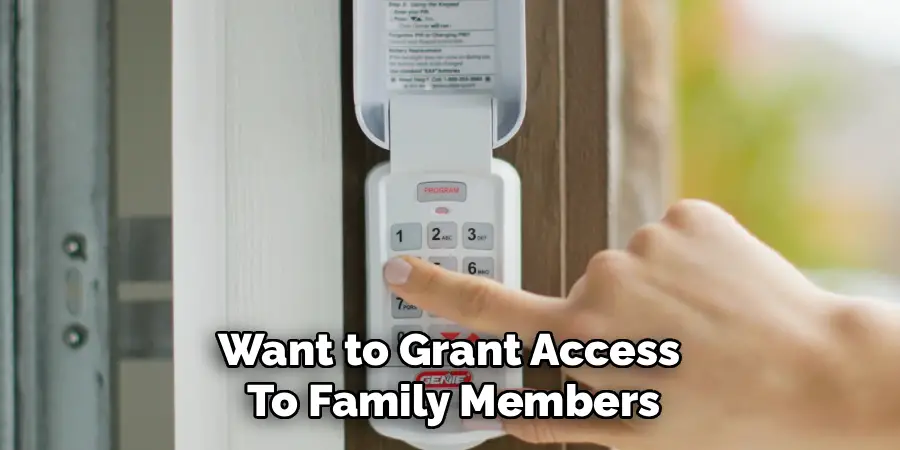
7. Program Additional PIN Codes for Other Users (Optional)
If you want to grant access to family members, friends, or trusted individuals, you can program additional PIN codes. Repeat the programming process by pressing the “Learn” button on the motor unit again and entering the new PIN on the keypad. Some Craftsman keypads allow multiple PINs to be stored, providing flexibility in managing who can enter your garage without needing a physical remote.
8. Clear or Delete Old PIN Codes When Necessary
To maintain security, periodically clear old or unused PIN codes from your keypad. Many Craftsman models have a reset or clear function accessible by pressing and holding certain buttons simultaneously (check your user manual for specific instructions). Clearing old codes ensures that only authorized users can operate your garage door and prevents access by former users who should no longer have entry privileges.
9. Troubleshoot Common Programming Issues
If programming does not work initially, several factors could be responsible. Weak keypad batteries are a common cause; replacing them with fresh ones often resolves issues. Ensure you are within the required range of the garage door opener when programming. Interference from other electronic devices or physical obstructions can also disrupt the signal. Verify that the keypad and opener are compatible models and that the garage door opener is functioning correctly without error lights or malfunctions.
10. Maintain and Secure Your Keypad Access
Once programmed, it is essential to maintain your keypad and keep it secure. Protect the keypad from weather elements by installing it in a sheltered location or purchasing a weatherproof cover. Periodically clean the keypad buttons to ensure proper function and prevent sticking. Additionally, update your PIN codes regularly to enhance security and prevent unauthorized access. Consider combining keypad use with other security measures, such as motion-activated lighting or surveillance cameras, for comprehensive garage safety.
Troubleshooting Common Issues
Keypad garage door openers are convenient, but occasional issues may arise. Below are some common problems and their potential solutions:
- Keypad Not Responding
- Ensure the keypad has fresh batteries. Replace them if needed.
- Check for loose or corroded wiring if the keypad is hardwired.
- Verify that the keypad is within range of the garage door opener.
- Incorrect or Forgotten PIN Code
- Reset the PIN by following the manufacturer’s instructions, often involving pressing a reset button and reprogramming the code.
- Refer to the user manual for steps or reach out to customer support for assistance.
- Garage Door Not Opening or Closing Consistently
- Examine the alignment of the garage door sensors and clean any debris obstructing them.
- Confirm that the keypad is transmitting the code correctly or try reprogramming if necessary.
- Weather-Related Malfunctions
- Ensure the keypad and its components are dry and free from frost. Use a weatherproof cover if the keypad is exposed to rain or snow.
- Check for moisture damage if the keypad stops functioning in damp conditions.
- Worn or Sticking Buttons
- Clean buttons regularly to remove dirt or residue. If the buttons remain unresponsive, the keypad may require replacement parts or a new unit.
If problems persist after troubleshooting, contacting a qualified technician or the keypad manufacturer may be necessary to resolve deeper issues.
Conclusion
Proper maintenance and care are essential to ensure the longevity and reliable performance of your keypad. By following the troubleshooting steps outlined above and addressing minor issues promptly, you can avoid more significant problems down the line. So, there you have it – a quick and easy guide on how to program craftsman garage door opener keypad.
I am Rick. I grew up helping my dad with his handyman service. I learned a lot from him about how to fix things, and also about how to work hard and take care of business. These days, I’m still into fixing things- only now, I’m doing it for a living.
I’m always looking for new ways to help people grow and develop. That’s why I have created this blog to share all my experience and knowledge so
that I can help people who are interested in DIY repair.