Painting the exterior of your garage can be a daunting task, but it is an essential part of home maintenance. Not only does it help to protect the exterior surfaces from harsh weather conditions and wear and tear, but it also enhances the overall appearance of your property.
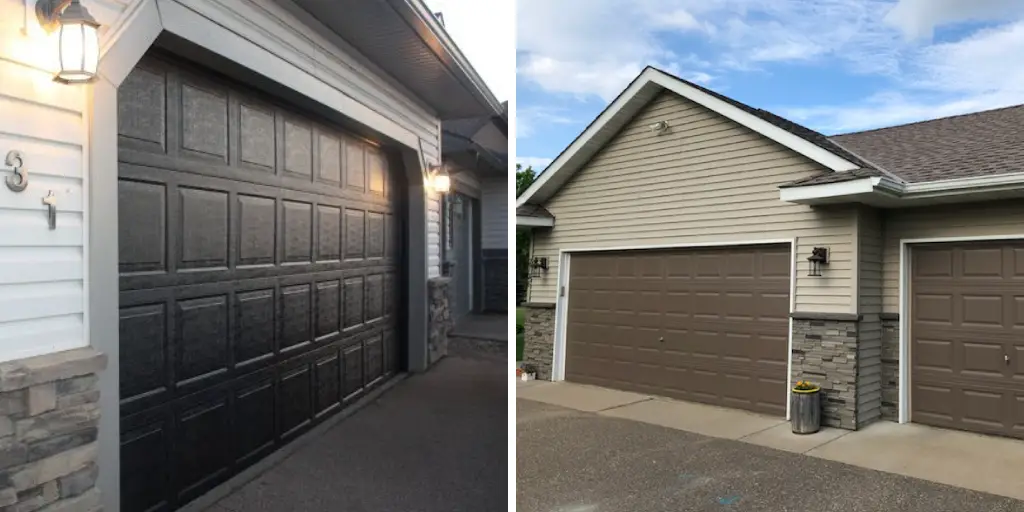
The main advantage of painting garage exterior is that you can give your old and dull garage a fresh new look. Painting the exterior walls, door, trims, and other parts of your garage will not only make it more aesthetically pleasing but also protect its surfaces from the weather elements. In this blog post, You will learn in detail how to paint garage exterior.
Step by Step Processes for How to Paint Garage Exterior
Step 1: Inspect the Area
The first step in any painting project is to inspect the area that you will be working on. This includes checking for any damages or cracks in the garage exterior, and determining if there are any repairs that need to be made before beginning the painting process.
Step 2: Clean the Surface
Before painting, it is important to clean the garage exterior thoroughly. This will ensure that the paint adheres properly and creates a smooth finish. Use soap and water, or a pressure washer if necessary, to remove any dirt, grime, or loose paint.
Step 3: Protect Surrounding Areas
Next, it is important to protect any surrounding areas such as windows, doors, and plants from getting paint on them. Use drop cloths or plastic sheets to cover these areas and secure them with painter’s tape. If there are any rough or uneven areas on the garage exterior, use sandpaper to smooth them out. This is especially important for wood surfaces as it will help the paint adhere better.
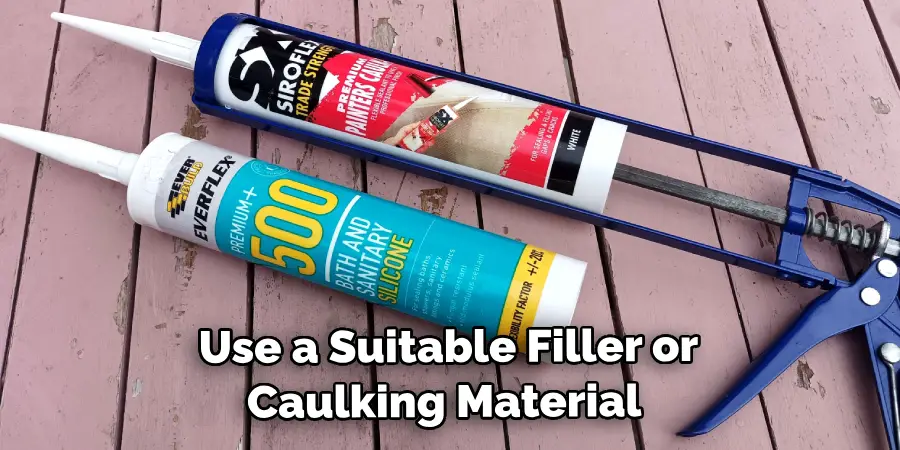
Step 4: Repair Damages
Now is the time to repair any damages or cracks that you found during the inspection. Use a suitable filler or caulking material to fill in these areas and ensure they are completely dry before proceeding. Priming the garage exterior is necessary if you are painting bare wood, metal, or masonry surfaces.
It helps to create an even base for the paint and improves its adhesion. Choose a primer specifically designed for the surface you are painting.
Step 5: Choose Your Paint
When choosing paint for your garage exterior, consider the type of surface you are painting, as well as the climate in your area. For example, if you live in an area with extreme weather conditions, it is important to choose a durable and weather-resistant paint. Start painting at the top of the garage exterior and work your way down. This will help avoid any drips or streaks on already-painted areas.
Step 6: Use the Right Tools
For best results, use a high-quality paintbrush or roller specifically designed for the type of paint you are using. This will help ensure an even application and a professional-looking finish. After you have finished painting, allow the garage exterior to dry completely before removing any protective coverings. This will ensure that the paint has enough time to cure and provide long-lasting results.
By following these step-by-step processes, you can successfully paint your garage exterior and give it a fresh new look. Remember to always use high-quality materials and take the time to properly prepare and protect the area before beginning.
Precautions for How to Paint Garage Exterior
- The most important thing when it comes to painting any surface is to protect yourself from harmful chemicals and debris. Make sure to wear goggles, a mask, and gloves while painting the garage exterior. This will prevent any unwanted accidents or health hazards.
- Before starting your painting project, check the weather forecast. Painting on a hot and humid day will result in a quick drying time, which can lead to an uneven finish. It is best to paint on a dry and mild day.
- Prepare the surface of your garage exterior before painting by cleaning it thoroughly with a pressure washer or scrubbing it with a mixture of water and trisodium phosphate (TSP). This will remove any dirt, grime, and mold, ensuring that the paint adheres properly.
- Cover any plants, outdoor furniture, and other objects near your garage with drop cloths to protect them from any paint splatters or drips. It is also a good idea to remove any loose objects from the area to avoid accidents.

- If you are using a ladder, make sure it is stable and placed on a flat surface. Avoid painting on a windy day as it can cause the ladder to wobble and lead to accidents.
- When using a paint sprayer, make sure to wear protective gear, such as goggles and a mask. Also, follow the manufacturer’s instructions carefully for proper usage.
- In case of any spills or accidents, have a bucket of water and some rags handy to clean up immediately. This will prevent the paint from drying and becoming harder to remove.
Apart from these precautions, it is also important to use high-quality paints and tools for a better finish and long-lasting results. By following these safety tips, you can ensure a smooth and hassle-free process while painting your garage exterior.
What is the Best Way to Prepare the Surface for Painting?
Painting the exterior of your garage can be a challenging task, especially if you’re not familiar with the proper techniques and methods. One crucial step in achieving a successful paint job is preparing the surface correctly.
Preparing the surface ensures that the paint adheres to it properly and provides lasting results. The following are steps on how to prepare your garage exterior for painting:
1. Clean the Surface
Before you start painting, it’s essential to clean the surface thoroughly. This step involves removing any dirt, dust, oil stains, or other debris that may be present on the surface. You can use a pressure washer or a hose with a high-pressure nozzle to remove any loose particles and grime.
2. Repair Any Damages
Inspect the surface for any cracks, holes, or other damages that may need to be repaired. Fill in any gaps or holes with a high-quality exterior filler and let it dry completely before moving on to the next step.
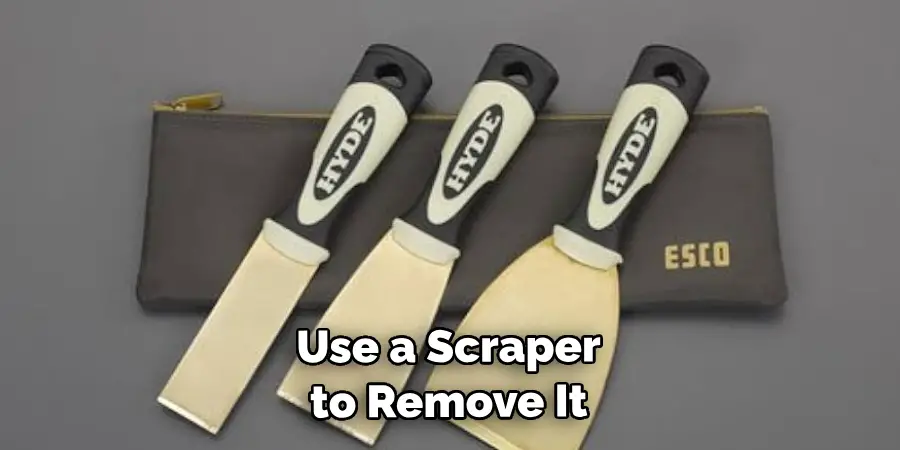
3. Scrape Off Loose Paint
If your garage exterior has old paint that is peeling or flaking off, use a scraper to remove it. This step is crucial as any loose paint can affect the adhesion of your new paint.
4. Sand the Surface
After scraping off the old paint, use sandpaper or a power sander to smooth out the surface. Sanding also helps in creating a rough texture that allows the new paint to adhere better.
5. Wash the Surface Again
After sanding, it’s essential to wash the surface again to remove any dust or debris that may have accumulated. You can use a mild detergent and water for this step.
6. Primer Application
Priming is an essential step in preparing your garage exterior for painting. It helps seal the surface and creates a smooth base for the paint to adhere to. Make sure to use a primer suitable for exterior surfaces.
7. Protect Your Surroundings
Before you start painting, make sure to protect your surroundings by covering any nearby plants, furniture or other items that may get damaged by paint splatters.
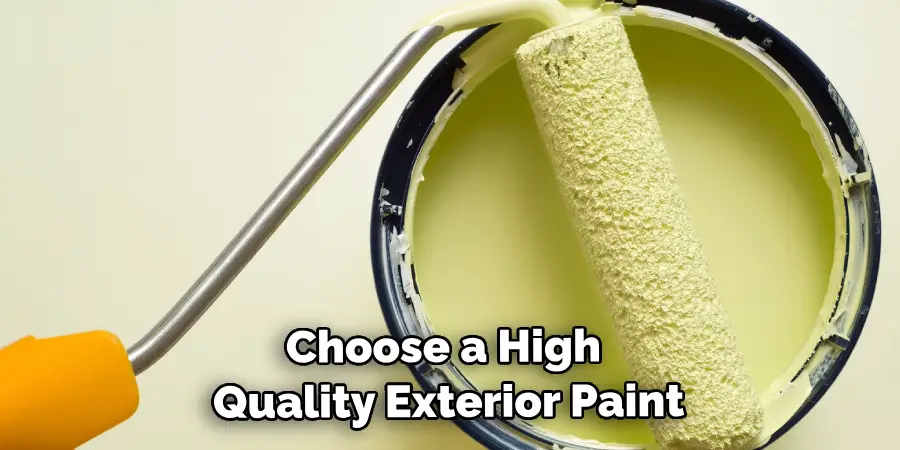
After following these steps, your garage exterior is now ready for painting. Remember to choose a high-quality exterior paint and follow the manufacturer’s instructions for optimal results.
What Are Some Common Mistakes to Avoid When Painting a Garage Exterior?
Painting the exterior of your garage can be a daunting task, especially if you have never done it before. However, with the right tools and techniques, you can achieve professional-looking results that will enhance the overall appearance of your home.
While there are many things you should do when painting a garage exterior, there are also some common mistakes that you should avoid. In this guide, we will discuss some of these mistakes and how you can prevent them.
1. Not Preparing the Surface Properly
One of the biggest mistakes that people make when painting a garage exterior is not preparing the surface properly. This means thoroughly cleaning and sanding any rough areas before starting to paint.
Painting over dirt, grime, or loose paint will result in an uneven finish and could cause the new paint to chip or peel off sooner. It is essential to take the time to properly clean and prep the surface for painting.
2. Skipping Primer

Primer is an important step in any painting project, and this includes when painting a garage exterior. Using primer will create a smooth base for your paint and help it adhere better to the surface, resulting in a longer-lasting finish. Many people skip primer, thinking it is an unnecessary step, but it can make a significant difference in the final outcome of your garage’s exterior.
3. Using Low-Quality Paint
Investing in high-quality paint is crucial when painting a garage exterior. While it may be tempting to save money by buying cheaper paint, it will likely result in less durable and less attractive results. Quality paint will provide better coverage, adhere better to the surface, and last longer, making it a worthwhile investment.
4. Painting in Unsuitable Weather Conditions
Another mistake that people make when painting a garage exterior is not considering the weather conditions. Painting in extreme heat or cold, high humidity, or rain can affect the paint’s application and overall finish. It is best to paint when the weather is dry, mild, and above 50°F (10°C) for the best results.
5. Not Using Proper Tools
Having the right tools for the job is essential when painting a garage exterior. Using low-quality or incorrect tools can result in an uneven finish and make the task more challenging than it needs to be. Investing in good quality brushes, rollers, and paint sprayers will make the process smoother and produce better results.
Conclusion
The main disadvantage of painting a garage exterior is the cost. Depending on the size and condition of your garage, it can be quite expensive to purchase all the necessary materials and tools for painting. Additionally, hiring a professional painter can add even more to the cost.
In conclusion, painting your garage exterior is a simple and cost-effective way to improve the overall appearance of your home. By following these steps, you can transform your drab and worn-out garage into a beautiful and eye-catching feature.
Remember to properly prepare the surface, choose high-quality paint, and apply it carefully for best results. I hope this article has been beneficial for learning how to paint garage exterior. Make Sure the precautionary measures are followed chronologically.
I am Rick. I grew up helping my dad with his handyman service. I learned a lot from him about how to fix things, and also about how to work hard and take care of business. These days, I’m still into fixing things- only now, I’m doing it for a living.
I’m always looking for new ways to help people grow and develop. That’s why I have created this blog to share all my experience and knowledge so
that I can help people who are interested in DIY repair.