
Are you looking for ways to move your metal carport? Moving a metal carport can be a daunting task, but with the right tools and techniques, it can be done easily.
In this guide on how to move metal carport, we will discuss the steps you need to take in order to successfully move your metal carport.
Moving a metal carport may seem daunting, but it can be accomplished smoothly with the right preparation and guidance. Whether you’re relocating to a new home or simply need to reposition your carport within your current property, understanding the steps involved in moving a metal carport can save you time and prevent potential damage.
This guide will explain the necessary preparations, tools, and techniques for moving your carport safely and efficiently.
Why Would You Need to Move Your Metal Carport?
There are several reasons why you may need to move your metal carport. Some common reasons include:
- Relocating to a New Home: If you’re moving to a new property, you may also need to move your metal carport.
- Reorganizing Your Outdoor Space: You may want to reposition your carport in a different property area for better organization or functionality.
- Renovations or Construction: If your property is undergoing ongoing renovations or construction, you may need to temporarily move your carport.
- Selling or Giving Away: If you’re selling or giving away your metal carport, you must move it to its new location.
No matter the reason for moving your metal carport, it’s important to plan and prepare properly to avoid any potential damage or injury.
What Will You Need?
Before we dive into the steps involved in moving a metal carport, here are some essential tools and materials that you will need:

- Truck or Trailer: You will need a truck or trailer to transport your carport from one location to another.
- Screwdriver or Wrench: These tools will come in handy when disassembling the metal frame of your carport.
- Plastic or Wooden Blocks: These will support the metal frame of your carport during disassembly and reassembly.
- Ratchet Straps: These will be used to secure the metal frame during transportation.
- Safety Equipment: To ensure your safety during the moving process, you should wear gloves, safety glasses, and other protective gear.
Now that you have all your tools and materials, let’s take a look at the steps involved in moving a metal carport.
10 Easy Steps on How to Move Metal Carport
Step 1. Plan and Measure:
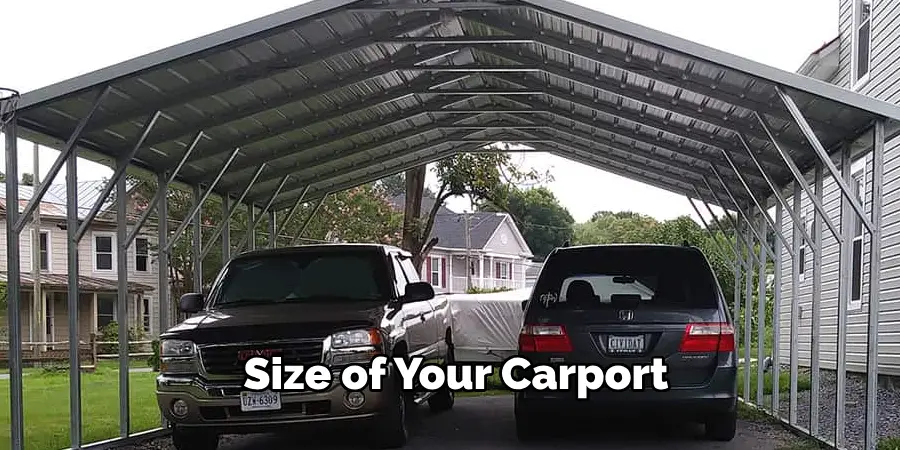
Before you begin the process of moving your metal carport, it is essential to plan and measure carefully. Start by determining the new location for your carport.
Once you have identified where you want to move it, measure the carport’s dimensions and the space available in the new location to ensure a good fit. This step is crucial for ensuring that your carport will fit in its new spot and planning the route you will take when moving it.
Consider any obstacles, such as narrow passages, low-hanging branches, or tight turns, that could complicate the move. Taking the time to thoroughly plan and measure in advance will greatly facilitate a smooth transition from one location to another.
Step 2. Gather Your Team:
Because moving a metal carport is not a one-person job, it’s important to enlist the help of friends or hire professionals. You’ll need a team to assist with disassembling, lifting, and transporting the carport.

Ideally, a team of at least four people is recommended to ensure the workload is evenly distributed and minimize the risk of injury. Make sure everyone involved understands their role and the overall plan before beginning the disassembly process.
This step is crucial for coordinating efforts and ensuring that everyone is on the same page to avoid any confusion or accidents during the move.
Step 3. Disassemble the Carport Carefully:
The next step is to carefully disassemble your metal carport. Begin by removing the roof panels, as these are usually the largest and most cumbersome parts. Store all screws and fasteners in a bag or container so they don’t get lost during the move.
Next, proceed to dismantle the frame, starting from the top and working your way down. This systematic approach helps prevent any structural damage and ensures the safety of your team.

Use your screwdriver or wrench to loosen and remove the bolts and screws. If any part is complicated to disassemble, avoid forcing it and consider applying penetrating oil to ease the process. Remember to label parts if necessary to make reassembly at the new location easier.
Step 4. Secure and Pack Components Properly:
After disassembling your metal carport, securing and packing all the components properly for transport is crucial. Use ratchet straps to securely bind the longer metal beams and frame parts to prevent them from shifting or becoming damaged during the move.
Wrap delicate parts like roof panels in protective materials such as bubble wrap or blankets to avoid scratches or bending. Place smaller components, such as screws, bolts, and fasteners, in a clearly labeled container to prevent them from getting lost.
Proper packing not only protects your carport components during transit but also organizes them for a more efficient reassembly process at the new location.
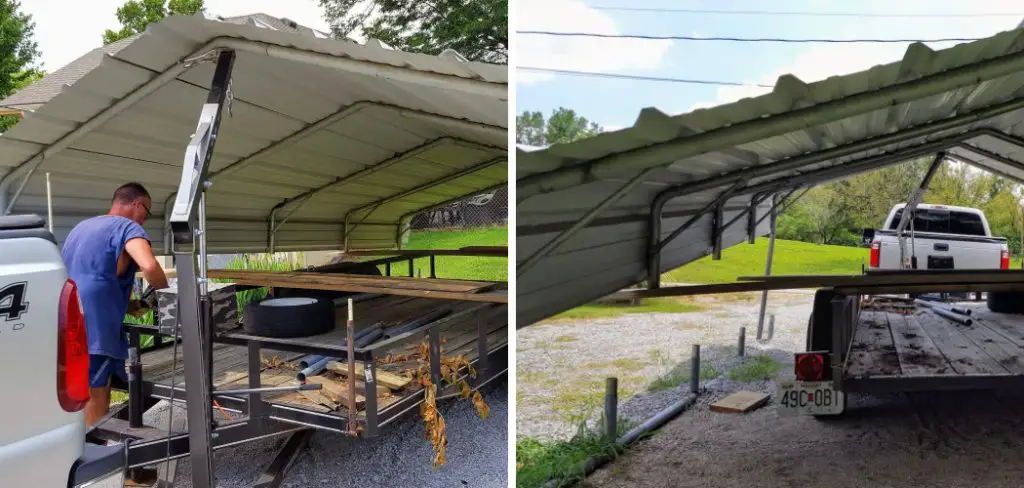
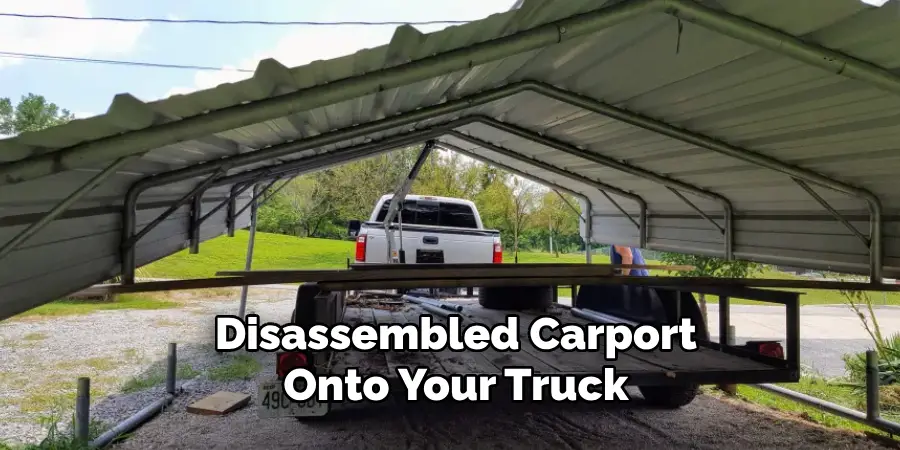
Step 5. Load the Carport onto the Transport Vehicle:
The next crucial step is to load the disassembled carport onto your truck or trailer. Given the weight and size of the components, this step will require teamwork and careful coordination.
Start with the heaviest and longest parts, positioning them at the bottom to create a stable base. Ensure that all pieces are evenly distributed to maintain balance during transport.
Use ratchet straps or ropes to secure the components to the vehicle, checking that there is no risk of movement that could lead to damage or a safety hazard on the road. It’s important to double-check that everything is tightly secured before transporting your carport to its new location.
Step 6. Transport the Carport Carefully:
Transporting the carport to its new location requires careful attention to detail and safety. Ensure that you have clear visibility and that the load doesn’t obstruct your view or make driving hazardous.
Drive cautiously, especially when navigating turns, inclines, or declines, to prevent the load from shifting. It’s also important to check the legal requirements or restrictions for transporting large loads in your area before you begin the move.
Depending on the size of your carport and the distance of the move, you may need to plan your route in advance, avoiding roads with low-hanging branches, tight turns, or low bridges that pose challenges.
Step 7. Unload and Organize Components at the New Location:
Once you arrive at the new location, the first task is carefully unloading the carport components from the vehicle.
With the help of your team, remove each piece, starting with the top layers and working down to avoid any damage or accidents. Organize the parts in a designated area, grouping similar items together to streamline the reassembly process.
This step is crucial for ensuring that all pieces are accounted for and in good condition, before you begin putting the carport back together. It also provides an opportunity to assess the new site one last time, making sure that the ground is level and ready for installation.
Step 8. Reassemble the Carport:
Reassembling the carport at its new location is the final step in the moving process. Start by consulting any notes or labels you made during disassembly to identify and organize the parts correctly.
Begin with the frame, ensuring it is level and secure before attaching the roof panels. Reinstall each piece in the reverse order that you disassembled them, making sure to tightly fasten all screws and bolts.
It may be helpful to have someone double-check the stability and alignment of each section as you go along.
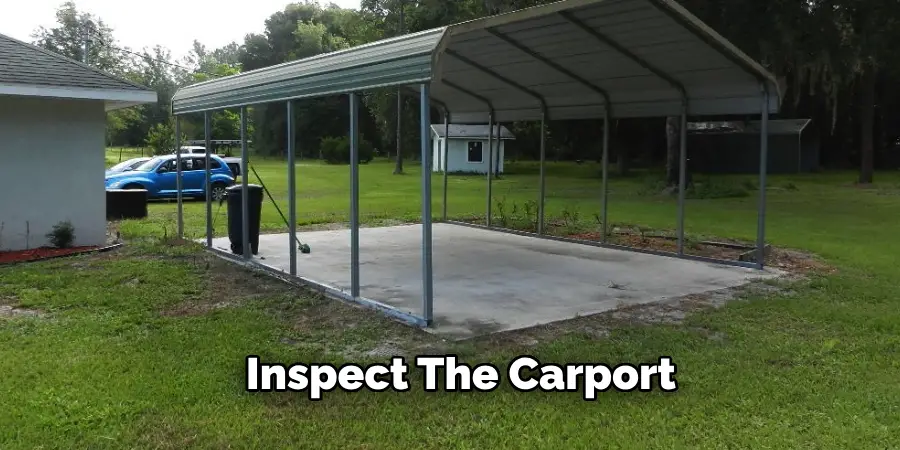
Once the carport is fully reassembled, perform a thorough inspection to ensure that everything is secure and that there are no missing parts or loose connections. This step not only marks the completion of the carport’s relocation but also ensures its readiness to withstand weather conditions and continue providing reliable shelter.
Step 9. Maintenance Tips:
After successfully reassembling your carport at the new location, routine maintenance is crucial to prolong its lifespan and maintain its structural integrity. Regularly inspect the carport for any signs of wear, rust, or damage, especially after extreme weather conditions.
Applying a protective coating or paint can prevent corrosion and fading caused by exposure to the elements. Ensure that the roof panels are clear of debris, such as leaves and branches, to avoid unnecessary weight and water buildup that can lead to damage. Tightening loose bolts and screws periodically can also help maintain the carport’s stability.
Step 10. Customize and Enhance Your Carport:
Once your carport is securely reassembled and maintained, consider customizing and enhancing it to better suit your needs and preferences. Adding side panels can provide extra protection against the elements of your vehicle or stored items.
Installing lighting can offer convenience and improve security. If your carport is primarily used for storage, shelving units or hooks can maximize space efficiency and organization.
For those looking to improve the aesthetic appeal of their carport, landscaping or decorative elements can integrate the structure into your property’s overall look. Customization not only increases the functionality of your carport but also its value and appeal.
Following these steps, you can successfully move your carport to a new location without major complications.
5 Additional Tips and Tricks
- Assess and Prepare the New Location: Before moving your metal carport, ensure that the new site is well-prepared. This includes leveling the ground, checking for underground utilities, and ensuring that the area is accessible for the move. Consider the direction of the sun and prevailing winds for optimal placement.
- Use the Right Equipment: Rent or purchase the appropriate equipment, such as heavy-duty lifting straps, jacks, and a flatbed truck or trailer. Using the right tools will make the move safer and more efficient.
- Secure Necessary Permits: Depending on your location, moving a large structure like a metal carport may require permits from local authorities. Check with your city or county government to ensure compliance with any regulations.
- Disassemble with Care: If moving the carport requires disassembly, label each part and take detailed notes or photographs during the process. This will make reassembly at the new location much easier and reduce the risk of damage.
- Seek Professional Help: For larger carports or those located in difficult-to-access areas, consider hiring professionals who specialize in moving large structures. Their experience and equipment can prevent injury and damage to the carport.
With these additional tips and tricks, moving your metal carport can be a smooth and successful process.
5 Things You Should Avoid When Moving a Metal Carport

- Neglecting Safety Measures: Do not overlook the importance of safety gear and practices. Skipping out on safety glasses, gloves, and sturdy footwear can result in injuries. Always prioritize the safety of everyone involved in the move.
- Ignoring Weather Conditions: Attempting to move the carport during adverse weather conditions such as high winds, heavy rain, or lightning is extremely risky. Plan your move for a day with favorable weather to avoid accidents and ensure a smoother process.
- Failing to Secure Loose Parts: When disassembling or moving the carport, ensure all parts are securely fastened or removed to prevent them from becoming dangerous projectiles or getting lost. Loose components can lead to unnecessary delays or damage.
- Underestimating the Weight and Size: Moving a metal carport is not easy and can be dangerous if not approached with caution. Do not underestimate the weight or size of the carport, as this can lead to accidents and damage to property or individuals.
- Rushing the Process: Moving a metal carport requires patience and attention to detail. Rushing through the process can result in mistakes, accidents, or damage to the carport. Take the time to plan and execute the move carefully for a successful outcome.
Remember to always prioritize safety and proper preparation when moving your metal carport.
How Do You Anchor Metal Carports?
There are several ways to anchor a metal carport, depending on the type of foundation it is being moved to. Here are some common methods:
- Concrete Anchors: These are typically used when the carport is being placed on a concrete slab or pad. The anchors are drilled into the concrete and secured with bolts.
- Ground Auger Anchors: These are long, corkscrew-like anchors that are twisted into the ground and then attached to the carport. They are suitable for grass or dirt surfaces.
- Mobile Home Anchors: These specialized anchors are used when moving a metal carport onto an existing mobile home foundation. They are typically long rods with a large plate on one end that is secured to the ground.
- Weighted Anchors: This method uses heavy objects such as concrete blocks or sandbags to secure the carport. It is best suited for temporary setups.
Before choosing an anchoring method, consider the location and type of foundation for the metal carport and consult with a professional if needed.
How Do You Make a Metal Carport Look Good?
While metal carports may not be the most visually appealing structures, there are a few things you can do to make them look better:
- Add Decorative Elements: You can customize your carport with decorative elements such as hanging plants, string lights, or banners. This will add some personality and make it more aesthetically pleasing.
- Paint or Stain: If your metal carport looks dull or rusty, consider painting or staining it to give it a fresh look. Choose a color that complements your home or surroundings.
- Incorporate Greenery: Planting shrubs or small trees around the carport can help blend it into the natural landscape and make it look more visually appealing.
- Install Siding: If your budget allows, consider installing siding on the sides of the carport to give it a more finished and polished look.
These are just a few ideas for making your metal carport look good, but ultimately, it depends on personal preference and budget. You can transform your carport into a more visually appealing structure with some creativity.
Conclusion
Moving a metal carport is a complex task that requires careful planning, the right equipment, and attention to safety. You can ensure a smooth transition by properly preparing the new site, using appropriate tools, securing necessary permits, disassembling with care, and considering professional help when needed.
Additionally, avoid common pitfalls such as neglecting safety, ignoring weather conditions, failing to secure loose parts, underestimating the weight and size of the carport, and rushing the process.
With these strategies in place, you can successfully relocate your metal carport while minimizing the risk of injury or damage. Safety and preparation are paramount in ensuring a successful and efficient move.
Hopefully, the article on how to move metal carport has provided you with valuable information and tips to make your move a success. With proper planning and execution, moving a metal carport can be an achievable task.
I am Rick. I grew up helping my dad with his handyman service. I learned a lot from him about how to fix things, and also about how to work hard and take care of business. These days, I’m still into fixing things- only now, I’m doing it for a living.
I’m always looking for new ways to help people grow and develop. That’s why I have created this blog to share all my experience and knowledge so
that I can help people who are interested in DIY repair.