Garage door molding is a great way to enhance the appearance and functionality of your garage door. Not only does it provide protection against harsh weather, but it also adds a finishing touch to your garage’s overall look. Installing garage door molding requires some basic tools and skills, but it can be easily done by following these simple steps.
The main advantage of installing garage door molding is that it helps to seal the gaps between the garage door and the frame, preventing any drafts or debris from entering your garage. This can help to improve energy efficiency and keep your garage cleaner. Additionally, garage door molding can also act as a barrier against pests and insects. Read this blog post to learn how to install garage door molding.
Step by Step Processes for How to Install Garage Door Molding
Step 1: Inspect and Measure
Before beginning the installation process, it is essential to inspect the garage door and make necessary measurements. This will ensure that you have the correct size and amount of molding needed for your specific door.
Step 2: Gather Materials
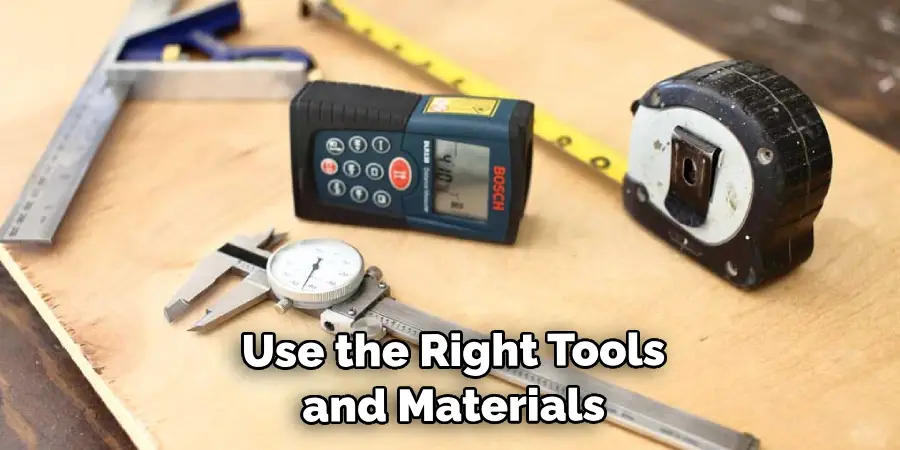
You will need a few tools and materials to successfully install garage door molding. These include a measuring tape, saw, level, hammer or nail gun, nails or screws, and of course, the molding itself. If there is already molding installed on your garage door, you will need to remove it before proceeding with the new installation. Use a pry bar or hammer to carefully remove any old molding.
Step 3: Cut Molding to Size
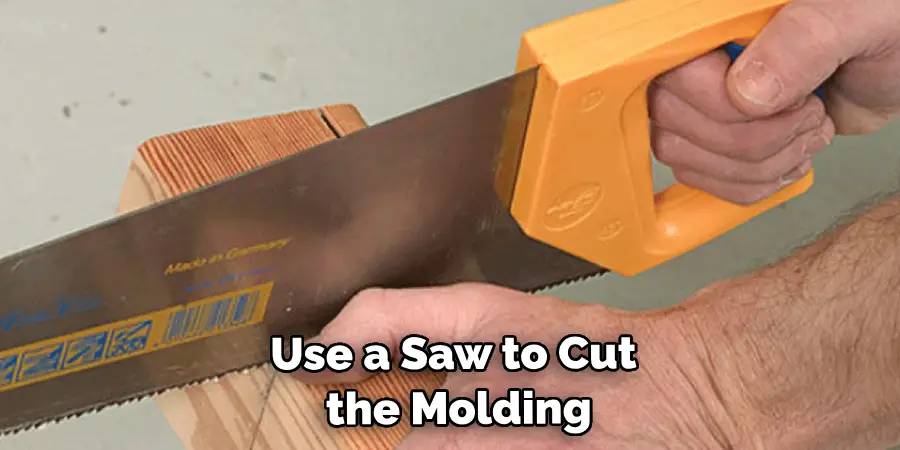
Using your measurements from step one, use a saw to cut the molding to the correct size for your garage door. It is essential to have precise cuts to ensure a proper fit. If you want your molding to match the color of your garage door, now is the time to paint or stain it before installation. This step is entirely optional, but it can add a finished look to your garage door.
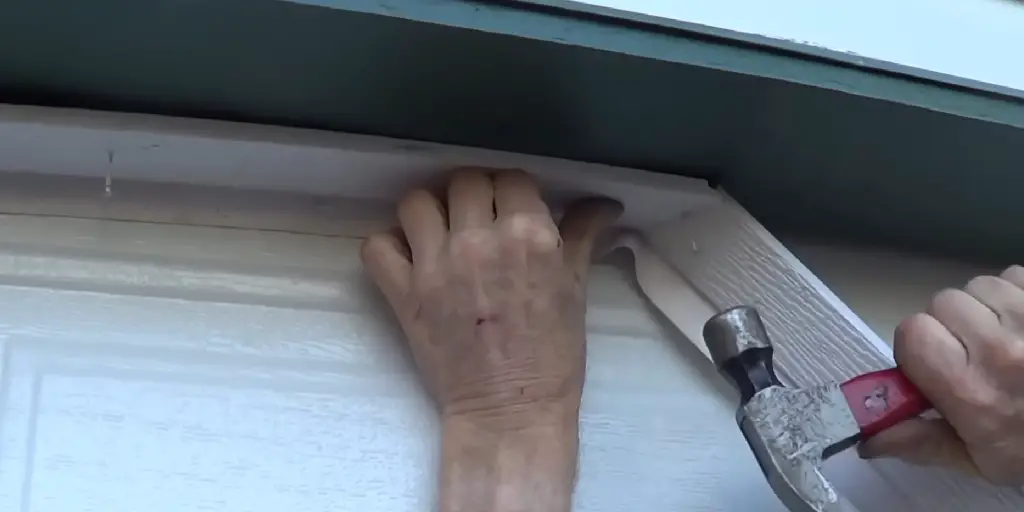
Step 4: Attach Molding to Door Frame
Using the level and either nails or screws, attach the molding to the door frame. Make sure it is straight and secure before moving on. To give your garage door a more polished look, you can add corner pieces to the molding. These are typically pre-made and easy to attach with nails or screws.
Step 5: Install Top Molding Piece
Next, install the top piece of molding along the top of your garage door. This will add a decorative touch and complete the frame of your garage door. If you used nails to attach the molding, you can fill in the holes with wood filler and sand them down for a smooth finish. This step is not necessary if you used screws to install the molding.
Step 6: Finishing Touches
Lastly, inspect your work and make any final adjustments or touch-ups as needed. Once everything looks good, you can sit back and admire your newly installed garage door molding.
By following these ten simple steps, you can easily install garage door molding and give your garage a more polished and finished look. Remember to take measurements accurately, use the right tools and materials, and pay attention to detail for the best results.
Tips for How to Install Garage Door Molding
- Wear proper safety gear such as gloves and goggles when handling tools or working with garage doors.
- Make sure to disconnect the power supply to your garage door opener before starting any installation work.
- Keep children and pets away from the work area to avoid any accidents.
- Use a sturdy ladder that is properly secured to reach higher areas of the garage door for installation.
- Double check the measurement and alignment of the molding before cutting or drilling any holes.
- Use caution when using power tools, always follow manufacturer instructions and avoid wearing loose clothing that could get caught in the machinery.
- If you are unsure about any step of the installation process, consult a professional for assistance.

Garage door molding is an important element in maintaining the appearance and functionality of your garage door. It not only creates a clean and finished look but also helps to protect the door from external elements such as water, dirt, and insects.
What Are Some Common Mistakes People Make When Installing Garage Door Molding and How Can You Avoid Them?
Garage door molding is an important addition to any garage door installation. Not only does it serve as a decorative element, but it also provides protection against weather elements such as rain and snow. However, installing garage door molding can be a tricky task for many homeowners. In this article, we will discuss some common mistakes people make when installing garage door molding and how you can avoid them.
1. Not Measuring Correctly
One of the most common mistakes people make when installing garage door molding is not measuring correctly. This can result in uneven and ill-fitting molding, which can ruin the overall appearance of your garage door.
To avoid this mistake, it is important to take accurate measurements before purchasing your molding. Measure the length of the top, sides, and bottom of your garage door opening. Make sure to account for any curves or angles in the measurements.
2. Using the Wrong Type of Molding
Another common mistake is using the wrong type of molding for your garage door installation. There are different types of molding available, such as PVC, vinyl, and wood.
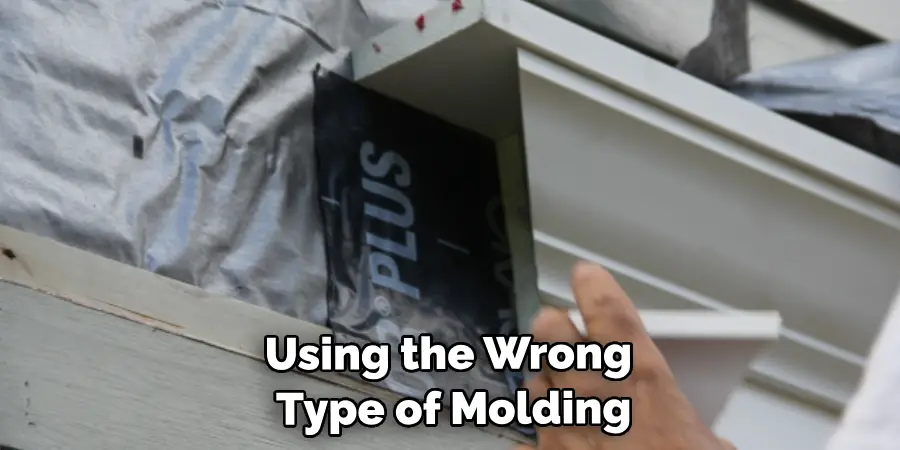
Each type has its own advantages and disadvantages, so it is important to choose the right one for your specific needs. For example, wood molding may be more aesthetically pleasing, but it requires more maintenance compared to PVC or vinyl.
3. Not Preparing the Surface Properly
A crucial step in installing garage door molding is preparing the surface properly. This includes cleaning the surface, removing any old moldings or debris, and making sure the surface is smooth and flat. Failure to properly prepare the surface can result in an uneven installation and cause the molding to come loose over time.
4. Not Using Enough Adhesive
Using enough adhesive is key to ensuring your garage door molding stays in place. Many people make the mistake of using too little adhesive, which can cause the molding to come loose. It is important to follow the manufacturer’s instructions and use a sufficient amount of adhesive to secure the molding in place.
5. Not Installing in Proper Weather Conditions
Finally, installing garage door molding in unfavorable weather conditions can lead to mistakes and issues down the road. It is best to install molding on a dry day with moderate temperatures. Extreme heat or cold can affect the adhesive and cause it not to bond properly, resulting in loose or falling molding.
What Are the Benefits of Installing Garage Door Molding on Your Garage Door?
Garage doors are an essential part of any home, providing security and protection for your vehicles and belongings. However, many homeowners tend to overlook the importance of adding garage door molding to their garage doors. Garage door molding is a term used to describe trim that is installed along the edges of the garage door, enhancing its appearance and functionality.
Installing garage door molding on your garage door comes with several benefits, making it a worthwhile investment for any homeowner. In this article, we will explore the reasons why you should consider installing garage door molding on your garage door.

1. Improved Aesthetics
One of the main benefits of adding garage door molding is that it can significantly improve the overall appearance of your garage door. By providing a clean and finished look, garage door molding can enhance the curb appeal of your home. With a wide range of styles and colors available, you can choose a molding that complements the design of your home and adds to its visual appeal.
2. Protection Against Elements
Garage door molding acts as a barrier against harsh weather elements such as rain, snow, wind, and sunlight. It helps prevent water from seeping into the garage, which can cause damage to your belongings and potentially lead to mold growth. Molding also helps keep out dirt and debris, keeping your garage clean and reducing the need for frequent maintenance.
3. Energy Efficiency
By sealing gaps between the garage door and the frame, garage door molding can improve energy efficiency in your home. It prevents air leakage, helping to maintain a consistent temperature in your garage and the rest of your home. This can lead to lower energy bills, as your heating and cooling systems won’t have to work as hard to maintain a comfortable temperature.
4. Reduced Noise
If you use your garage for other purposes besides parking your car, such as a workshop or play area, adding garage door molding can help reduce noise levels. It acts as a buffer between the door and the frame, reducing vibrations and noise from the garage door opener.
5. Easy Installation
Installing garage door molding is a simple process that can be done by most homeowners with basic tools. There are various tutorials and guides available online to help you through the installation process. However, it’s always recommended to hire a professional if you’re not confident in your DIY skills.
6. Cost-Effective Solution
Compared to other home improvement projects, adding garage door molding is a relatively affordable option. It can enhance the look and functionality of your garage door without breaking the bank. Additionally, it can potentially increase the value of your home, making it a cost-effective solution in the long run.
Conclusion
In conclusion, we have learned about the benefits and process of installing garage door molding. We have discussed how this simple addition can enhance the aesthetics and functionality of your garage door. However, as with any project, there are a few potential disadvantages to keep in mind.
One of the main drawbacks is that it may require some expertise or professional assistance for proper installation. While it may seem like a simple task, precise measurements and cutting may be necessary to achieve a seamless look.
Additionally, the cost of materials and labor for installation may add up depending on the type and size of molding you choose. I hope this article has been beneficial for learning how to install garage door molding. Make Sure the precautionary measures are followed chronologically.
I am Rick. I grew up helping my dad with his handyman service. I learned a lot from him about how to fix things, and also about how to work hard and take care of business. These days, I’m still into fixing things- only now, I’m doing it for a living.
I’m always looking for new ways to help people grow and develop. That’s why I have created this blog to share all my experience and knowledge so
that I can help people who are interested in DIY repair.