
Installing a garage door threshold seal is a crucial step in enhancing the functionality and efficiency of your garage space. One of the primary benefits is that it effectively prevents water, dust, pests, and debris from entering the garage, thus maintaining a cleaner and drier environment. Additionally, a well-fitted threshold seal can provide insulation, helping to regulate temperatures and ultimately leading to energy savings by reducing heating and cooling costs.

In this article, we will guide you through how to install a garage door threshold seal. The installation process involves several straightforward steps: preparing the area, measuring and cutting the seal to fit, applying the appropriate adhesive, and finally securing the seal in place to ensure a tight fit that will last for years to come.
Understanding Garage Door Threshold Seals
What is a Threshold Seal?
A garage door threshold seal is essential for sealing the gap between the bottom of the garage door and the floor. This barrier prevents the intrusion of water, dust, pests, and debris from the outside environment, effectively maintaining the cleanliness and dryness of your garage space. Threshold seals are generally made from durable materials like rubber or vinyl, each offering distinct advantages. Rubber seals are more resilient and can withstand severe weather conditions better than their vinyl counterparts, which are often lighter and easier to install. Both materials are designed to provide effective sealing for years, but choosing the right one will depend on your specific needs, local climate, and the expected wear and tear.
Benefits of Installing a Threshold Seal
Installing a threshold seal has several key benefits that enhance functionality and longevity. Firstly, it significantly improves weatherproofing, guarding against rain, snow, and wind. This protection is vital for maintaining the integrity of your garage and any items stored within it. Secondly, it protects against pests, preventing rodents and insects from accessing your garage.
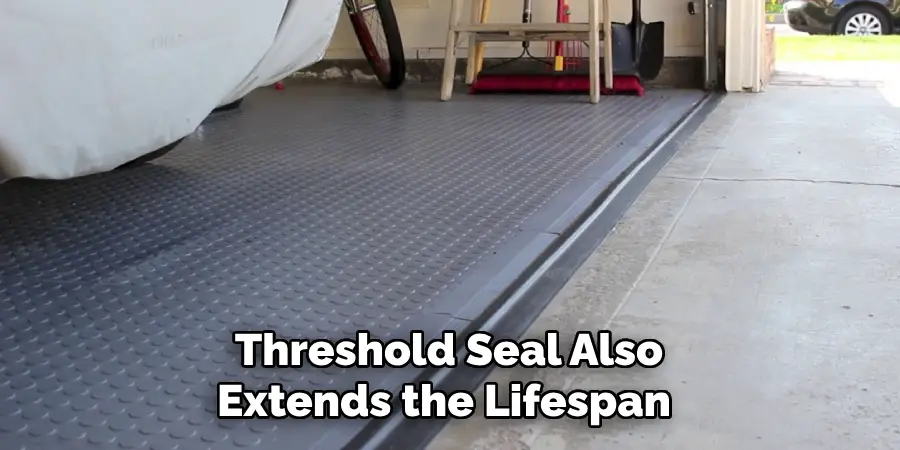
Additionally, a proper threshold seal contributes to energy efficiency by reducing air leaks, thereby helping to regulate indoor temperatures and save on energy costs. By keeping moisture at bay, a threshold seal also extends the lifespan of your garage door and floor materials, preventing decay and damage caused by water exposure. Ultimately, installing a garage door threshold seal is a worthwhile investment in the maintenance and efficiency of your space.
Preparing for Installation
Tools and Materials Needed
To successfully install a garage door threshold seal, you’ll need the following tools and materials: a threshold seal kit, a utility knife for cutting the seal, a measuring tape for accurate measurements, adhesive (usually included in the kit), a caulking gun for applying the adhesive, a wire brush or broom for cleaning, and safety gloves to protect your hands during the installation process.
Cleaning the Garage Floor
A clean surface is essential for ensuring the adhesive bonds effectively. Begin by sweeping away any dirt, debris, or loose materials from the garage floor where the threshold seal will be placed. Consider using a degreaser to ensure a smooth, clean surface for stubborn grime or oil stains. This preparation step is crucial, as it helps the adhesive adhere properly, leading to a long-lasting seal that effectively protects your garage from unwanted elements.
How to Install a Garage Door Threshold Seal: Measuring and Cutting the Threshold Seal
Measuring the Garage Door Opening
Accurate measurement is critical to ensuring that your threshold seal fits correctly, preventing any gaps that could allow moisture, dust, or pests to enter your garage. To begin, use a measuring tape to measure the width of your garage door opening. Start at the left edge of the door frame and extend the tape measure to the right edge. Make sure to measure at the base of the door where the threshold seal will be installed, as this is typically the widest point.
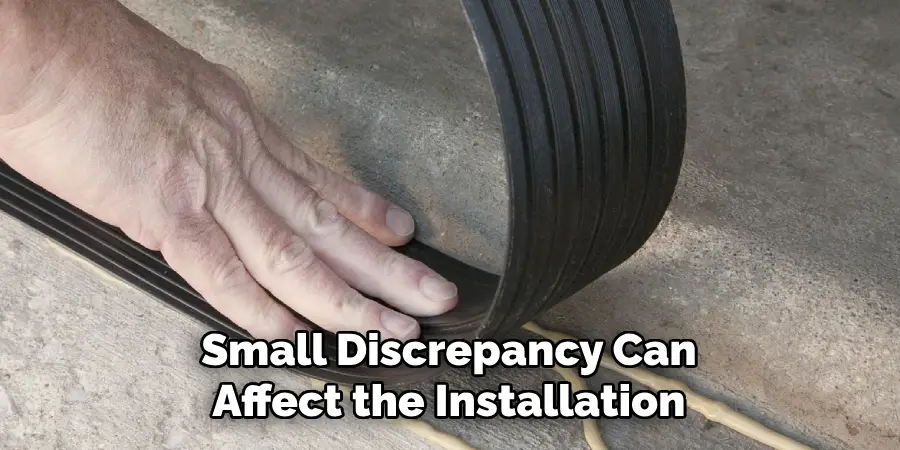
It’s advisable to take at least two measurements at different heights to account for any inconsistencies in your garage floor or door alignment. Once you have your measurements, select the longest value to determine the length of the threshold seal you will need. Remember, precision in measuring is essential; even a small discrepancy can affect the installation outcome and the seal’s effectiveness.
Cutting the Threshold Seal to Size
Once you have the correct measurement, it’s time to cut the threshold seal to the appropriate length. Carefully align the seal on a flat surface using a sharp utility knife. Wear safety gloves to protect your hands during the cutting process. For a straight and clean cut, you may want to use a straight edge or ruler as a guide. Position the utility knife blade lightly against the seal, then apply consistently, even pressure while cutting.
It’s important to cut in one smooth motion to avoid jagged edges, which can compromise the seal’s fit. After cutting, check the seal against the garage door to ensure it fits snugly against the sides. If necessary, make small adjustments by trimming any excess material. A properly sized and cut threshold seal will provide optimal protection and a long-lasting result.
How to Install a Garage Door Threshold Seal: Applying the Adhesive
Marking the Position for the Threshold Seal
To ensure that the threshold seal aligns perfectly with your closed garage door, you must accurately mark its position on the garage floor. Close the garage door and use a pencil or chalk to trace along the bottom of the door, creating a guideline that will indicate where the seal should sit. This line will help you apply the adhesive consistently across the designated area, ensuring a seamless fit once the seal is in place.
Applying the Adhesive
With your guidelines in place, it’s time to apply the adhesive. Use a caulking gun to dispense a continuous bead of adhesive along the marked line. Start at one end of the line and apply an even amount of adhesive as you move steadily along, ensuring coverage across the entire area where the threshold seal will rest.

It’s important to maintain consistent pressure on the caulking gun to avoid gaps in the adhesive. Be sure to cover the entire line to create a solid bond and prevent any moisture or debris from seeping underneath the seal once it’s in place. After applying the adhesive, allow it to get tacky according to the product instructions, enhancing the bonding process.
Positioning the Threshold Seal
Carefully position the threshold seal over the adhesive, aligning it with the marks on the garage floor. Press down firmly along the entire length of the seal to secure a strong bond. Ensuring proper alignment and pressure will help maintain the integrity of the seal, effectively enhancing your garage’s protection from the elements.
Securing and Finalizing the Installation
Pressing Down and Securing the Seal
Once the threshold seal has been positioned over the adhesive, adhering evenly is crucial. Press down firmly along the entire seal length using a roller or your hands. This action promotes a consistent bond with the adhesive and helps eliminate any air pockets that may interfere with its effectiveness. For added security, consider placing weights or heavy objects on top of the seal as it cures. This will hold it in place and ensure it maintains the correct alignment during drying.
Allowing the Adhesive to Cure
After securing the seal, allow the adhesive to cure fully, which typically takes around 24 hours. It’s important to avoid using the garage door during this time to prevent any shifting or misalignment of the seal, ensuring a strong and lasting bond is achieved. During the curing period, refrain from applying any pressure to the door or opening it, as this could compromise the installation.
Trimming Excess Material
Once the adhesive has completely cured, inspect the threshold seal for any excess material that may need trimming. Using a utility knife, carefully cut away any surplus sections to create a neat and polished finish. Make sure to cut gently and accurately to avoid damaging the seal or the surrounding areas. A clean edge enhances the appearance of your garage space and contributes to the threshold seal’s overall effectiveness.
Testing and Maintenance
Testing the Seal
After installation, it’s essential to test the effectiveness of your threshold seal. Close the garage door and carefully inspect the bottom edge for any visible gaps where air or light may penetrate. To simulate rain, use a hose to spray water along the closed door and observe if any moisture seeps under the threshold. If water penetrates, it may indicate that the seal requires adjustment or replacement.
Maintaining the Threshold Seal
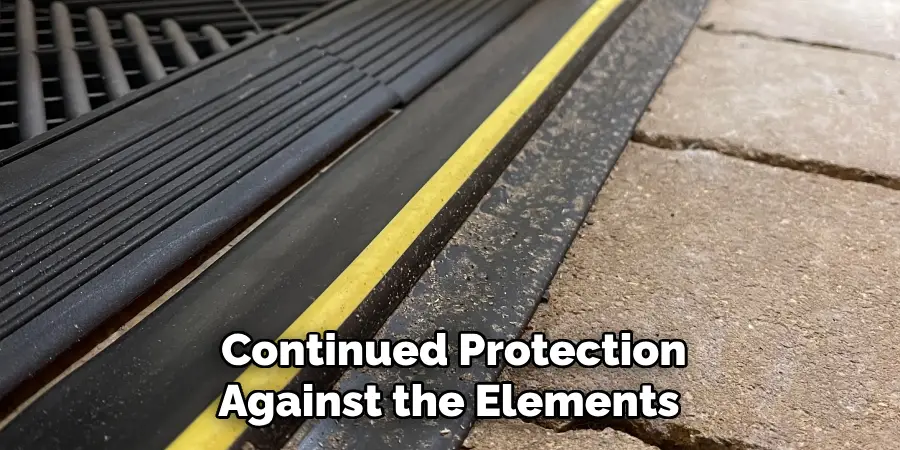
To ensure longevity and effectiveness, regularly inspect your threshold seal for signs of wear and tear. Look for cracks or areas where the seal has become dislodged. Clean the seal periodically to remove any debris or dirt accumulating and compromising its integrity. If you notice that the adhesive is wearing thin or the seal is lifting, consider reapplying the adhesive to maintain a strong bond and continued protection against the elements.
Conclusion
In conclusion, installing a garage door threshold seal is a manageable DIY project that can greatly enhance your garage’s protection and insulation. The process begins with an accurate measurement, cutting the seal to the desired length, and then marking the position on the garage floor. Next, you apply the adhesive along the marked line, carefully position the seal, and press it down to secure a strong bond. After allowing the adhesive to cure fully, trimming any excess material ensures a neat finish.
Remember to test the seal to verify its effectiveness and perform regular maintenance to extend its longevity. By meticulously following these steps on how to install a garage door threshold seal, you can ensure a precise installation that maximizes its performance. Take your time throughout the process, and rest assured that the benefits will be well worth the effort.
I am Rick. I grew up helping my dad with his handyman service. I learned a lot from him about how to fix things, and also about how to work hard and take care of business. These days, I’m still into fixing things- only now, I’m doing it for a living.
I’m always looking for new ways to help people grow and develop. That’s why I have created this blog to share all my experience and knowledge so
that I can help people who are interested in DIY repair.