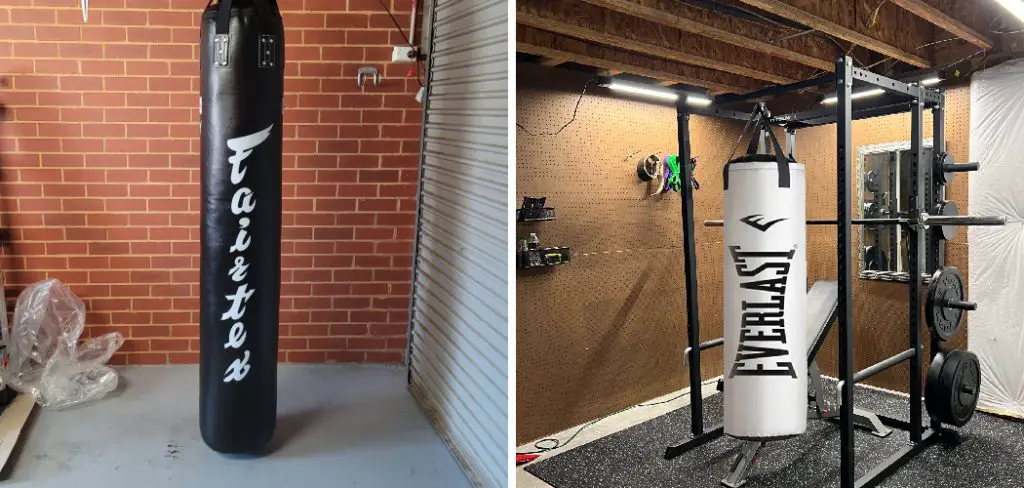
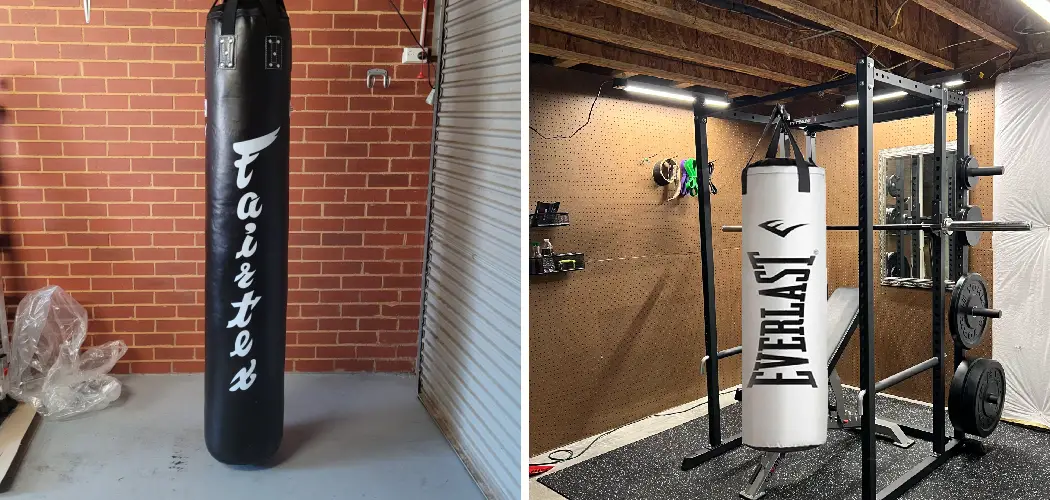
Hanging a boxing bag in your garage can transform a simple space into a dedicated training area, offering numerous benefits for your fitness routine. With the convenience of being at home, you can engage in effective workouts whenever it suits your schedule, eliminating the need for a gym membership or travel time.

This setup allows you to refine your boxing skills while also providing a full-body workout that enhances strength, agility, and coordination. When considering how to hang a boxing bag in garage, it’s essential to create an environment that fosters focus and motivation.
The process involves selecting an appropriate location within the garage that supports the necessary clearance and stability. Additionally, ensuring safe and secure installation is crucial to prevent accidents during use. By following the right steps, you can enjoy the advantages of having a personal boxing space that caters to your fitness goals.
Choosing the Right Spot in Your Garage
Selecting the ideal location to hang your boxing bag is critical in setting up your home training space. First, you need to assess the space and clearance requirements. Finding an area in your garage that offers sufficient room to move around the bag freely is essential. Measure the height and width around the intended hanging spot, ensuring that the bag will not be in danger of hitting walls, vehicles, or other obstacles during use.

A general guideline is to allow at least three feet of clearance around the bag, giving you ample room to perform various punches and footwork without restriction. Additionally, consider the height at which you will hang the bag; it should be positioned so that the striking surface aligns with your head or shoulder level, depending on your training goals.
Assessing Space and Clearance Requirements
When choosing the space for your boxing bag, take accurate garage measurements. Check for adequate vertical and horizontal clearance, as striking the bag requires a wide range of motion.
If you’re taller or shorter than average, adjust the height accordingly to suit your personal dimensions. Consider potential obstructions, like shelves or doors, that may interfere with your routine. By ensuring a solid space is available, you enhance the safety and effectiveness of your workouts.
Considering the Garage Structure

Next, evaluate the structural elements of your garage. Look for strong support structures such as ceiling joists or beams, as these will determine where you can safely hang your bag. It is crucial to select a location that can bear the weight and movement of the bag, especially since heavy punches can create significant force. Ideally, choose a spot where the joists run perpendicular to the length of the boxing bag for added stability.
If you’re unsure about the integrity of these elements, consulting with a professional can provide peace of mind and help ensure your setup is both secure and functional. You can carefully consider these factors to create a safe and effective training environment in your garage.
Gathering Necessary Tools and Materials

Before hanging your boxing bag, it’s essential to gather the necessary tools and materials to ensure a smooth and secure installation. Being well-prepared will help you avoid any disruptions during the process and guarantee a sturdy setup that will withstand intense workouts.
Tools List
- Stud finder
- Drill
- Wrenches
- Socket set
- Measuring tape
- Ladder
- Safety gear (gloves, goggles)
Materials List
- Heavy-duty ceiling mount or wall bracket
- Bolts or screws
- Carabiners
- Chains
- Swivel attachment for the bag (optional)
These tools and materials will streamline the hanging process and help you achieve a safe and successful boxing training environment in your garage.
How to Hang a Boxing Bag in Garage: Installing a Ceiling Mount

Hanging your boxing bag securely from the ceiling requires careful installation of a ceiling mount to ensure safety during your workouts. This section will guide you through the process of locating ceiling joists, drilling holes, and attaching your boxing bag for optimal performance.
Locating Ceiling Joists
Begin by using a stud finder to locate the ceiling joists in your garage. These joists provide the necessary support for your boxing bag, so it’s crucial to find them before installing the mount. To use the stud finder, turn it on and slowly slide it along the ceiling until it signals the presence of a stud.
Once you’ve located the joists, mark the spots lightly with a pencil. To ensure maximum support, measure and mark the center of each joist where the mount will be installed. It’s advisable to check multiple locations for accuracy, as the spacing may vary. This careful preparation will help prevent any accidents caused by improperly mounted equipment.
Drilling Holes and Installing the Mount
With the joists marked, it’s time to drill pilot holes for the mount. Using a drill bit that matches the size of the heavy-duty screws or bolts you’ll be using, drill carefully into the marked locations on the joists. Ensure that you drill straight to avoid any complications during installation.
Once the pilot holes are in place, align the ceiling mount with the holes and secure it using your heavy-duty screws or bolts. It’s essential to fasten the mount securely, as a loose installation may result in the structure moving or loosening over time, posing safety risks during your training sessions. Double-check that the mount is straight and stable before proceeding.
Attaching the Boxing Bag

After installing the ceiling mount securely, it’s time to attach your boxing bag. Depending on your setup, you may be using chains or straps to connect the bag to the mount. If using chains, hook them through the top loop of the bag and then secure the other end to the ceiling mount.
Adjust the chain length so that the middle of the bag hangs at a comfortable height—typically around chest level- allowing for efficient striking during workouts. If your setup includes a swivel attachment, add this to the chains for added mobility, allowing the bag to swing freely while you practice.
Ensuring that the bag hangs correctly will significantly improve your training effectiveness and safety. Once everything is in place, give the bag a few light punches to test the stability of the setup before engaging in a full workout.
How to Hang a Boxing Bag in Garage: Installing a Wall Bracket (Alternative Method)
Choosing the Right Wall
When selecting a wall for mounting your boxing bag, consider the proximity to a solid structural element, such as a support beam or a load-bearing wall. These areas can bear the weight and movement associated with vigorous training. Before proceeding, checking for any electrical wiring or plumbing hidden within the wall is vital.
You can do this by using a stud finder with wire detection capabilities or visually inspecting the wall for outlets and other fixtures. Mark the spots where you want to drill, ensuring you stay clear of any potential hazards. By selecting an appropriate wall and conducting these preliminary checks, you can ensure a safe and secure installation for your boxing bag.
Mounting the Bracket
Once you’ve chosen a suitable wall, it’s time to install the wall bracket. Begin by positioning the bracket at the desired height, typically where the bag will hang at chest level.
Use a level to ensure that the bracket is parallel to the ground. Mark the drill holes through the bracket’s mounting holes on the wall, ensuring they correspond with the studs identified earlier. With a drill bit appropriate for your screws, carefully drill holes into the marked locations. After drilling, insert either wood screws or bolts into the pilot holes, making sure they penetrate the wall studs for maximum support.
Tighten the screws securely until the bracket feels solid; this will help prevent any movement during use. Finally, check that the bracket remains level throughout the tightening process, as an uneven installation can lead to shifting and improper bag function during training. Once fastened, attach the boxing bag to the bracket, ensuring it is properly secured before enjoying your workout.
Adding a Swivel or Spring Attachment
Benefits of Using a Swivel
Incorporating a swivel attachment into your boxing bag setup allows for greater freedom of movement, enabling the bag to rotate smoothly during strikes.
This design promotes more dynamic training by simulating real-life scenarios and significantly reduces the stress placed on the ceiling mount or wall bracket. As the bag pivots, it encourages varied angles of attack and improves your reflexes, making your workouts more effective and enjoyable.
Installing the Swivel or Spring
To attach a swivel or spring, simply connect it between the chains and the ceiling mount or wall bracket. Slide one end of the swivel through the top loop of the boxing bag, securing it tightly, and then connect the other end to the mount or bracket.
This addition absorbs shock during use, thereby reducing noise and wear on your equipment. Ensure all connections are secure for optimal performance and safety during your training sessions.
Safety Considerations and Final Adjustments
Checking Stability and Weight Capacity
Before using your boxing bag, it’s essential to ensure your setup is stable and secure. Gently push the bag from side to side to check for any wobbling or movement in the ceiling mount or wall bracket.
If you notice any instability, re-evaluate the fastenings and make sure everything is tightly secured. Additionally, verify that the weight capacity of your chosen mount or bracket is suitable for your boxing bag. Always refer to the manufacturer’s specifications, as this can prevent accidents during training.
Making Final Adjustments
After confirming stability, make any necessary adjustments to the chain length or swivel attachment to ensure the bag hangs evenly and at the correct height. Ideally, the bag should rest around chest level for optimal striking. Double-check all fastenings, ensuring they are secure before starting your training sessions. These final checks will enhance both your safety and your training experience.
Conclusion
In summary, understanding how to hang a boxing bag in garage involves several key steps to ensure a secure and functional setup. Start by selecting an appropriate location, ideally near a sturdy wall or ceiling beam, and carefully check for hidden wiring or plumbing.
After this, install the mount, whether it’s a ceiling or wall bracket, and securely attach the boxing bag, ensuring it hangs at chest level for optimal use. Don’t forget to install a swivel or spring for improved movement, and perform thorough safety checks to confirm stability before your first workout. As you embark on this project, take your time with each installation step and prioritize safety.
A well-installed boxing bag can greatly enhance your garage gym, serving as a durable and effective tool in your fitness journey. Enjoy your training, knowing you’ve created a safe and valuable addition to your home workout environment!
I am Rick. I grew up helping my dad with his handyman service. I learned a lot from him about how to fix things, and also about how to work hard and take care of business. These days, I’m still into fixing things- only now, I’m doing it for a living.
I’m always looking for new ways to help people grow and develop. That’s why I have created this blog to share all my experience and knowledge so
that I can help people who are interested in DIY repair.

