
Frosting garage door windows can be a great way to add a touch of privacy and aesthetic appeal to your home. In addition, it also provides insulation benefits which can help keep your home more comfortable throughout the year.
The frosted look will also help diffuse light entering the room, creating an even distribution of natural light that won’t cause glare or too much brightness. Frosting your garage door windows can also be a cost-effective way to enhance the look of your home without having to replace them completely.
The advantages of frosting garage door windows are numerous. Frosting provides an extra layer of privacy and protection, preventing people from seeing inside your garage or looking in through the windows. It also makes the interior of your garage look more attractive, modern, and inviting. In this blog post, You will learn in detail how to frost garage door windows.
Summary: Frosting garage door windows can be an easy and inexpensive way to add privacy to your home. Not only does frosted glass look attractive, but it also helps decrease the amount of sunlight that enters a room and reduces glare from the outside. Frosted glass can be purchased in a variety of colors, patterns, and textures and is typically applied using a spray-on product or adhesive film.
Importance of How to Frost Garage Door Windows
- Increase Security: Frosted windows on your garage door can help preserve the privacy of your home. This is especially important if you keep valuable items in your garage or have a workshop there. Frosting the windows adds an extra layer of security and helps deter criminal activity.
- Enhance Curb Appeal: The appearance of frosted windows on a garage door can enhance your home’s curb appeal. It adds a touch of sophistication to an otherwise plain-looking garage door, making it look more attractive and stylish.
- Increase Comfort: Frosted windows on a garage door also helps reduce the amount of sunlight that passes through the windows, which in turn makes the room inside more comfortable and cozy.
- Reduce Energy Costs: The extra layer of protection provided by frosted windows on a garage door helps to regulate the temperature inside, reducing energy costs in both summer and winter. This is especially beneficial if you use your garage as an art studio or workshop.
- Block Noise: Another advantage of frosting your garage door windows is that it can help block out any outside noise, making it easier to concentrate on your work.
11 Stepwise Guideline for How to Frost Garage Door Windows
Step 1: Measure and Plan
Begin by measuring the dimensions of each windowpane on your garage door. This will help you determine the amount of frosting material you need to purchase. Sketch a rough layout of your garage door windows and label the measurements to serve as a reference during the frosting process.
Step 2: Choose a Frosting Method
There are several methods available for frosting garage door windows, including adhesive window film, spray-on frost, and etching cream. Each method has its advantages and drawbacks, so consider factors such as ease of application, durability, and desired appearance when choosing a method.
Step 3: Gather Necessary Tools and Supplies
Based on the chosen frosting method, gather the necessary tools and supplies. Common items you may need include:
- Window cleaner
- Lint-free cloth
- Measuring tape
- Utility knife or scissors
- Straight edge or ruler
- Pencil or marker
- Painter’s tape
- Squeegee or credit card (for adhesive window film)
- Protective gloves (for spray-on frost or etching cream)
- Drop cloth (for spray-on frost)
- Paintbrush (for etching cream)
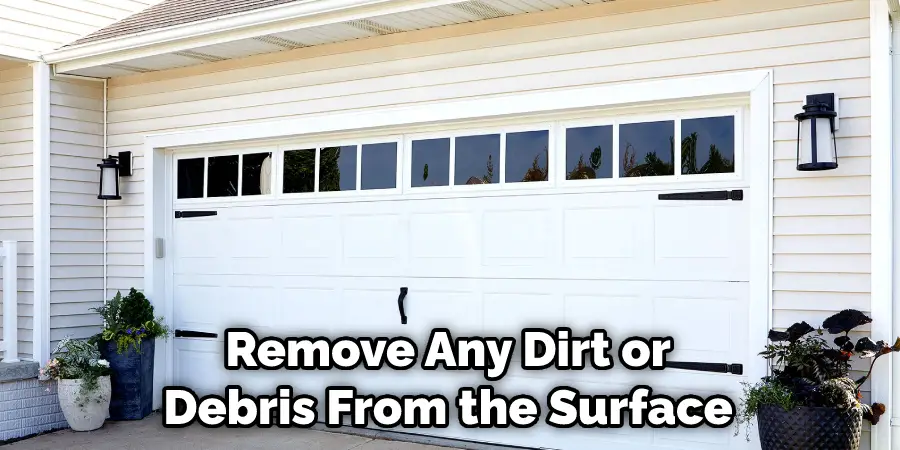
Step 4: Clean the Windows
Before applying the frosting material, clean the garage door windows thoroughly using a window cleaner and a lint-free cloth. Make sure to remove any dirt, dust, or debris from the surface, as these can interfere with the frosting process. Allow the windows to dry completely before proceeding.
Step 5: Apply the Chosen Frosting Method
Follow the steps for the chosen frosting method:
- Adhesive window film: Measure and cut the window film to fit each windowpane, adding an extra inch to the width and height. Peel the backing off the film and carefully apply it to the window, starting from one corner and smoothing it out as you go. Use a squeegee or credit card to remove any air bubbles or wrinkles, working from the center of the windowpane outward. Trim any excess film using a utility knife and a straight edge.
- Spray-on frost: Tape off the edges of the windowpane using painter’s tape, ensuring that the tape adheres well to prevent the spray from seeping underneath. Place a drop cloth below the window to catch any overspray. Wearing protective gloves, shake the spray-on frost canister well and apply the frost to the window using smooth, even strokes. Allow the frost to dry according to the manufacturer’s instructions, then carefully remove the painter’s tape.
- Etching cream: Tape off the edges of the windowpane using painter’s tape, and protect your hands with gloves. Using a paintbrush, apply a thick, even layer of etching cream to the windowpane, taking care to avoid drips or streaks. Allow the cream to sit for the recommended time according to the manufacturer’s instructions. Rinse the cream off thoroughly with water, then remove the painter’s tape.
Step 6: Inspect the Windows
After applying the frosting material, inspect the windows to ensure that the frosting is even and consistent. If you notice any imperfections, consider repeating the process or applying touch-ups as needed.
Step 7: Maintain the Frosted Windows
To keep your frosted garage door windows looking their best, clean them regularly using a soft cloth and a gentle window cleaner. Avoid using abrasive tools or harsh chemicals, as these can damage the frosted surface. If the frosting material becomes damaged or wears away over time, reapply the frosting using the same method as before.
By following these steps, you can successfully frost your garage door windows, enhancing privacy and adding a decorative touch to your garage. Proper application and maintenance will help ensure that your frosted windows remain attractive and functional for years to come.
Step 8: Customize Your Frosted Windows with Designs
If you want to add a personal touch or artistic flair to your frosted garage door windows, consider incorporating designs or patterns. This can be done using any of the frosting methods mentioned earlier. For adhesive window film, you can purchase pre-cut decorative patterns or create custom designs by cutting the film with a utility knife. For spray-on frost and etching cream, you can create designs using stencils or painter’s tape to mask off areas you want to keep clear.
Step 9: Carefully Remove Frosting If Needed
If you decide to remove or change the frosting on your garage door windows, follow the appropriate steps based on the chosen frosting method:
- Adhesive window film: Carefully peel the film away from the windowpane, starting from one corner. If the film is difficult to remove, use a hairdryer to warm the adhesive and make it easier to lift. Clean any residual adhesive using a window cleaner and a soft cloth.
- Spray-on frost: Scrape off the frosting using a plastic scraper, taking care not to scratch the glass. Clean the windowpane with window cleaner and a soft cloth to remove any remaining residue.
- Etching cream: Unfortunately, etching cream is permanent and cannot be removed from the glass. If you need to remove an etched design, you will need to replace the affected windowpane.
Step 10: Consider Alternative Privacy Solutions
If you’re not satisfied with the results of frosting your garage door windows or if you want additional privacy options, consider alternative solutions such as:
- Installing curtains or blinds inside the garage to cover the windows.
- Replacing the existing garage door windows with tinted or textured glass.
- Adding a privacy screen or lattice outside the garage to obstruct the view of the windows.
Step 11: Ensure Proper Safety Precautions
When working with frosting materials such as spray-on frost or etching cream, it’s important to follow safety precautions. Work in a well-ventilated area, wear protective gloves, and avoid contact with your skin and eyes. If using etching cream, be especially cautious, as it contains strong chemicals that can cause burns or irritation.
By following these additional steps, you can ensure that your frosted garage door windows meet your needs and preferences while providing privacy and aesthetic appeal. Whether you choose to apply a simple frosting treatment or incorporate custom designs, remember to work carefully, follow safety guidelines, and maintain your frosted windows for lasting results.
Tips for How to Frost Garage Door Windows
- Wear protective eyewear. When frosting windows, you may come into contact with harmful chemicals, so it’s important to protect your eyes and skin.
- Wear old clothes that you don’t mind getting stained or ruined. Be sure to cover any areas of exposed skin as well in case of splashes or spills.
- Make sure you have adequate ventilation in the area you are frosting. After all, you don’t want to be overwhelmed by chemical fumes.
- Clean the garage door windows thoroughly before beginning the frosting process and make sure that it is completely dry. This will ensure a good bond between the product and the window.
- Follow all instructions on the frosting product carefully and test a small area before proceeding with the entire job. This will not only help you avoid any costly mistakes but also make sure that you get the desired effect.
How Do You Clean the Garage Door Windows Before Applying Frosted Window Film?
Cleaning the garage door windows before applying frosted window film is important to ensure a smooth, professional-looking finish. Here are the steps to take:
- First, remove any dirt or debris from the surface of the window with a microfiber cloth.
- Next, clean the windows with a household glass cleaner. Be sure to wipe in a circular motion and allow the cleaner to dry completely before proceeding.
- Once the windows are clean and dry, measure the glass and cut the frosted window film to size.
- Apply the frosted window film to the surface of the window, starting at one corner and working your way down. Use a squeegee to smooth out any bubbles or wrinkles.
- Finally, trim off any excess film with a utility knife or scissors. Now your garage door windows are ready for frosted privacy.
How Can You Protect Your Frosted Garage Door Windows From Long-term Damage?
Frosted garage door windows can add privacy and style to your home but can also be susceptible to damage from the elements. To help protect your frosted windows from long-term damage, here are a few tips:
- Apply a clear coat of sealant: A clear coat of sealant will help to create a barrier between your frosted window and the elements. Be sure to apply the sealant evenly and allow it to dry completely before being exposed to the elements.
- Store Frosted Windows Indoors: If possible, store your frosted garage door windows indoors when they’re not in use. This will help to protect them from sun damage, rain, snow, and other external factors.
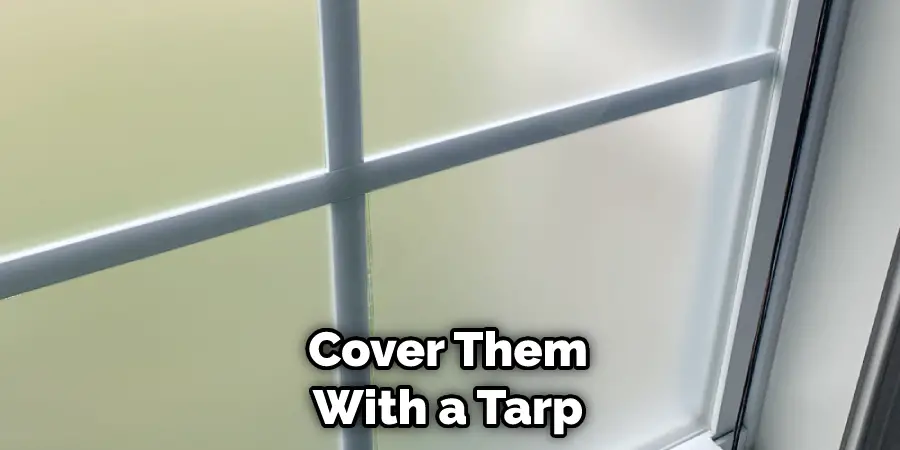
- Cover Frosted Windows When Not in Use: If you can’t store your frosted windows indoors, be sure to cover them with a tarp or other protective material when they’re not in use. This will help to keep them clean and free of debris.
By following these tips, you can help keep your frosted garage door windows looking like new for years to come.
Conclusion
One of the main disadvantages of frosting garage door windows is the cost. Depending on how much you need to frost, it can be expensive. Not only do you have to purchase special window film but also tools and supplies needed for installation.
Also, some legal implications may arise from tinting garage door windows, so you’ll want to check with your local building codes before beginning. Finally, the glare caused by direct sunlight hitting frosted windows may limit visibility outside and inside your garage.
In conclusion, frosting garage door windows effectively add privacy and style to any home. With a few simple supplies and the right technique, anyone can create beautifully etched glass patterns that will increase the curb appeal of their home.
It is economical and easy to do yourself and provides numerous benefits, such as improved privacy and cooling energy costs. I hope this article has been beneficial for learning how to frost garage door windows. Make Sure the precautionary measures are followed chronologically.