
Garage door opener remotes are essential devices that provide convenience and security, allowing homeowners to effortlessly access their garages. However, common issues can arise, leading to frustration and the potential for compromised safety.
Understanding how to fix garage door opener remote problems is crucial, as resolving these issues can often be accomplished with simple troubleshooting steps, helping to avoid unnecessary replacements.
This article will guide you through an overview of the repair process, which includes checking and replacing batteries, troubleshooting connectivity issues, and reprogramming the remote. By following these steps, you can save time and money, ensuring that your garage door operates smoothly and securely. Let’s explore the common challenges faced with garage door opener remotes and the effective solutions that can restore their functionality.
Common Issues with Garage Door Opener Remotes
Unresponsive Remote
One of the most common issues homeowners face is an unresponsive garage door opener remote. Symptoms include pressing the button without the garage door reacting and failing to open or close when commanded. This problem may stem from several factors, such as depleted batteries, connectivity issues with the opener, or improper programming of the remote, all of which can hinder its performance.
Intermittent Functionality
Occasionally, remote functionality may be inconsistent, resulting in the garage door operating sporadically. This could be due to interference from other electronic devices, obstacles obstructing the signal, or a weak battery. Additionally, worn-out internal components may contribute to this frustrating problem, making it essential to thoroughly assess the remote’s condition to identify the root cause and determine the necessary steps for resolution.
How to Fix Garage Door Opener Remote: Checking and Replacing the Remote’s Batteries
Open the Remote and Inspect the Batteries
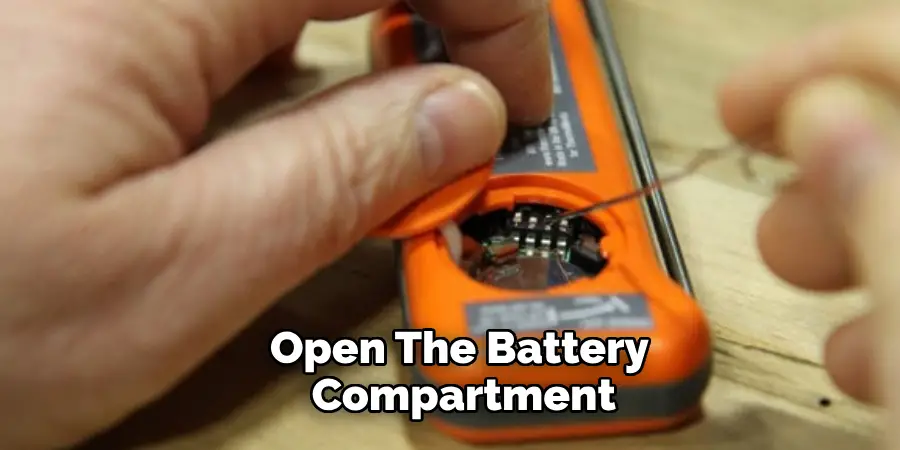
To begin checking the remote’s batteries, locate and open the battery compartment, typically found on the back of the remote. Inspect the batteries for any signs of corrosion, leakage, or low charge, which can affect performance. If you have a multimeter available, test the battery voltage to confirm whether it is functioning properly. If corrosion is present, carefully clean it with a small brush or cloth to prevent further damage.
Replace the Batteries
If the batteries are low on charge or damaged, replace them with fresh batteries, ensuring they are oriented correctly according to the markings inside the compartment.
It’s crucial to use the battery type recommended by the manufacturer, as using incorrect batteries can lead to malfunction or could damage the remote. By regularly checking and replacing the batteries, you can help maintain the remote’s functionality and prevent issues from arising in the future.
Troubleshooting Remote Connectivity Issues
Check the Distance from the Garage Door Opener
One of the simplest factors to consider when troubleshooting remote connectivity issues is the distance from the garage door opener. If the remote is too far away, it may not have enough signal strength to communicate effectively with the opener. To rule out range problems, try moving closer to the garage door and pressing the remote button again. If it works while closer, it’s likely a distance issue that may require adjustments in placement or usage.
Inspect the Remote’s Antenna
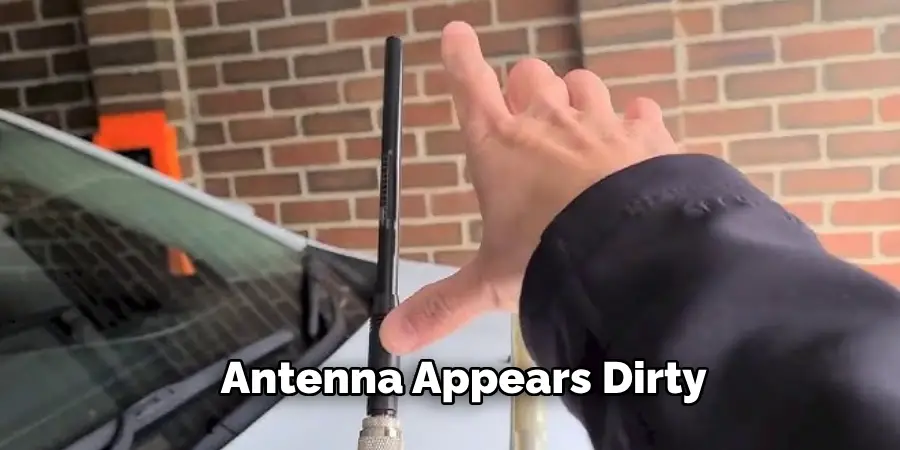
Another critical aspect to check is the garage door opener’s antenna. Inspect it carefully for any signs of damage, bending, or obstructions that could impede the remote’s signal. If the antenna appears dirty or blocked, cleaning it gently can improve connectivity. Additionally, repositioning the antenna to a more upright and unobstructed position may enhance the strength of the transmitted signal from the remote.
Check for Interference
Interference from other electronic devices can significantly impact the performance of a garage door opener remote. Common sources of such interference include Wi-Fi routers, cordless phones, or other remote-controlled devices nearby. If you’re experiencing connectivity issues, first identify any potential electronic devices causing interference. If possible, try turning off or relocating these devices temporarily to see if it resolves the problem.
Another option is to change the remote’s frequency. Many garage door openers operate on specific frequencies, and switching to a different one can help eliminate interference.
If changing the frequency isn’t feasible, consider using a universal remote that allows for frequency selection. By reducing environmental interference, you can significantly enhance the functionality of your garage door opener remote, ensuring smoother operation and reliable connectivity.
Reprogramming the Remote
Clear Existing Codes from the Opener
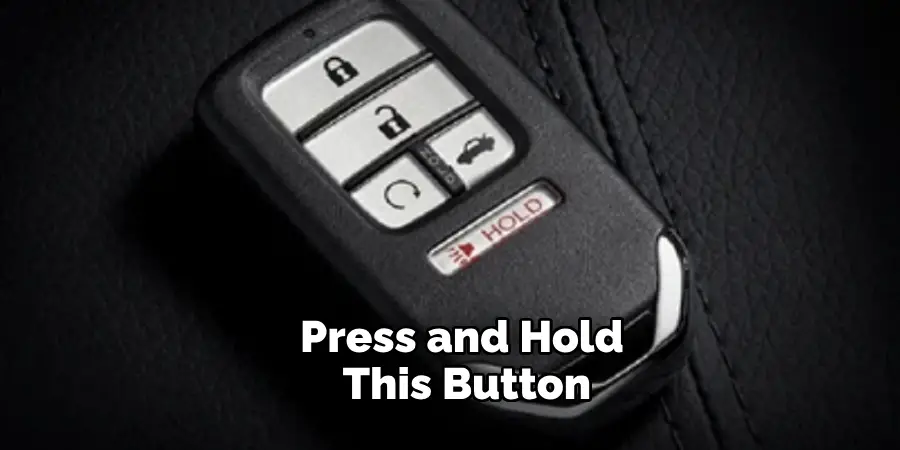
Reprogramming your garage door remote often begins with clearing any existing codes from the opener, ensuring a fresh start for the syncing process. To do this, locate the “Learn” or “Smart” button on the garage door opener, usually found on the back or side of the unit. Press and hold this button until the indicator light turns on and then off, indicating that all remote codes have been cleared.
This process effectively resets the opener, erasing any previously programmed remotes and preparing it for new entries. It’s important to perform this step before pairing your remote to avoid conflicts with older codes that could prevent the new remote from functioning properly. Always ensure safety by checking that the garage door is closed before proceeding with this reset.
Enter Programming Mode on the Remote
To facilitate the syncing process, your remote must first enter programming mode. Depending on the model, this often involves pressing a specific combination of buttons.
Typically, you may need to press and hold the “Program” button alongside another designated button for a few seconds—check your user manual for the exact sequence needed for your particular remote. This step is crucial, as it places the remote into a state that allows it to communicate with the garage door opener. If your remote does not have a dedicated programming button, follow the indicated steps in the user manual. After successfully entering programming mode, the remote should emit a light or beep, confirming that it is ready to sync with the opener.
Sync the Remote with the Opener
Once the remote is in programming mode, it’s time to sync it with the garage door opener. Begin by pressing the remote button you wish to program while ensuring the opener is still in programming mode. You should observe the opener’s indicator light blinking, which indicates it is receiving the signal from the remote. After a few moments, the light should remain steady, confirming that the programming process was successful.
It may also emit a small sound, depending on the model. To conclude the programming, test the remote by pressing the newly programmed button to check if the garage door operates as expected. If it doesn’t work immediately, repeat the steps, ensuring that the remote entered programming mode correctly and that you followed the syncing procedure accurately. You’ll restore convenient access to your garage by successfully syncing your remote.
Inspecting the Remote’s Internal Components
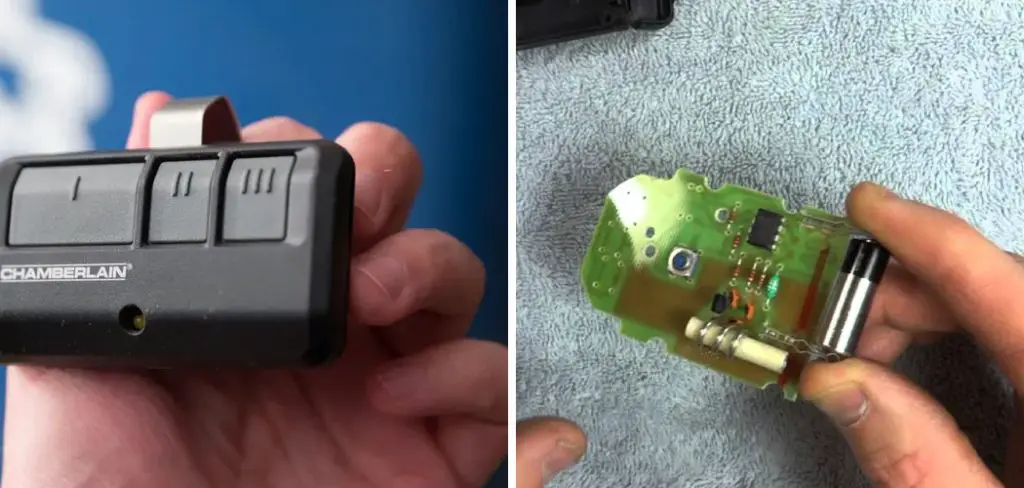
Open the Remote and Inspect the Circuit Board
To inspect the internal components of your garage door remote, carefully open the casing using a small screwdriver or a similar tool. Take care not to damage the plastic clips or the casing itself.
Once opened, examine the circuit board for any visible signs of damage, such as loose connections, broken solder joints, or worn-out components. If you notice any irregularities, it may indicate that repairs are needed to restore proper function.
Clean or Repair the Circuit Board
Keeping the circuit board clean is essential for optimal performance. Use a soft brush or compressed air to gently remove any dust or debris that may have accumulated.
For repairs, if you identify loose connections, consider re-soldering them to ensure a solid electrical connection. If there are damaged components, replacing them may be necessary. Always take precautions when handling electronics and ensure the remote is powered off during this process to avoid any risk of short circuits.
Resetting the Remote and Opener
Reset the Remote and Opener
Performing a full reset of your garage door remote and opener can help resolve persistent connectivity issues by restoring default settings.
To execute this, consult your manufacturer’s instructions, which typically involve pressing a specific button combination simultaneously on both the remote and the opener. This action will erase all programmed codes and settings, allowing you to start fresh. Following the reset, it’s essential to reprogram the remote to reconnect it with the opener.
Test the Remote After Reset
After successfully resetting and reprogramming your remote, testing its functionality is crucial. Press the newly programmed button to operate the garage door and observe its response.
If the door does not open or close correctly, double-check the programming steps were followed accurately. Troubleshooting tips include confirming the opener is receiving power, ensuring the antenna is unobstructed, and checking for interference from nearby electronic devices. By systematically following these steps, you can diagnose and correct any lingering issues.
When to Replace the Remote
Signs the Remote is Beyond Repair
If you notice extensive internal damage to your garage door remote, such as casing cracks or a malfunctioning circuit board, it may be time to consider replacement.
Despite successful reset and reprogramming attempts, consistent failure to sync with the opener also indicates that the remote has likely reached the end of its usable life. In these situations, exploring a replacement remote can be the most efficient solution to restore functionality to your garage door.
Choosing a Replacement Remote
When selecting a replacement remote, it’s essential to ensure compatibility with your existing garage door opener. Check the frequency specified in your owner’s manual, as this will determine whether the remote can effectively communicate with the opener.
If an exact match isn’t available, consider looking into universal remotes that support multiple opener brands. Additionally, read reviews and warranty information to ascertain the reliability and performance of the replacement remote before making a purchase.
Conclusion
In summary, understanding how to fix garage door opener remote involves several key steps. Start by checking and replacing the batteries to ensure sufficient power. If issues persist, reset the remote and opener, then sync them meticulously. Inspect the internal components of the remote for any damage or dirt that could impede functionality, and take necessary cleaning or repair actions.
As you navigate this process, you must consult your user manual for specific instructions tailored to your model. Remember that many remote problems can be resolved through these straightforward troubleshooting techniques.
However, should you encounter persistent issues, don’t hesitate to seek professional assistance or consider a replacement remote. With patience and attention to detail, you’ll be well-equipped to restore the convenience and reliability of your garage door opener remote.
I am Rick. I grew up helping my dad with his handyman service. I learned a lot from him about how to fix things, and also about how to work hard and take care of business. These days, I’m still into fixing things- only now, I’m doing it for a living.
I’m always looking for new ways to help people grow and develop. That’s why I have created this blog to share all my experience and knowledge so
that I can help people who are interested in DIY repair.