
Are you having trouble with your garage door not reversing automatically? This is a common issue that many homeowners encounter, but luckily it can be easily fixed. Here, we will walk you through the steps on how to fix auto reverse on garage door.
Auto reverse is a crucial safety feature in garage doors, designed to prevent accidents by automatically stopping and reversing the door’s movement if it encounters an obstruction. However, when this function malfunctions, it can lead to frustration and potential hazards. Fortunately, diagnosing and fixing issues related to auto-reverse can often be achieved with a few simple steps.

In this guide, we will explore common causes of auto-reverse problems, demonstrate how to troubleshoot these issues and provide practical solutions to restore your garage door’s functionality and ensure a safe and efficient operation.
What Will You Need?
Before we get started, there are a few tools and materials you will need to gather in order to fix the auto reverse on your garage door. These items include:
- Ladder
- Screwdrivers (flathead and Phillips)
- Clean cloth
- Lubricant spray
- Safety gloves and goggles
It’s essential to have all of these supplies handy before beginning the troubleshooting process. Additionally, disconnect the power to your garage door opener before attempting any repairs.
10 Easy Steps on How to Fix Auto Reverse on Garage Door
Step 1: Inspect the Safety Sensors
The first step in troubleshooting the auto-reverse feature is to inspect the safety sensors at the bottom of the garage door tracks. These sensors are critical as they detect obstructions in the door’s path. Begin by ensuring that both sensors are aligned correctly; the LED lights should be on and shining steadily. If one or both lights are blinking or off, there may be an alignment issue. You can gently adjust the sensors until they point directly at each other.
Next, clean the sensor lenses using a clean cloth to remove any dirt or debris that could interfere with their operation. Sometimes, simply clearing obstructed sensors can resolve the auto reverse problem. After cleaning, test the garage door to see if it reverses appropriately when encountering an object. If the problem persists, proceed to the next step to diagnose the issue further.
Step 2: Check the Garage Door Tracks
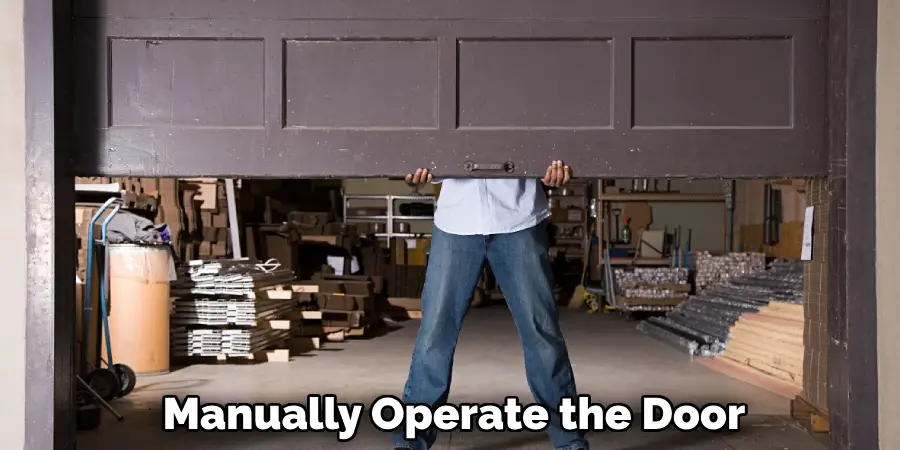
Once you have inspected the safety sensors, the next step is to check the garage door tracks for any obstructions or damage. Start by visually inspecting the tracks on both sides of the door. Look for any debris, dirt, or foreign objects that may be lodged within the tracks, as these can hinder the door’s movement and trigger the auto-reverse feature.
If you find any obstructions, carefully remove them. Additionally, examine the tracks for any dents, bends, or misalignments. If the tracks are not straight, it may cause the door to operate erratically. Use a level to check for alignment and make adjustments as necessary. After ensuring the tracks are clear and aligned, manually operate the door to see if it moves smoothly. If the issue remains unresolved, proceed to the next step for further investigation.
Step 3: Examine the Garage Door Motors
In this step, you will need to examine the garage door motor and its components more closely. Begin by checking for signs of wear or damage around the motor unit. Ensure that the motor is securely mounted and that all connections are tight. If you notice frayed wires or loose connections, they could be the source of the malfunction.
Next, listen for any unusual sounds from the motor when operating the door. Grinding or clicking noises can indicate that the motor is struggling. If the motor appears to malfunction, it may need to be repaired or replaced. Sometimes, lubricating the motor gears with a suitable lubricant spray can help improve performance. After performing these checks, test the garage door again to see if the reverse function works correctly. If not, continue to Step 4 for further troubleshooting.
Step 4: Test the Garage Door Limit Settings
Adjusting the limit settings on your garage door opener can also resolve auto reverse issues. The limit settings dictate how far the door should open or close before stopping. To check these settings, locate the limit adjustment screws on the garage door opener unit. Using a screwdriver, turn the open and close limit screws slightly clockwise to increase the limits or counterclockwise to decrease them.
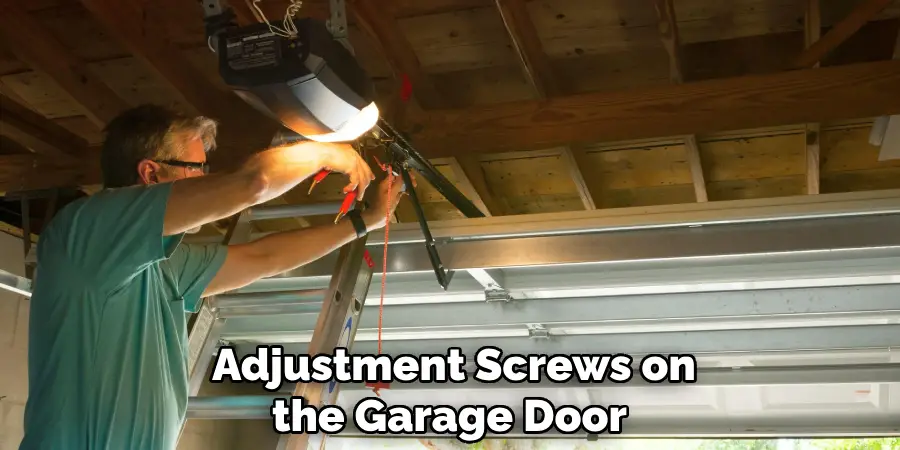
After making adjustments, test the garage door’s operation. Close the door entirely and place an object, such as a small piece of wood, in its path to see if it reverses correctly. If the door functions properly, the issue may have been related to the limit settings. If the problem persists, proceed to Step 5 for additional troubleshooting.
Step 5: Inspect the Garage Door Springs
The next step involves checking the garage door springs, vital in the door’s operation. Begin by visually inspecting the springs for signs of wear, such as rust, fraying, or stretching. If the springs appear damaged or are not functioning correctly, they may not provide enough tension, leading to auto-reverse problems.
It’s essential to ensure that the springs are correctly adjusted; if they are too loose or tight, it can affect how the door responds to objects in its path. If you notice any issues with the springs, it’s advisable to consult a professional for repairs or replacements, as handling garage door springs can be dangerous. After inspecting the springs, test the garage door to see if the auto-reverse feature works properly. If the issue remains unresolved, move on to Step 6 for further troubleshooting.
Step 6: Examine the Remote Control
The next step in troubleshooting is to check the remote control that operates your garage door. Ensure that the batteries in the remote are fresh and correctly installed. Weak or dead batteries can prevent the door from receiving the correct signals, which may result in auto-reverse issues. If the batteries are new, try reprogramming the remote according to the manufacturer’s instructions.
Additionally, ensure that there is no interference from other electronic devices when using the remote. After checking these aspects, test the garage door to see if the issue persists.
Step 7: Look for Electrical Issues
If the garage door still fails to reverse properly, it may be time to examine the electrical components of the opener. Start by checking the garage door opener’s power supply to ensure it receives adequate power. Look for any signs of frayed wires or damaged connections that may disrupt the power flow. Also, check the circuit breaker or fuses related to the garage door opener to ascertain that they are functioning correctly and not tripped. If you identify any electrical issues, they should be addressed promptly.
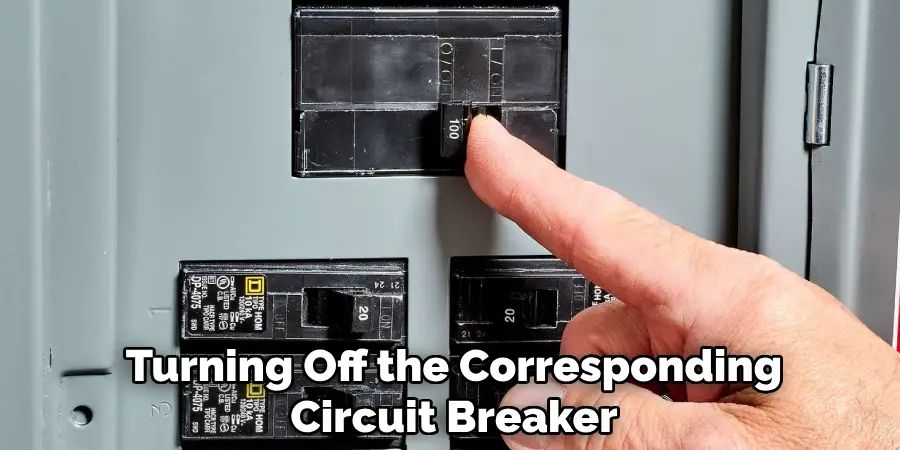
Step 8: Reset the Garage Door Opener
Sometimes, a simple reset of the garage door opener can resolve glitches affecting the auto-reverse feature. To reset the system, disconnect the power to the opener by unplugging it or turning off the corresponding circuit breaker. Wait for about 30 seconds, then reconnect the power. This brief interruption can clear any temporary faults. After resetting, test the garage door again to determine if the auto-reverse feature is functioning as expected.
Step 9: Lubricate Moving Parts
Keeping all moving parts of the garage door system well-lubricated is essential to ensure proper operation. Use a suitable lubricant spray on the rollers, hinges, and other moving components to help reduce friction and wear. Be sure to wipe away any excess lubricant to prevent buildup, which could attract dirt and debris. After lubricating, operate the garage door a few times to see if the auto-reverse function improves.
Step 10: Seek Professional Assistance
If you have followed all the previous steps and the auto-reverse feature is still not working correctly, it may be time to consult a professional garage door technician. There could be underlying issues requiring specialized knowledge or tools for resolution. Seeking expert help can ensure a thorough diagnosis and proper repairs, restoring your garage door’s functionality and safety. Remember to schedule regular maintenance checks to prevent future problems and prolong the lifespan of your garage door system.
By following these troubleshooting steps, you can identify and resolve auto reverse issues with your garage door, ensuring the safety of your family and property.
What are the Causes of Auto Reverse Issues?
There can be various reasons why your garage door is experiencing auto reverse problems. Some common causes include:
- Obstructions in the Door’s Path: If the sensors detect any objects or obstructions in the door’s path, it will automatically trigger the auto-reverse mechanism.
- Malfunctioning Sensors: Faulty or misaligned safety sensors can prevent the auto-reverse function from working correctly.
- Motor Issues: A malfunctioning motor can affect the opening and closing force of your garage door, leading to problems with the auto-reverse feature.
- Limit Switch Settings: Incorrectly set limit switches can interfere with how far the door should open and close, causing issues with the auto-reverse function.
- Damaged Springs: Worn or damaged garage door springs can affect the tension and balance of the door, resulting in auto-reverse issues.
- Electrical Problems: Faulty wiring, power supply, or circuit issues can disrupt the proper functioning of your garage door opener and impact the auto-reverse feature.

By understanding these potential causes, you can address them promptly and prevent further problems with your garage door.
Conclusion
In summary, how to fix auto reverse on garage door involves a systematic approach that includes inspecting various components, checking for obstructions, and ensuring all electrical systems are functioning correctly.
Begin by thoroughly visually inspecting the springs, remote control, and sensors, followed by necessary adjustments and lubrication of moving parts. If problems persist, consider resetting the garage door opener or consulting a professional for more complex issues. By taking these steps, you can enhance the safety and functionality of your garage door system, ensuring it operates smoothly and effectively for years to come.
Regular maintenance and prompt troubleshooting are vital to preventing future complications and ensuring yours remains in optimal condition.
I am Rick. I grew up helping my dad with his handyman service. I learned a lot from him about how to fix things, and also about how to work hard and take care of business. These days, I’m still into fixing things- only now, I’m doing it for a living.
I’m always looking for new ways to help people grow and develop. That’s why I have created this blog to share all my experience and knowledge so
that I can help people who are interested in DIY repair.