
Are you tired of handing out your spare garage door remotes to all sorts of people? Wouldn’t it be great if you could make copies of your remote — so that each set is unique for a specific homeowner and still operate with just one key fob?
Copying a garage door remote is simpler than most people think. With just a few everyday items, you, too, can create a transmitter that will open up your automated gate or garage door.

This blog post will explore how to copy garage door remote quickly and easily without buying new ones. We’ll explain the process step-by-step, as well as discuss what materials are needed and other tips for successfully completing the task. So if you’ve been wanting a foolproof way of ensuring that only those who should have access to your home actually do — keep reading!
Summary: Copying the garage door remote is a simple and straightforward process that can be done in three easy steps. First, locate the learn button on the back or side of the garage door opener. Press and hold this button for about 6 seconds until the indicator light starts flashing. Take your new remote and press the same learn button again until the indicator light stops flashing.
What Will You Need?
Before you can start to copy your garage door remote, there are certain materials that are necessary. You will need the following items:
- Two identical models of two button garage door remotes. Make sure they have the same frequency and coding system (more on this later).
- A small flathead screwdriver.
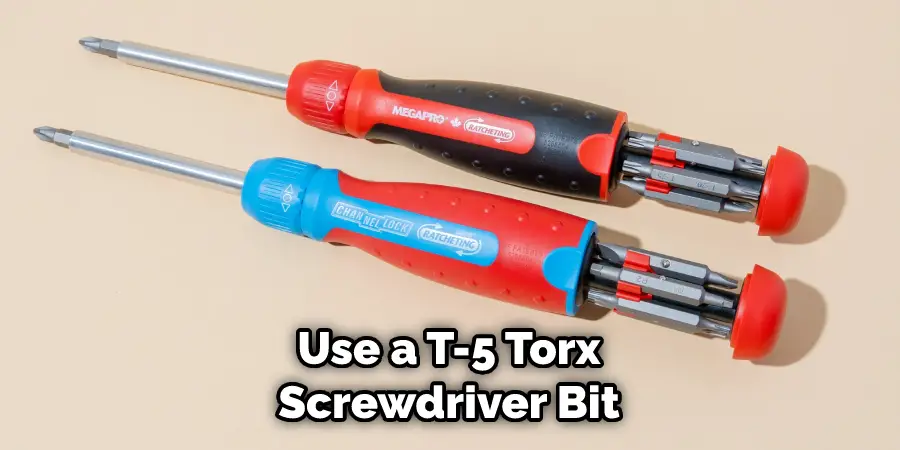
- A T-5 Torx screwdriver bit.
- A Micro soldering iron and solder.
Once you’ve gathered all the materials, it’s time to start!
10 Easy Steps on How to Copy Garage Door Remote
Step 1: Take Apart the Remotes
The first step is to take apart both of your remotes. Use a small flathead screwdriver to remove the screws located at the back of your remotes. Be careful and make sure to keep the screws safe.
Step 2: Remove the Circuit Board and Transmitter Module
Once you have taken apart your remotes, you will find the circuit board and transmitter module. Use a T-5 Torx screwdriver bit to remove the screws that hold these components in place. Don’t forget to keep the screws safe.
Step 3: Solder Wires to the Transmitter Module
Now it’s time to solder wires to the transmitter module. This is where your micro soldering iron comes in handy! Solder two red wires onto one side of the transmitter module, then two black wires on the other side. Make sure to leave enough slack to move them around easily.
Step 4: Connect Wires Between Remotes
Now take one of the remotes and connect each red wire from its transmitter module to a black wire from the other remote’s transmitter module. Then do the same with the other two wires. Make sure to twist them together firmly so that they stay in place. If done correctly, the two remotes should be connected.
Step 5: Put Everything Back Together
Now it’s time to put everything back together. Start by putting the circuit board and transmitter module back in place with the T-5 Torx screwdriver bit. Then use the small flathead screwdriver to put the screws back in the back of each remote.
Step 6: Check the Connection
Once you have put the remotes back together, it’s important to ensure that the connection between them is working. To do this, press one of the buttons on one remote and see if the same button activates on the other remote. If it does, then congratulations — your connection is successful!
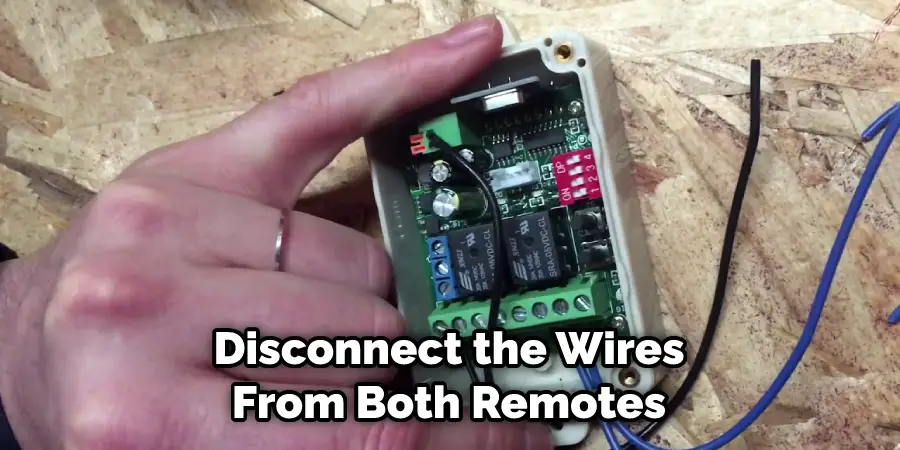
Step 7: Disconnect Wires
Now that you know your connection is working, it’s time to disconnect the wires from both remotes. Carefully twist each wire in an anti-clockwise direction until they come apart. This will ensure that no damage is done to either of your remotes.
Step 8: Program Each Remote Separately
Now it’s time to program each of your remotes separately. Consult the user manual of your garage door opener to find out how to do this. Don’t forget to test each remote to ensure it works properly before moving on to the next step.
Step 9: Test Your Remotes
Once both of your remotes are programmed, it’s time to test them out! Press a button on one remote and see if the same button activates on the other remote. If it does, then congratulations — you have successfully copied your garage door remote!
Step 10: Enjoy Easy Access To Your Home
Now that you have successfully copied your garage door remote, you can enjoy easy access to your home. You won’t have to worry about buying new ones every now and then or running around looking for a spare key when someone needs it. Plus, you can relax knowing that your home is safely secured with your remotes.
If you followed these steps correctly, you should now have two identical working copies of your garage door remote. Congratulations on taking the time to learn how to copy a garage door remote! Enjoy the convenience and security it brings.
Thank you for reading this article on how to copy a garage door remote! We hope it was helpful and informative. If you found it useful, please share it with family and friends so they can enjoy the same easy access to their homes. Good luck!
5 Additional Tips and Tricks
- Read all instructions provided with the garage door remote before attempting to copy the remote.
- Locate the “learn” button on your garage door opener and press it once.
- Place the original garage door remote close to the “learn” button and press the button on the remote. The opener should respond by emitting a beep sound or light flashing.
- Once you hear/see a response from the opener, you can replicate this process with your copy of the garage door remote and position it close to the learning button again, then press its button once more for a successful sync-up.
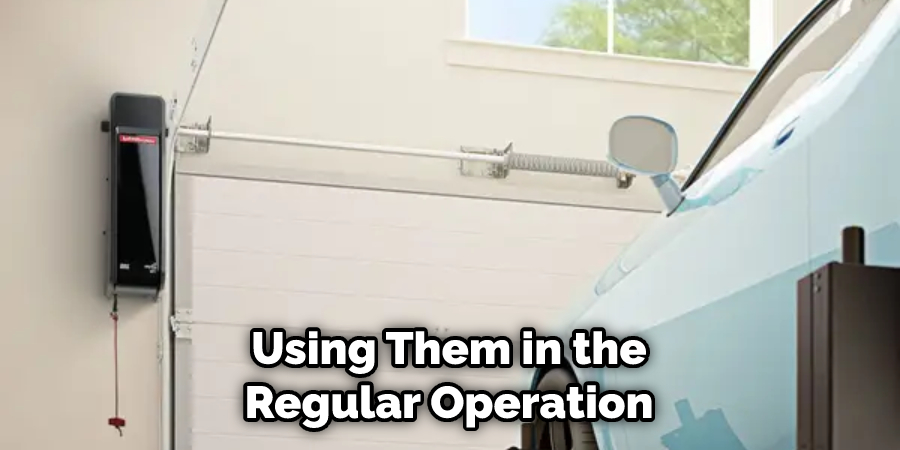
- After syncing up both remotes, test them out to ensure they are working properly before using them in the regular operation of your garage doors or gate system.
If you find that these tips do not help solve your problem, you may want to consult with a professional garage door technician or customer service representative at your local home improvement store. With their help and expertise, you can ensure the job will be done properly and safely.
5 Things You Should Avoid
- Never try to copy the remote yourself. It’s important to understand that copying a garage door remote requires specialized hardware and programming, so it’s best left to the pros.
- Don’t attempt to program more than one button on the same remote. If you do this, you can erase all of your previous programming’s and make it difficult to reset the remote correctly.
- Never use any type of universal remote to program a garage door remote, as they can’t be programmed properly and risk not working correctly.
- Don’t try to reprogram a new garage door opener without consulting the instructions first. Understanding your particular model works is important before attempting any programming yourself.
- Avoid using an unlicensed or unreliable locksmith or service provider for copying a garage door remote – you never know if their services are reliable enough for something as important as your home security! Remember, it’s always better to be safe than sorry when it comes to protecting what matters most!
By following these simple tips and avoiding common mistakes, you can be sure to safely program your garage door remote and keep your home secure. You can also trust that if you ever need help in the future, you’ll know how to copy a garage door remote correctly.
Can All Remotes Be Universal?
No, not all remotes are universal. Universal remotes are a certain type of remote that can be used to operate multiple devices or appliances simultaneously.
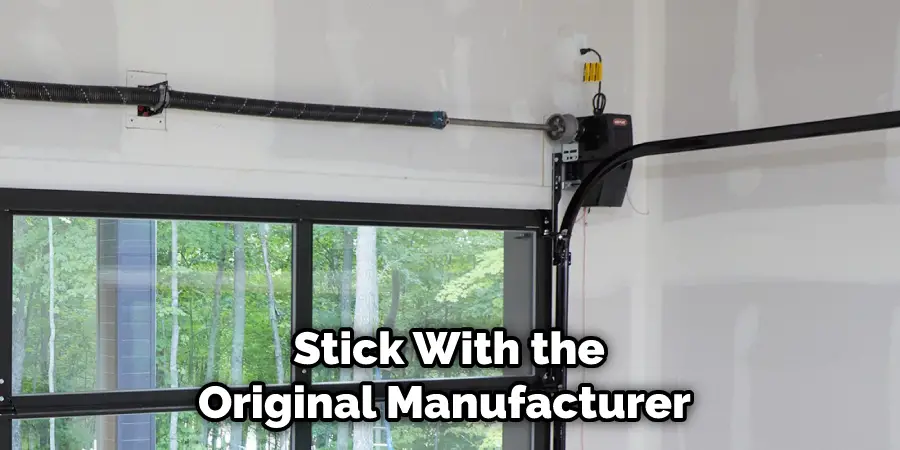
While they may be able to copy some functions from your garage door remote, they cannot replicate all features and, therefore, cannot be a true replacement for the original remote. It’s best to stick with the original manufacturer supplied remote when possible.
As always, if you have any questions regarding how to program a garage door opener and its associated remotes properly, it is recommended that you contact an experienced locksmith or customer service representative from your local home improvement store.
They will be able to provide you with more detailed information regarding how to correctly copy a garage door remote for your specific model of opener.
With their help, you can rest assured that the job will be done properly and safely.
Conclusion
Replacing your existing garage door remote and learning how to copy it can be an overwhelming task, but with these steps, you can easily perform this maintenance yourself. Before attempting to program the remote, ensure you’ve taken out the batteries from the remote and the garage door opener.
This will allow for a smooth setup and prevent any old settings from interfering. After that, refer to your owner’s manual for detailed instructions on using your specific garage door opener model.
Finally, double-check all steps until you hear the click indicating a successful programming process. With just a few simple steps and a bit of preparation, you can have a new copy of your garage door remote in no time at all!
Hopefully, this guide has been of help in teaching how to copy garage door remote and how to program it properly. Keep these tips in mind, and you’ll have no problems with your garage door opener!
I am Rick. I grew up helping my dad with his handyman service. I learned a lot from him about how to fix things, and also about how to work hard and take care of business. These days, I’m still into fixing things- only now, I’m doing it for a living.
I’m always looking for new ways to help people grow and develop. That’s why I have created this blog to share all my experience and knowledge so
that I can help people who are interested in DIY repair.