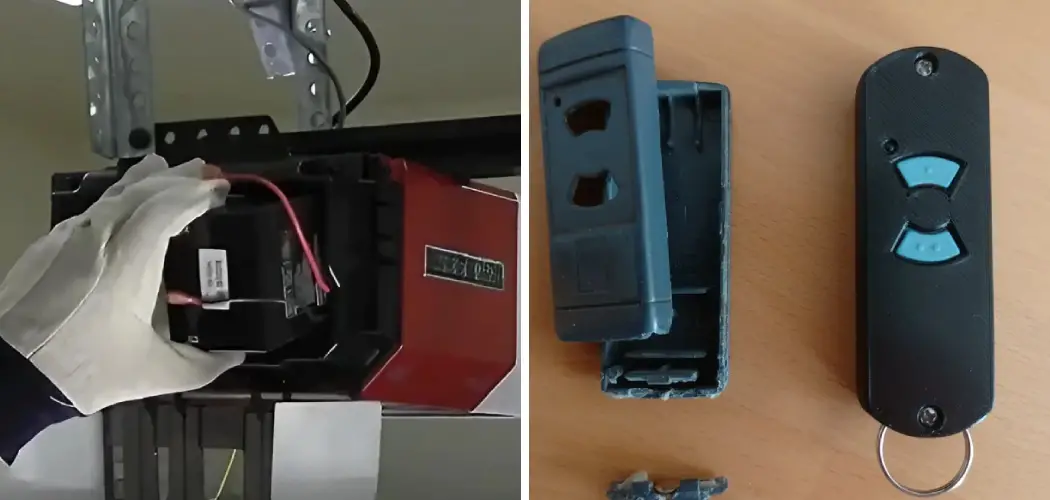
There are few daily conveniences we take for granted quite like the automatic garage door opener. You press a button, and the heavy door glides open effortlessly, welcoming you home from a long day. But when that button suddenly stops working, it can be incredibly frustrating.

Before you start worrying about expensive motor repairs or calling a technician, the solution is likely much simpler and cheaper: a dead remote battery. Hormann remotes are known for their durability and sleek design, but like all electronics, they eventually need a fresh power source.
The good news is that swapping out the old cell is a quick DIY task that anyone can handle in just a few minutes. You do not need specialized tools or electrical knowledge to get your access back. This guide is designed to walk you through exactly how to change battery in Hormann garage door opener handheld transmitters, ensuring you can restore the smooth operation of your home’s largest door without any hassle or stress.
Why Change the Battery?
Replacing the battery in your Hormann garage door opener is essential to ensure the device continues to function reliably. Over time, as the battery depletes, you may notice decreased range or delayed responses when using the transmitter.
A weakened battery can leave you stranded outside your garage or struggling to operate the door efficiently. Regular battery replacement not only restores optimal performance but also helps prevent inconvenient interruptions, especially during critical moments like bad weather or early morning departures. Keeping the transmitter powered ensures seamless and secure access to your garage at all times.
Step-by-Step Guide on How to Change Battery in Hormann Garage Door Opener
Step 1: Identify Your Specific Hormann Remote Model
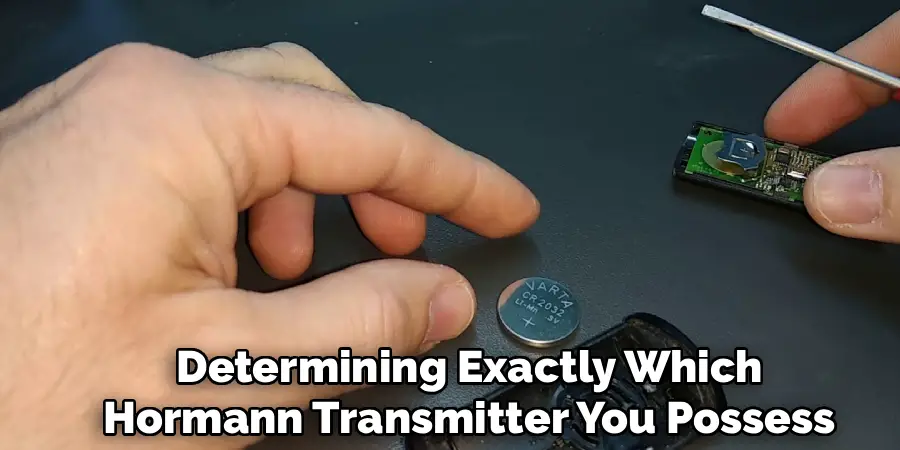
The first and most crucial part of this process involves determining exactly which Hormann transmitter you possess. Hormann manufactures a variety of remote styles, ranging from the classic grey rectangular models with blue buttons to the newer, sleek BiSecur models that feature a glossy black or white finish. This distinction is vital because the method for opening the casing varies slightly between the different series.
Take a moment to look closely at the back or the bottom of your handheld device. You might find a model number printed on a sticker or engraved into the plastic. Knowing your specific model ensures you do not force a latch that isn’t there or try to slide a cover that is actually screwed shut. Identifying the correct unit prevents accidental damage to the plastic housing right from the start.
Step 2: Acquire the Correct Replacement Battery
Once you have identified your remote type, you must purchase the appropriate power source before you open the device. Hormann remotes typically utilize specific coin-cell batteries or small cylindrical alkaline batteries, depending on their generation. The most common types are the CR2032 lithium coin cell for newer BiSecur models or the 12V Type 23A for some older styles.
It is highly recommended to check your owner’s manual or do a quick online search for your specific model number to confirm the battery type. Buying a high-quality brand is also advisable to ensure longevity and consistent signal strength. Having the correct new battery ready on your workspace prevents the annoyance of opening the remote only to realize you have to make a trip to the store with the device in pieces.
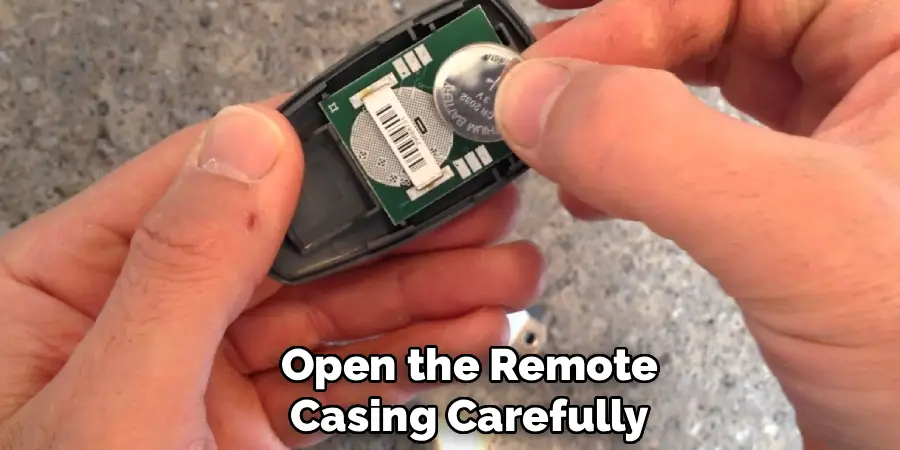
Step 3: Open the Remote Casing Carefully
Now comes the delicate task of accessing the internal components. For most modern Hormann remotes, this does not require a screwdriver. Instead, you will need to look for a small seam or a release tab. On the BiSecur models, the battery compartment is often hidden behind a circular cover on the back which can be twisted open with a coin, or the top housing slides off.
For older standard models, you might need to press a small tab on the bottom while gently pulling the top and bottom halves of the casing apart. Apply gentle, steady pressure to avoid snapping the small plastic clips that hold the unit together. If you encounter significant resistance, stop and double-check that you are opening it correctly rather than forcing it, which could crack the shell.
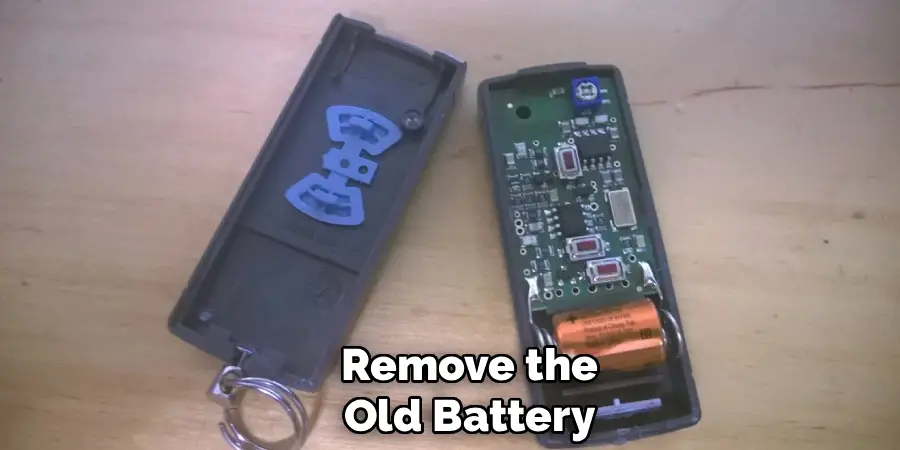
Step 4: Remove the Old Battery
With the casing open or the battery cover removed, you will see the old battery nestled in its slot. Pay very close attention to its orientation before you touch it. Note which side is facing up—typically the positive side marked with a plus sign (+) is visible. This observation is critical for ensuring the new battery works immediately.
To remove the old cell, you may need to use a non-conductive tool, like a wooden toothpick or a plastic spudger, to gently pry it out. Avoid using metal tools like screwdrivers or knives if possible, as they can accidentally short-circuit the contacts or scratch the delicate circuit board underneath. Slide the battery out smoothly without bending the metal contact springs that hold it in place.
Step 5: Clean the Battery Contacts
Over time, battery compartments can accumulate dust, lint, or even slight corrosion from the old battery. Before installing the fresh power source, it is excellent practice to clean the metal contact points inside the remote. Use a clean, dry cotton swab or a soft cloth to gently wipe the metal springs and pads where the battery connects.
If you see any white or green corrosion, you can dip the swab in a tiny amount of isopropyl alcohol to clean it off, but ensure it dries completely before proceeding. Clean contacts ensure a strong electrical connection, which translates to better range and reliability for your garage door opener. This simple maintenance step prevents intermittent signal issues that might mimic a dead battery, saving you future frustration.
Step 6: Install the New Battery Correctly
Now you are ready to insert the fresh energy source into your transmitter. Take your new battery and align it exactly as the old one was positioned, matching the positive (+) and negative (-) indicators. Slide or press the battery firmly into the slot. You should feel a slight resistance from the contact springs, followed by a satisfying click or a snug fit as it seats into place.
Be careful not to touch the flat surfaces of a coin cell battery with your bare fingers too much, as the natural oils from your skin can increase resistance and slightly reduce battery life. Ensure the battery sits flat and secure; a loose battery can cause the remote to rattle or lose power when the device is shaken or dropped.
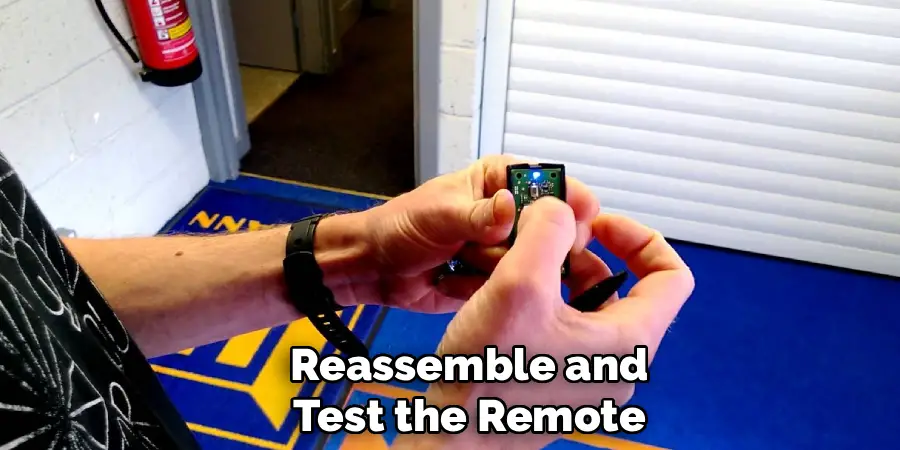
Step 7: Reassemble and Test the Remote
The final stage of the process is putting everything back together and verifying your success. Align the battery cover or the casing halves carefully. If it is a slide-on cover, ensure it tracks perfectly in the grooves before pushing it home. If it is a snap-fit case, press the edges together gently until you hear them click shut.
Once the unit is reassembled, walk towards your garage door and press the operation button. You should see the LED light on the remote flash brightly, and the door should respond immediately. If the LED does not light up, reopen the case and check that the battery is not upside down. A working door confirms you have successfully mastered the skill of how to change battery in Hormann garage door opener devices.
Frequently Asked Questions (FAQ)
Which Battery Does My Hormann Remote Need?
The specific battery depends on the model generation of your remote.
- Hormann BiSecur (HSE/HS): These typically use a 3V lithium coin cell battery, most commonly the CR2032.
- Older Blue Button Models: These often require a 12V Type 23A cylindrical alkaline battery.
- Mini Transmitters: Some very small keychain models might use different coin cells like the CR2016 or CR2025. Always check the label on the old battery or the engraving on the remote casing to be 100% sure before purchasing a replacement.
Will Changing the Battery Erase the Programming?
In the vast majority of cases, no. Hormann remotes use non-volatile memory chips to store the connection code for your garage door operator. This means that removing the power source for a few minutes to swap the battery will not wipe the code. Your remote should work immediately after the new battery is installed without needing to be reprogrammed or re-paired with the receiver unit on the garage ceiling.
Why Is My Remote Still Not Working After a Battery Change?
If a new battery doesn’t fix the issue, check the following:
- Orientation: Ensure the battery is not inserted upside down (check the +/- signs).
- Contacts: The metal contacts might be bent or dirty; try cleaning them or gently bending them outward to ensure a tight connection.
- Defect: The remote itself may be damaged from a drop or water exposure.
- Lock Mode: Check if the garage door opener unit has been accidentally locked via the wall console.
How Long Should a Hormann Remote Battery Last?
Under normal usage conditions, a high-quality battery in a Hormann remote should last anywhere from two to five years. “Normal usage” typically means opening and closing the door two to four times a day. Factors that can shorten this lifespan include extreme temperatures (leaving the remote in a freezing car), very frequent use, or keys being pressed accidentally while in a pocket or purse.
Can I Use a Rechargeable Battery in My Remote?
It is generally not recommended to use rechargeable batteries in garage door remotes. Rechargeable coin cells or 12V batteries often have a slightly lower voltage than their non-rechargeable counterparts (e.g., 1.2V vs 1.5V per cell) and a much higher self-discharge rate. This means they will lose their charge quickly just by sitting in the remote, leading to poor range and the need for frequent recharging. Stick to high-quality alkaline or lithium primary batteries for reliability.
Conclusion
maintaining your home’s access points doesn’t have to be a complicated chore reserved for professionals. By taking the initiative to replace the battery in your Hormann remote yourself, you save time, money, and the inconvenience of being locked out.
This simple maintenance task ensures that your garage door opener remains a reliable convenience rather than a source of frustration. Regular battery checks and replacements keep your system functioning at peak performance, offering you the security and ease of access you expect.
Now that you have the knowledge and confidence regarding how to change battery in Hormann garage door opener transmitters, you can tackle this small project effortlessly, ensuring your home remains accessible and secure with just the click of a button.
I am Rick. I grew up helping my dad with his handyman service. I learned a lot from him about how to fix things, and also about how to work hard and take care of business. These days, I’m still into fixing things- only now, I’m doing it for a living.
I’m always looking for new ways to help people grow and develop. That’s why I have created this blog to share all my experience and knowledge so
that I can help people who are interested in DIY repair.