With the rise of home automation, more and more people are looking for ways to bring the golf course into their own garage. Building a golf simulator in your home is a great way to practice your skills year-round without traveling to an expensive driving range or golf club. In addition, you can also use it as a fun activity for family or friends.
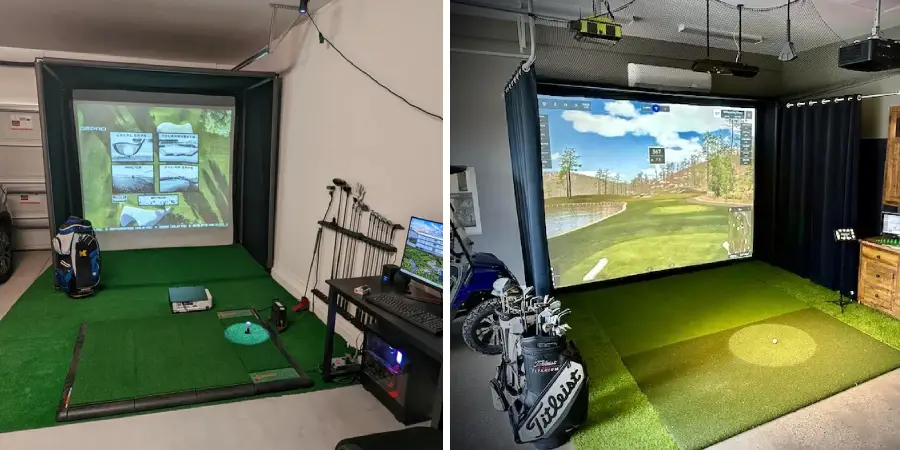
One of the biggest advantages of building a golf simulator in your garage is that you can practice and perfect your game anytime, anywhere. With a golf simulator in your garage, you’ll have full control over the environment and be able to adjust every aspect for maximum accuracy and precision.
Plus, when bad weather strikes or if you don’t have enough time to get out on the course, you can still practice and develop your skills in the comfort of your own home. In this blog post, You will learn how to build a golf simulator in your garage.
Step-by-Step Processes for How to Build a Golf Simulator in Your Garage
Step 1: Inspect Your Garage Space
You will need to assess your available space to determine how much room you have for building a golf simulator. Measure the width and length of the designated area and consider any existing furniture or appliances that cannot be moved.
Step 2: Invest in the Right Equipment
You must purchase a simulator system with a projection screen, projector, launch monitor, and mat. Depending on your budget and preference, you can also opt for golf simulators with additional features such as cameras, sensors, and measuring tools. Make sure to compare different systems before making a decision.
Step 3: Set Up the Projection Screen and Projector
Once you have all your equipment, it’s time to set up the projection screen and projector. The size of the area and the type of projector you purchased will determine the best locations for these two items. Ensure you also consider any ambient light that could interfere with the projection clarity.
Step 4: Install the Launch Monitor and Mat

The launch monitor and mat will be essential for building your golf simulator. Ensure that you follow the manufacturer’s instructions for installation carefully to ensure everything is done correctly. Depending on the complexity of the setup, you may need assistance from a professional.
Step 5: Add the Necessary Accessories
You must purchase additional accessories such as a hitting net, turf, lighting system, and soundproofing to get the most out of your golf simulator. These items can help enhance your experience by giving you a more realistic environment for practicing.
Once you have completed the installation process, it’s time to test out your simulator. Get friends together and start playing around with different settings and features to ensure everything runs properly.
Step 6: Make Necessary Adjustments
Based on your testing, you may need to make a few adjustments or purchases to improve the performance of your golf simulator. Consider any potential upgrades, such as additional sensors or cameras, that could give you a more realistic experience.
You should invest in soundproofing materials for your golf simulator to ensure optimal sound quality. This is especially important if you plan on playing with other people. Additionally, make sure to install a lighting system to optimize visibility and accuracy when playing.
Step 7: Add Turf and Hit Nets
The turf and hitting nets will help give the golf simulator an authentic look and feel. Ensure you have properly installed the turf to ensure it is secure. Test out different hitting nets to find the right one for your playing style.
Once everything is up and running, you are ready to enjoy your golf simulator! Invite some friends over or practice by yourself to get the full experience. With a properly built golf simulator, you can practice and play in the comfort of your own home.
Safety Tips for How to Build a Golf Simulator in Your Garage
- Ensure that the room or area where you plan on setting up your golf simulator is free from flammable materials and vents such as gas, propane, and other vapors.
- Avoid wiring electrical components in a damp environment to reduce the risk of electric shock or short-circuiting.
- Ensure you use the appropriate protective equipment, such as goggles, face shields, and gloves, when installing or connecting any components on your golf simulator.
- Always double-check to ensure all connections are secure before powering on the system.
- If you plan on having an enclosed room/ area for your golf simulator, ensure it is well-ventilated with adequate air circulation.
- Regularly inspect the components of your golf simulator for any signs of wear and tear or damage to ensure that it is functioning at its best.
Following these safety tips, you can build a golf simulator in your garage with ease and peace of mind.
How Much Space is Required for a Golf Simulator in the Garage?
If you’re looking to build a golf simulator in your garage, you first need to consider space. The size of the area available will ultimately dictate the size and type of simulator you can buy. Generally, for a basic at-home golf simulator setup, you’ll need an area of around 10 feet by 15 feet, or 150 square feet. You may require up to 200 square feet for a more professional setup.
The size of the area will also impact the type of golf simulator you can accommodate. If your area is smaller than 150 square feet, you may opt for a basic system that uses an electronic hitting net and a projector or television to show your golf game on the screen.
If you have a larger area, then you may be able to purchase a more professional system that uses launch monitors and sensors to track the ball’s trajectory accurately.
How Should You Maintain the Golf Simulator in Your Garage?
Once you’ve built a golf simulator in your garage, it’s important to maintain the setup properly. Here are some tips for keeping your golf simulator in top condition:

- Clean the screen regularly: The most important part of the simulator is the screen, and if not kept clean, it can impact the quality of the shots you take and your overall experience. Clean the screen using a damp cloth and appropriate cleaning solution.
- Check for damage: Make sure that all of the components of the simulator are securely fastened, and be on the lookout for any potential signs of wear or damage. This includes checking cables, connections, and other parts regularly for defects or signs of damage that could affect your golf performance.
- Adjust the sensors: Depending on the type of simulator you have, sensors may need to be adjusted for optimal accuracy and performance. Make sure these are properly calibrated before each use.
- Change settings as needed: The simulator should have different settings, such as difficulty levels or terrain presets, that can help optimize your experience. Check these often and adjust them as needed for a better golfing experience.
By following these tips, you can ensure that your golf simulator in your garage is maintained properly so that you can get the most out of it.
What Common Mistakes to Avoid When Installing a Golf Simulator in the Garage?
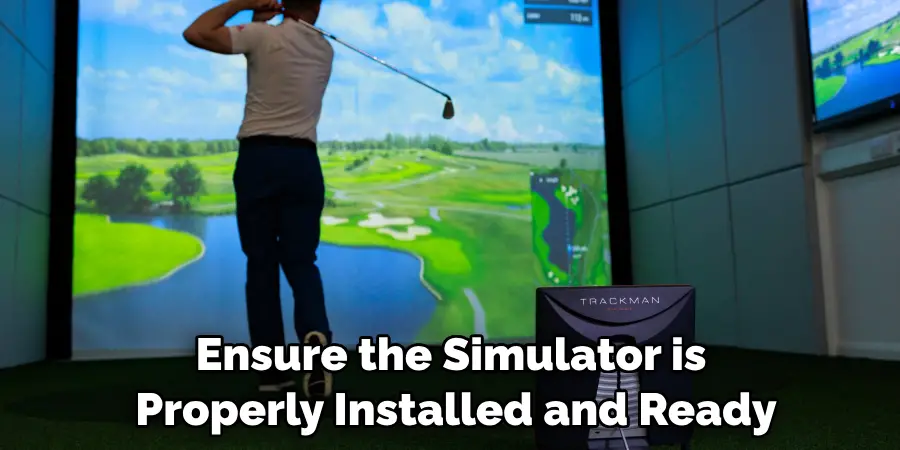
When installing a golf simulator in the garage, there are certain mistakes you should avoid. This can help ensure the simulator is properly installed and ready to use. Here are some of the most common mistakes to avoid when building a golf simulator in your garage:
- Not doing proper research before beginning – Before beginning installation, it’s important to do the proper research and ensure you understand what materials are needed, the best locations to install the simulator, and any potential issues you might face.
- Not allowing enough space – Make sure you allow enough room for all components of the simulator while also considering any other objects or furniture in your garage. If there is not enough room, it could lead to installation issues.
- Not considering the lighting – Depending on the type of simulator you have, it may require a certain level of lighting. Look into the suggested lighting and ensure it’s available in your garage before beginning installation.
- Not testing the system after installation – Once the simulator is installed, it should be tested several times to ensure it works properly. This can help avoid any future technical issues and ensure the simulator is ready to use when needed.
By avoiding these common mistakes, you can ensure that your golf simulator will be installed correctly and efficiently. With proper installation, you’ll be able to enjoy a realistic golf experience in your own garage.

Conclusion
In conclusion, building a golf simulator in your garage is a great way to enjoy the game of golf without having to leave the house. With some basic carpentry, electrical wiring, and DIY skills, you can build your own setup for less than the cost of buying one pre-made. This allows you to reduce costs while enjoying all the benefits of a golf simulator in your home.
Finally, remember that when building a golf simulator in your garage, it is important to make sure the space is well-ventilated and to properly anchor all items so they won’t move or shake during swings or impact from balls. I hope this article has been beneficial for learning how to build a golf simulator in your garage. Make Sure the precautionary measures are followed chronologically.
You Can Check It Out To- Store Golf Clubs in Garage
I am Rick. I grew up helping my dad with his handyman service. I learned a lot from him about how to fix things, and also about how to work hard and take care of business. These days, I’m still into fixing things- only now, I’m doing it for a living.
I’m always looking for new ways to help people grow and develop. That’s why I have created this blog to share all my experience and knowledge so
that I can help people who are interested in DIY repair.