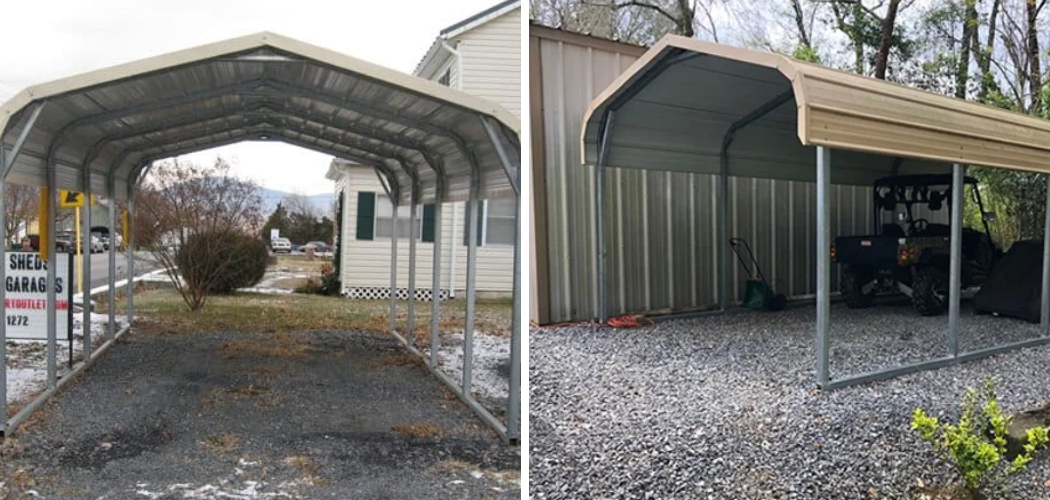
If you’re looking for a way to add some protection to your car from the elements, you may want to consider building a carport out of steel pipe. It’s a project that can be completed in just a few hours, and it doesn’t require any special skills or tools.
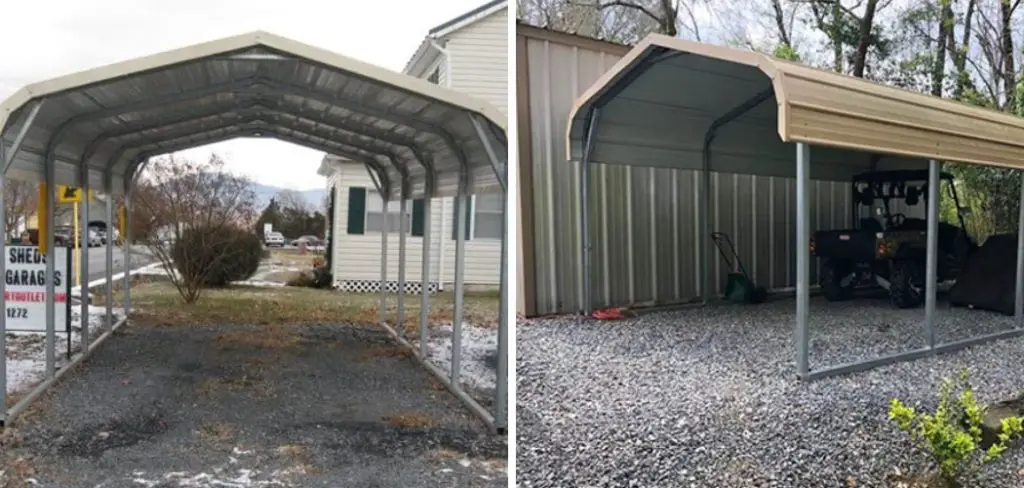
Just follow these simple steps on how to build a carport out of steel pipe, and you’ll have a carport that will keep your car safe and dry. This relatively easy project can be completed over a weekend, and it will protect your car from the elements. Here’s how to do it.
Summary: A carport made from steel pipe is a great way to protect your vehicles from the elements, such as rain, snow, and hail. It is also cost-effective and easy to construct. You will need steel pipes, brackets, anchors, nuts and bolts or welding supplies for assembling the frame. Once the frame is built you can cover it with a tarp or other waterproof covering.
What Kind of Metal Is Best for Carports?
Steel pipe is a great option for building carports. It’s strong and durable, and it can withstand the elements better than most other materials. Plus, steel pipe is relatively inexpensive and easy to find at any local hardware store. If you want an even more durable carport, you could opt to build it out of aluminum or galvanized steel pipe.
How to Assemble the Frame?
Start by laying out your frame pieces on the ground. Use clamps or stakes to keep them in place. You’ll need four vertical pieces of steel pipe (two for each side), four horizontal pieces of steel pipe (one for each side and one across the top), and two diagonal pieces of steel pipe that will connect the sides together at an angle.
Once everything is laid out, attach the pipes together using couplers or flanges according to the instructions on the package.
16 Steps on How to Build a Carport Out of Steel Pipe
Step 1: Plan and Design the Carport
Begin by planning and designing your steel pipe carport. Determine the desired dimensions, including the width, length, and height of the structure. Consider the number of vehicles or items you want to store under the carport, as well as any local building codes or regulations that may impact the design. Sketch a rough plan or create a digital design using software to visualize the final structure.
Step 2: Calculate Materials and Gather Tools
Based on your design, calculate the required materials for the project. This will include steel pipes of various lengths and diameters, pipe fittings (such as elbows, tees, and caps), and other materials like roofing panels and fasteners. Make a list of the tools you’ll need, such as a pipe cutter, pipe wrench, drill, level, and measuring tape.
Step 3: Obtain Necessary Permits
Before starting construction, check with your local building department to determine if any permits are required for your carport project. This may involve submitting plans, paying fees, and adhering to specific building codes and regulations.
Step 4: Mark and Measure the Carport Area
With the necessary permits in hand, mark and measure the area where the carport will be built. Use stakes and string to outline the perimeter of the structure, and double-check your measurements to ensure accuracy.
Step 5: Prepare the Ground and Install Footings
Prepare the ground by removing any grass or vegetation and leveling the area. If necessary, compact the soil to provide a stable base for the carport. Install footings or concrete piers at each corner and along the perimeter of the carport, following the requirements of your local building codes. Allow the footings to cure fully before proceeding.
Step 6: Assemble the Steel Pipe Columns
Assemble the steel pipe columns that will support the carport roof. This will typically involve cutting pipes to length, threading the ends, and connecting them using pipe fittings. Be sure to use a level to ensure the columns are straight and plumb before securing them in place.
Step 7: Install the Columns in the Footings
With the columns assembled, install them into the footings or concrete piers. This may involve securing the columns using anchor bolts or embedding them directly into the concrete. Use a level to ensure the columns are plumb and properly aligned.
Step 8: Assemble and Install the Roof Supports
Assemble the steel pipe roof supports by cutting and threading the pipes, then connecting them using appropriate fittings. The roof supports should form a grid or truss-like structure that will span the width and length of the carport. Install the roof supports onto the columns, ensuring they are level and properly aligned.
Step 9: Attach Cross Bracing
To improve the stability and strength of the carport structure, attach cross bracing between the columns and roof supports using steel pipes and fittings. This may involve diagonal bracing, horizontal bracing, or a combination of both. Make sure the bracing is securely fastened and does not interfere with the functionality of the carport.
Step 10: Install the Roofing Material
With the steel pipe framework complete, install the roofing material of your choice onto the roof supports. This may include metal panels, polycarbonate sheets, or other suitable materials. Be sure to follow the manufacturer’s recommendations for proper installation, including the use of appropriate fasteners, sealants, and flashing.
Step 11: Secure the Structure
Once the roofing material is installed, double-check that all connections and fasteners are secure and tight. This may involve tightening pipe fittings, securing bolts, or adding additional fasteners as needed. A secure structure will ensure the carport remains stable and durable over time.
Step 12: Paint or Finish the Steel Pipes (Optional)
To protect the steel pipes from corrosion and improve the overall appearance of the carport, consider painting or finishing the pipes with a suitable product. This may involve cleaning and priming the pipes before applying a high-quality, rust-resistant paint or finish. Be sure to follow the manufacturer’s recommendations for proper application and drying times.
Step 13: Add Gutters and Downspouts (Optional)
To manage rainwater runoff and prevent water from pooling around the carport, consider installing gutters and downspouts along the edges of the roof. This will help direct water away from the structure and protect the ground below from erosion or damage.
Step 14: Install Lighting and Electrical Outlets (Optional)
If desired, install lighting fixtures and electrical outlets within the carport to provide illumination and power for tools or equipment. Be sure to follow local electrical codes and safety guidelines, and hire a licensed electrician if necessary.
Step 15: Landscape and Pave the Area
With the carport structure complete, finish the area by landscaping and paving as desired. This may involve laying gravel, concrete, or pavers for a driveway or parking pad, planting grass or other vegetation around the carport, and adding decorative elements like edging or planters.
Step 16: Perform Regular Maintenance
To ensure the longevity and durability of your steel pipe carport, perform regular maintenance on the structure. This may include inspecting and tightening connections, checking for signs of corrosion or damage, cleaning the roof and gutters, and repainting or refinishing the pipes as needed.
By following these steps, you can successfully build a carport out of steel pipes that will provide reliable shelter and protection for your vehicles and belongings. With proper planning, quality materials, and attention to detail, your steel pipe carport will be a functional and attractive addition to your property for years to come.
Things to Consider When Building a Carport Out of Steel Pipe
1. Choose a Location:
The first thing to consider when building a carport out of steel pipe is the location. Make sure the area is large enough and level to accommodate your structure and that it has good drainage. Consider existing trees or other obstacles that could interfere with the construction or use of the carport.
2. Determine Size:
Measure the width and length of your vehicle (or vehicles if you plan on accommodating more than one) to determine the size of your carport frame. You’ll need enough room for both access points as well as adequate protection from inclement weather conditions like wind, rain, snow and hail.
Also, factor in any additional storage space you may need for items such as lawn equipment or patio furniture.
3. Select the Right Material:
Steel pipe is an excellent material choice for carports because it is strong, durable and resistant to corrosion from rain or snow. Galvanized steel has a zinc coating that helps prevent rusting and should be used if you’re located in a wetter climate.
4. Consider Building Codes:
Before beginning construction, make sure your local building codes permit such structures on residential properties and whether any permits are required for installation. This will ensure you stay compliant with the law while protecting against any potential problems down the road.
5. Plan for Assembly:
If you plan to build your carport kit yourself, make sure you have access to all of the necessary tools and materials needed for assembly. This may include basic hand tools like a hammer, screwdriver, wrench set, and power drill.
6. Check Construction Details:
Carefully review the detailed instructions that come with your carport kit to ensure you have all the right parts and pieces for assembly. Pay special attention to any safety warnings or cautions included in the package.
7. Learn More about Steel Pipe:
If you’re new to building with steel pipe, take some time to read up on best practices before getting started. There are plenty of helpful resources available online that can help teach you how to effectively weld and join steel pipes together without compromising their strength or integrity.
8. Seek Professional Help:
If you don’t feel comfortable assembling a carport out of steel pipe on your own, consider hiring a professional. They can help ensure the job is done right and in compliance with all local codes and regulations.
Conclusion
A carport is a great way to protect your vehicle from the elements, and a steel pipe carport is an economical and durable option. Building a steel pipe carport is not as difficult as you might think, and with a little help from some friends or family, you can have it up in no time.
Follow these steps, and you’ll be driving into your new carport in no time. Thanks for reading our blog post on how to build a carport out of steel pipe! We hope you found it helpful and informative.
I am Rick. I grew up helping my dad with his handyman service. I learned a lot from him about how to fix things, and also about how to work hard and take care of business. These days, I’m still into fixing things- only now, I’m doing it for a living.
I’m always looking for new ways to help people grow and develop. That’s why I have created this blog to share all my experience and knowledge so
that I can help people who are interested in DIY repair.