
Are you tired of your garage door slamming shut every time you close it? Not only is it annoying, but it can also cause damage to your garage door and opener over time. Fortunately, you can take a few simple steps to stop this from happening.
Garage doors are an essential feature of many homes, providing security and convenience. However, a slamming garage door can be alarming and damaging over time. The loud noise created when the door closes abruptly can disturb the tranquillity of your home and may lead to potential injury or property damage.
Understanding the underlying causes of this issue is crucial for preventing it. In this guide on how to stop garage door from slamming, we will explore practical solutions and maintenance tips to help you stop your garage door from slamming, ensuring a quieter and safer home environment.
What Will You Need?
Before diving into the methods of stopping your garage door from slamming, gathering some basic tools and materials is essential. These include:
- Lubricant spray
- Screwdriver
- Wrench
- Pliers
- Rubber or foam weatherstripping
Having these items ready will make it easier to follow the steps and troubleshoot any potential problems.
10 Easy Steps on How to Stop Garage Door From Slamming
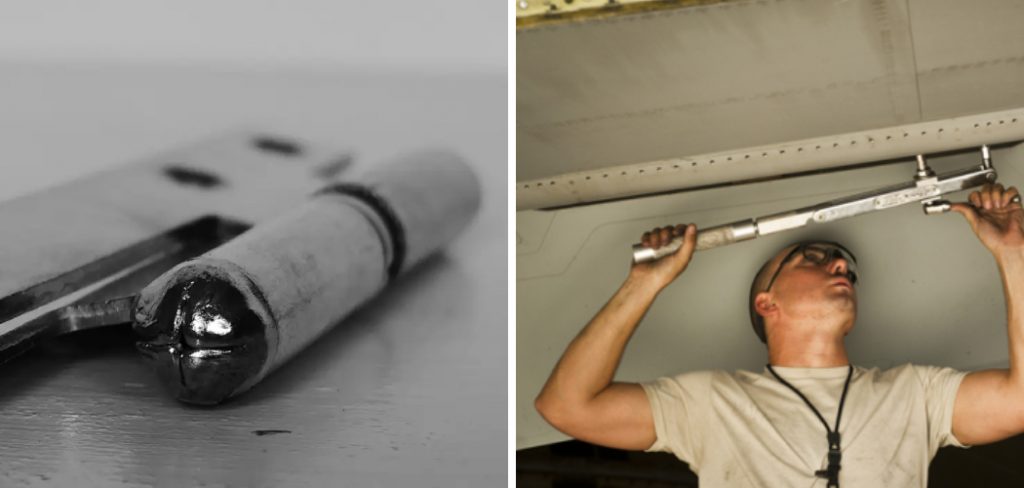
Step 1: Inspect the Garage Door Opener
Begin by examining your garage door opener to ensure it is functioning correctly. Look for any signs of wear or damage, particularly in the springs, cables, and tracks. If you notice any broken or frayed components, it may be necessary to repair or replace them before proceeding. A properly working opener can significantly reduce the force with which the door closes, potentially preventing it from slamming.
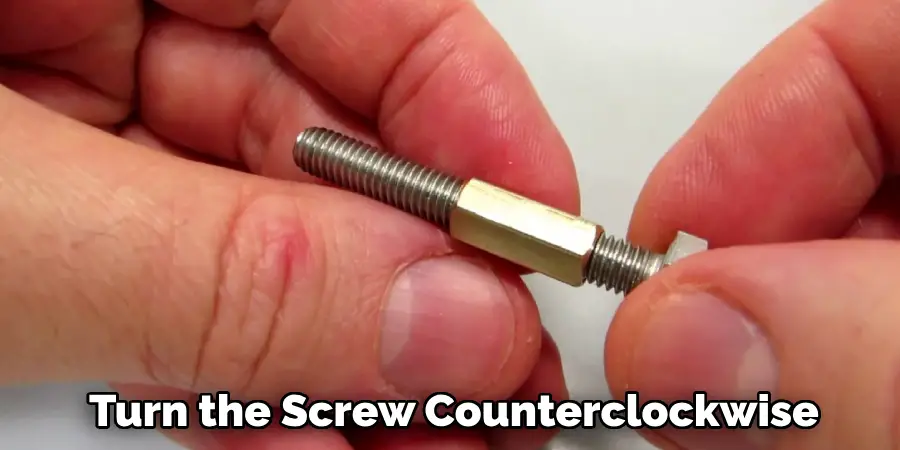
Step 2: Adjust the Closing Force Settings
After inspecting your garage door opener, the next critical step is to adjust the closing force settings. Most garage door openers come equipped with adjustable force settings that dictate how much power is used to close the door. If the settings are too high, it may cause the door to slam shut with excessive force. To adjust, locate the force adjustment screws on your garage door opener, usually found on the motor unit.
Turn the screw counterclockwise to decrease the force or clockwise to increase it. Making small adjustments and testing the door closure after each change is advisable to find the optimal setting that ensures a smooth and gentle close without slamming. This simple adjustment can significantly enhance the longevity of your garage door and opener while minimizing noise.
Step 3: Install a Soft Close Mechanism
For an even quieter operation, consider installing a soft close mechanism. This system gradually slows the door as it nears the ground, preventing any sudden impact and ensuring a gentle landing. Soft close kits are available at hardware stores and come with all the necessary components for installation.
Follow the manufacturer’s instructions for setup, typically involving attaching the mechanism to the garage door’s tracks. Once installed, you will notice a significant reduction in noise and a decreased risk of damage to both the door and its components.
Step 4: Check and Replace Weatherstripping
Another effective way to prevent your garage door from slamming is to check the weatherstripping. Old, worn, or damaged weatherstripping can fail to cushion the impact when the door closes, leading to a slamming noise. Inspect the weatherstripping around the door frame and on the bottom of the door for any signs of deterioration.
If you notice cracks or breaks, it’s time to replace it. Select a rubber or foam weatherstripping that fits snugly and provides adequate cushioning. Installing new weatherstripping can dramatically soften the noise upon closure and offer additional insulation to your garage, making it a worthwhile investment.
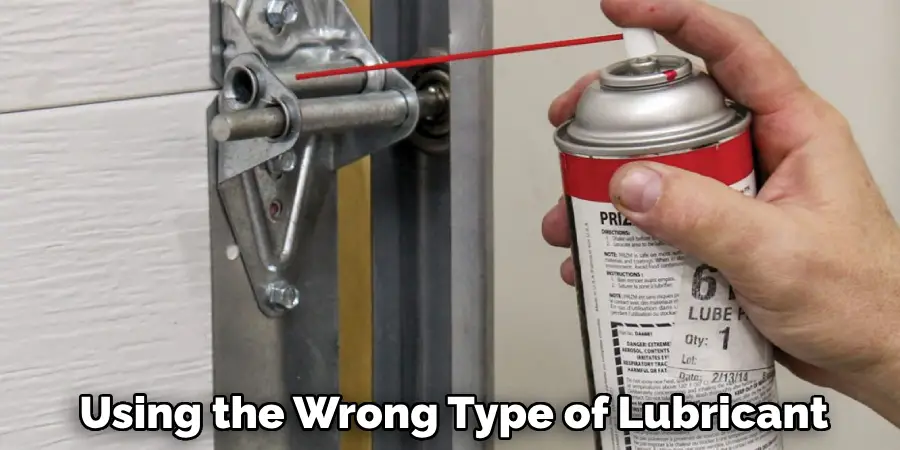
Step 5: Lubricate Moving Parts
Regular maintenance of your garage door’s moving parts is essential for smooth operation and noise reduction. A high-quality lubricant spray coats the rollers, hinges, and tracks. Lubricating these components helps reduce friction, allowing the door to open and close more smoothly, minimizing the risk of slamming.
Follow the manufacturer’s recommendations on lubrication frequency to keep your garage door functioning optimally. Remember to wipe away any excess lubricant to prevent dirt accumulation, which can cause the door to stick over time.
Step 6: Adjust the Limit Settings
After ensuring that your garage door opener is functioning correctly and that the closing force settings are optimal, the next step is to adjust the limit settings. The limit settings determine how far the garage door travels when closing. If these settings are incorrectly adjusted, the door may hit the ground too hard or not close completely, leading to slamming.

To adjust these limits, locate the limit adjustment screws on your garage door opener. Turn them clockwise to decrease the travel distance or counterclockwise to increase it. Make incremental adjustments and test the door’s performance after each change to ensure it closes softly without slamming. Correctly set limit settings will enhance the safety and efficiency of your garage door operation.
Step 7: Inspect and Tighten Hardware
Regularly inspecting and tightening the hardware on your garage door can significantly reduce the chance of slamming. Over time, bolts, screws, and nuts can become loose due to vibrations and repeated use. Begin by checking all visible hardware, including the brackets, hinges, and roller tracks. Use a wrench or screwdriver to tighten any loose components.
A stable and properly secured door will operate more smoothly, decreasing the potential for slamming and extending the life of your garage door. Remember to avoid over-tightening, which can lead to other issues.
Step 8: Balance the Garage Door
An unbalanced garage door can cause it to close unevenly, contributing to a slamming effect. To check if your door is balanced, disconnect it from the opener by pulling the emergency release cord and manually lift the door halfway. If it stays in place, it’s appropriately balanced. If it falls or rises, it may need adjustment.
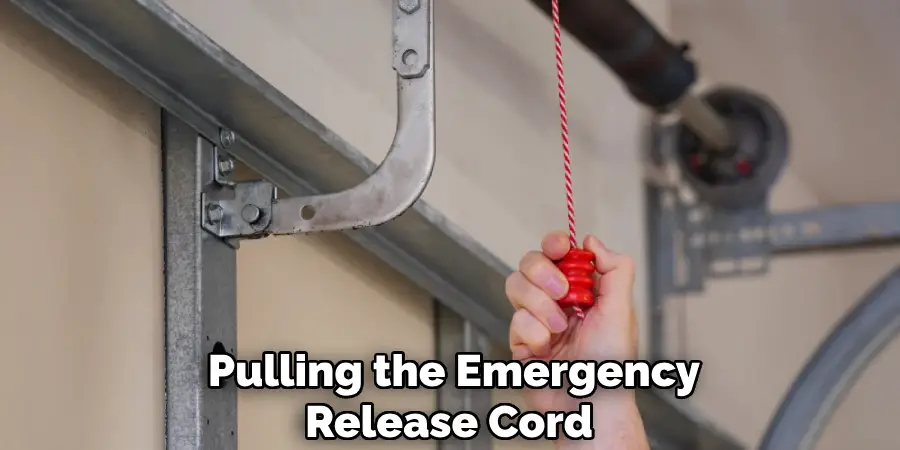
Consult a professional for assistance if you’re uncertain about the balancing process, as it involves adjusting the tension on the springs, which can be dangerous if not handled correctly. A balanced door will enhance performance and significantly reduce noise upon closing.
Step 9: Add a Door Sensor
Incorporating a door sensor can add layer of safety and help prevent slamming. These sensors detect obstructions and reverse the door automatically before it hits something. Installing a sensor is often straightforward; it typically involves attaching it to the sides of the garage door frame and connecting it to the opener. This solution not only helps prevent slamming but also protects your vehicle and other items in the garage from damage.
Step 10: Seek Professional Help
If you’ve tried all the above steps and your garage door continues to slam, it may be time to consult a professional. An expert can thoroughly inspect and identify underlying issues that may not be immediately visible. They can also suggest more advanced solutions tailored to your garage door system, ensuring a quieter and more efficient operation. Investing in professional help can save time and prevent further damage, ultimately leading to a safer home environment.
By following these steps and implementing additional solutions, you can significantly reduce or eliminate the slamming noise from your garage door.
5 Things You Should Avoid
- Neglecting Regular Maintenance: Make sure to complete routine inspections and maintenance of your garage door system. Failing to check the hardware regularly, lubricate moving parts, and replace worn components can lead to increased noise and slamming over time.
- Over-tightening Hardware: While it’s important to ensure that all hardware is secure, over-tightening bolts and screws can cause stress on the door and its components. This can lead to uneven operation and increase the likelihood of slamming.
- Using Incompatible Lubricants: Using the wrong type of lubricant can create more problems than it solves. Avoid grease that attracts dirt or oil-based lubricants that may cause messy accumulation. Stick to manufacturer-recommended products for optimal performance.
- Ignoring Limit Settings Changes: Never overlook the impact of misconfigured limit settings. Failing to adjust these settings can cause the door to hit the ground too hard, resulting in slamming. Regularly verify that these settings are correctly adjusted.
- Postponing Professional Insights: If you’ve tried various DIY solutions without success, avoid delaying consultations with professionals. Ignoring potential underlying issues can perpetuate the slamming problem and cause further damage to the garage door system.
By avoiding these mistakes and taking the necessary precautions, you can significantly reduce or eliminate slamming noises from your garage door.
Conclusion
In conclusion, how to stop garage door from slamming requires a combination of regular maintenance, proper adjustments, and safety measures.
Lubricating moving parts, adjusting limit settings, and ensuring that the door is balanced lay the groundwork for quieter operation. Adding features like door sensors can enhance safety and prevent accidents while maintaining a schedule of hardware checks can prolong the lifespan of your garage door. If persistent issues remain, professional help is advisable to diagnose and resolve any underlying problems effectively.
With these strategies, you can significantly reduce noise and ensure a more peaceful garage door operation.
I am Rick. I grew up helping my dad with his handyman service. I learned a lot from him about how to fix things, and also about how to work hard and take care of business. These days, I’m still into fixing things- only now, I’m doing it for a living.
I’m always looking for new ways to help people grow and develop. That’s why I have created this blog to share all my experience and knowledge so
that I can help people who are interested in DIY repair.