
One of the most appreciated convenience features in a modern Toyota Highlander is its integrated HomeLink system. This technology allows drivers to seamlessly operate their garage doors, security gates, and even home lighting systems without fumbling for separate, clunky remotes.
However, to get the most out of this feature and to maintain your home’s security, you will eventually need to know how to manage its settings. A “reset” is a crucial function for various common scenarios, such as troubleshooting a button that has stopped working, clearing your personal data before selling the vehicle, or setting up the system after moving or installing a new garage door opener.
This guide will provide clear, easy-to-follow instructions that demystify the entire process, from understanding the terminology to performing the reset and reprogramming your buttons. Knowing how to reset toyota highlander garage door opener buttons is a simple yet essential skill for any owner. It ensures the system remains secure, functional, and tailored to your specific needs, empowering you to take full advantage of this convenient technology.
Understanding “Reset” vs. “Reprogram” for Your HomeLink System
Before you start, it is helpful to clarify the terminology, as “reset” and “reprogram” refer to two distinct actions. Understanding the difference will help you choose the correct procedure for your situation and avoid unnecessary steps.
What is a Master Reset?
A master reset, often referred to as clearing the memory, is the process of completely wiping all programmed signals from your Highlander’s HomeLink system. This action erases the settings for all three buttons at once, returning the module to its factory default state. This is the procedure you would use when you want to start entirely fresh, such as when you first get the vehicle or when you are preparing to sell it. It is a global action that affects the entire system.
What is Reprogramming?
Reprogramming, on the other hand, is the process of teaching a single HomeLink button the signal from a specific device’s remote control. You can reprogram an individual button at any time without performing a master reset. For instance, if you get a new remote for your community gate but your garage door opener remains the same, you would simply reprogram the one button assigned to the gate. This overwrites the old code for that single button while leaving your other programmed buttons untouched.
Key Reasons to Reset Your Highlander’s Garage Door Opener
Performing a master reset is a powerful function that is most useful in a few key situations where security and a clean slate are paramount.
Enhancing Security Before a Sale
This is arguably the most critical reason to perform a reset. Before you sell or trade in your Toyota Highlander, it is imperative that you clear the HomeLink memory. If you forget this step, the new owner will possess a fully functional remote control for your garage door, security gate, and any other devices you had programmed. A 30-second reset procedure is all it takes to protect your home and ensure your peace of mind.
Starting Fresh with a New Opener or Home
If you move to a new house or install a new garage door opener system, performing a master reset is the cleanest way to begin the new programming process. While you could reprogram buttons individually, a full reset ensures there are no old or conflicting signals lingering in the system’s memory that could potentially interfere with the new setup. It guarantees you are starting from a known, blank state.
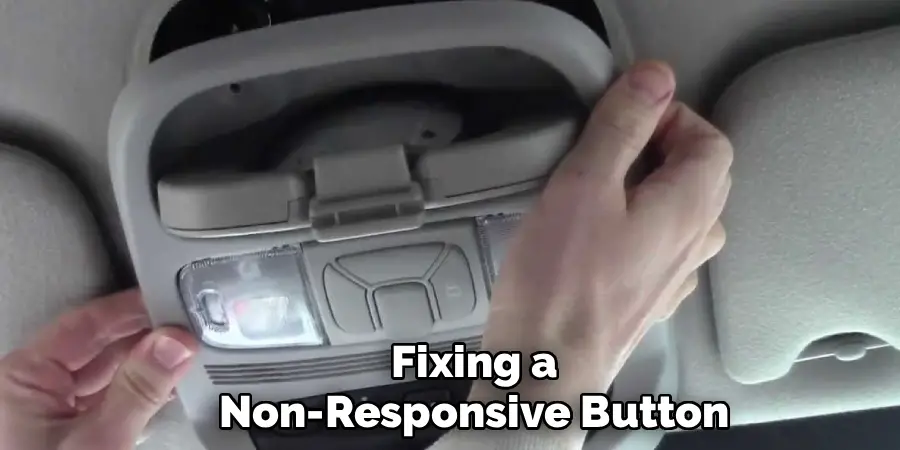
Fixing a Non-Responsive Button
If one of the HomeLink buttons has become unreliable or has stopped working altogether, a full system reset followed by a complete reprogramming can often resolve the issue. While less common, electronic glitches can occur, and a master reset acts as a “reboot” for the system, often clearing up connectivity or performance problems that simple reprogramming might not fix.
Preparations: What You’ll Need Before You Start
A successful and stress-free reset and reprogramming session begins with having everything you need ready to go. A few moments of preparation will save you time and prevent interruptions during the process.
Gathering Your Equipment
To reprogram your system after the reset, you will need your original handheld remote control for the garage door opener. It is crucial that this remote is fully functional and has a fresh battery. A weak signal from the handheld remote is the number one cause of programming failure. If your garage door opener is a modern rolling-code model (which is highly likely), you will also need a secure ladder or a sturdy step stool to safely reach the “Learn” button on the motor unit in your garage.
Positioning the Vehicle
For the best results, it is recommended that you park your Highlander outside of the garage but with the front of the vehicle facing the garage door. This ensures a clear, unobstructed signal path between the HomeLink transmitter in your car and the receiver on the garage door motor. It also eliminates the risk of the door accidentally closing on your vehicle during the reprogramming phase.
How to Reset Toyota Highlander Garage Door Opener: The Step-by-Step Guide
This is the core instructional part of the article, detailing the master reset procedure. This process will completely erase all stored codes from your Highlander’s HomeLink system, returning it to its factory default state.
Step 1: Turn the Highlander’s Ignition On
To begin, get into the driver’s seat of your vehicle. You need to provide power to the HomeLink system, so turn the ignition to the “ON” or “Accessory” mode. You do not need to start the engine, but the vehicle’s electronics must be active.
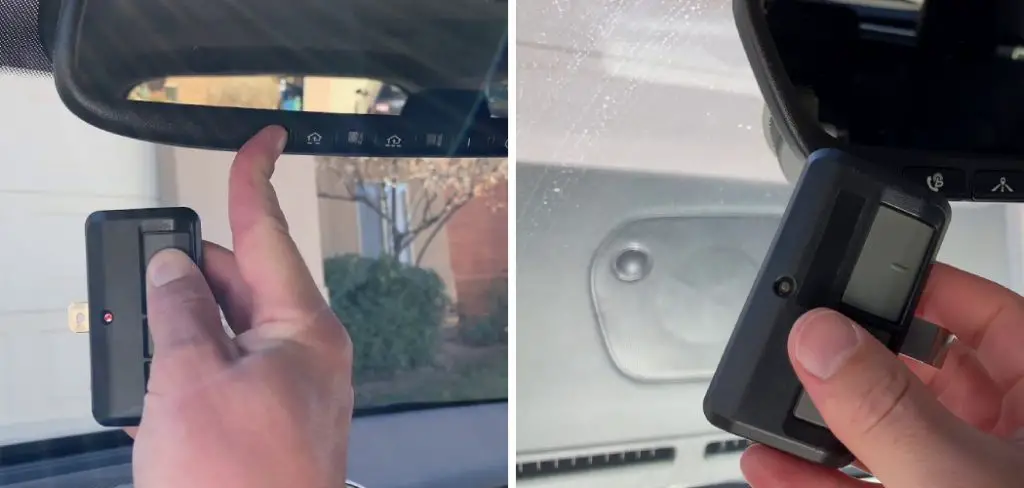
Step 2: Locate the HomeLink Buttons
Next, identify the HomeLink buttons in your Highlander. In most model years, these are integrated directly into the rearview mirror. However, in some trims, they may be located in the overhead console near the map lights. You will see a set of three programmable buttons, often accompanied by a small LED indicator light. This light is your essential feedback tool during the process.
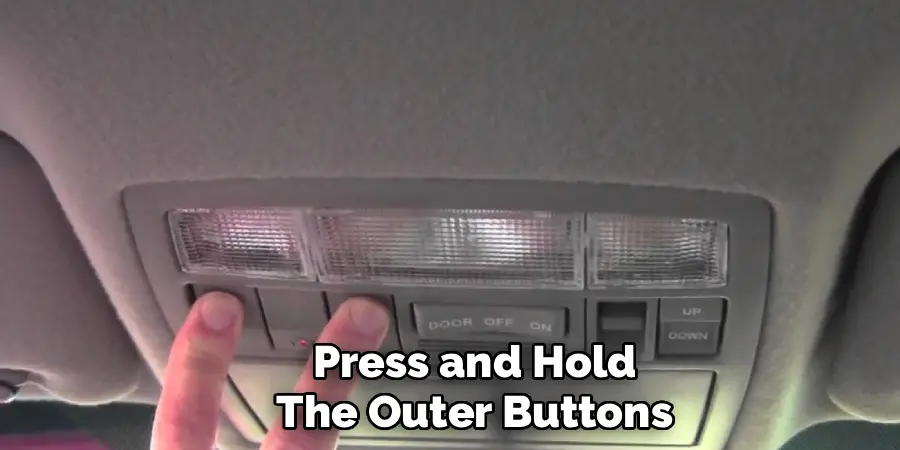
Step 3: Press and Hold the Outer Buttons
To perform the master reset, you will need to press and hold the two outside HomeLink buttons at the same time. These are typically the first and third buttons in the row (or the leftmost and rightmost buttons). For this reset procedure, you can ignore the middle button completely.
Step 4: Watch for the Indicator Light Change
Continue to hold both outer buttons down firmly. This is a timed process that usually takes between 10 and 20 seconds. As you hold the buttons, keep your eye on the LED indicator light. It will initially turn on (often flashing slowly), but you must continue to hold the buttons down until its behavior changes.
Step 5: Confirm the Reset is Complete
The confirmation that the memory has been successfully cleared is a distinct change in the light’s flashing pattern. After holding the buttons for 10-20 seconds, the slow flash will change to a rapid flash. This rapid flashing is the signal that all stored codes have been erased. Once you see the light flashing rapidly, you can release both buttons. The HomeLink system is now fully reset and ready to be programmed.
Reprogramming Your HomeLink System After a Reset
With the memory cleared, your HomeLink buttons are now blank and must be reprogrammed to operate your devices. This process involves two main stages for modern openers: training the button with your handheld remote and then syncing it with the garage door motor.
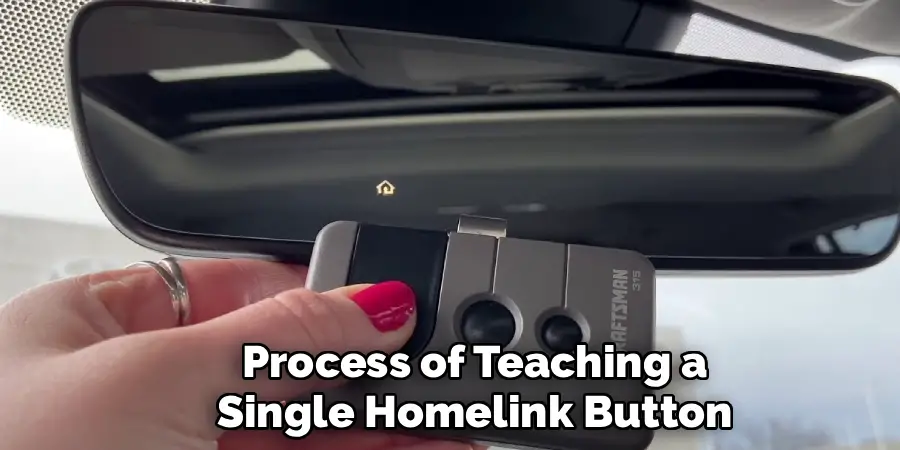
Training the HomeLink Button
Sit in your Highlander and hold your original, functional remote control about 1 to 3 inches away from the HomeLink buttons. Now, simultaneously press and hold the HomeLink button you wish to program and the button on your handheld remote. The LED indicator on the mirror will begin to flash slowly. Continue holding both buttons down. After several seconds, the light will change from a slow flash to a rapid flash. This confirms that the HomeLink system has successfully learned the signal from your remote. You can now release both buttons.
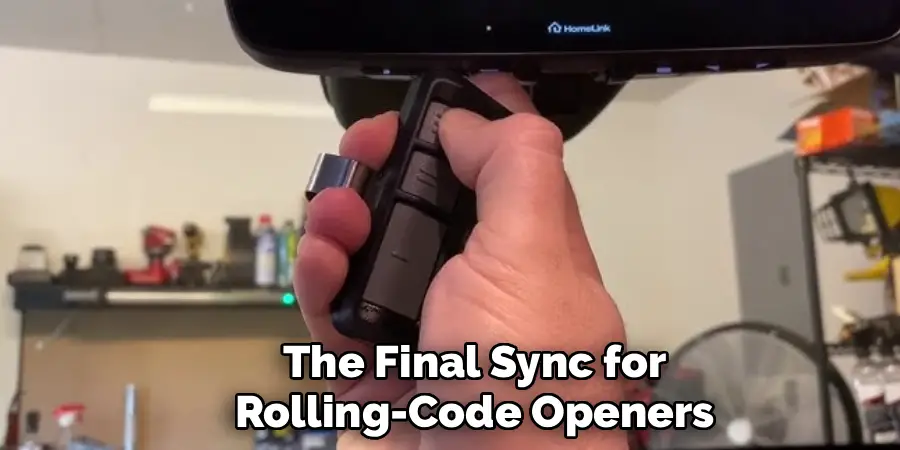
The Final Sync for Rolling-Code Openers
At this point, press the button you just programmed. If your garage door moves, you have an older fixed-code opener, and you are finished. However, it is much more likely that the door will not move.
This is normal and simply means you have a rolling-code system that requires the final synchronization step. Use your ladder to safely access the motor unit in your garage and locate the “Learn” button. Press and release this button once.
An LED on the motor should light up, indicating it is in pairing mode for about 30 seconds. Quickly return to your Highlander and press the just-programmed HomeLink button two or three times (holding for a second each time). The garage door should activate, confirming the secure link is complete.
Troubleshooting Common Reset and Programming Problems
Even with a simple process, you might encounter a snag. These troubleshooting tips cover the most common issues.
HomeLink Light Does Not Flash Rapidly During Programming
If you are trying to train a button but the indicator light never changes from a slow to a rapid flash, the system is failing to learn the code from your remote. The most common cause, by far, is a weak or dying battery in your handheld garage door remote. Before trying anything else, install a fresh battery and attempt the process again. This simple fix solves the vast majority of training failures.
The Reset Procedure Isn’t Working
If you are trying to perform the master reset but the light never changes to a rapid flash, even after holding the two outer buttons for 30 seconds or more, there could be a couple of issues. First, double-check that your ignition is in the “ON” or “Accessory” position, as the system needs power. If it has power but still will not reset, there is a rare possibility of a fault in the HomeLink module itself, which may require a visit to the dealership.
A Note on Different Highlander Model Years
While Toyota has made many updates to the Highlander over the years, the HomeLink system and its operation have remained remarkably consistent.
System Consistency
The specific location of the HomeLink buttons might shift slightly between model years, moving from the rearview mirror to the overhead console and back again, depending on the trim level and generation. However, the fundamental reset procedure of pressing and holding the two outer buttons has been the standard method for nearly all Toyota and Lexus models equipped with the HomeLink system for many years. Similarly, the reprogramming process has also remained consistent.
Conclusion
The integrated HomeLink system in your Toyota Highlander is a feature designed to make your daily life more convenient and secure. Understanding how to manage it is a key part of the ownership experience. Whether you are clearing your personal data for security reasons, troubleshooting a non-responsive button, or setting up your system in a new home, the reset function is your starting point for a clean slate.
Reiterate that knowing how to reset toyota highlander garage door opener buttons is a simple skill that empowers you to maintain control over your vehicle’s technology. The process is quick, requires no special tools, and ensures that access to your home is always secure and reliable. By following these straightforward steps, you can confidently manage your Highlander’s HomeLink system and enjoy the seamless integration it provides.
I am Rick. I grew up helping my dad with his handyman service. I learned a lot from him about how to fix things, and also about how to work hard and take care of business. These days, I’m still into fixing things- only now, I’m doing it for a living.
I’m always looking for new ways to help people grow and develop. That’s why I have created this blog to share all my experience and knowledge so
that I can help people who are interested in DIY repair.