When your garage door opener starts acting up—the remote stops working, or the door doesn’t close all the way—one of the first troubleshooting steps many homeowners search for is how to perform a reset. If your system was installed by Precision Garage Door, you might be looking for a specific set of instructions for their brand. However, it is important to understand that “Precision Garage Door” is a leading, nationally recognized service company that installs and repairs various top-tier brands of garage door openers, such as LiftMaster, Chamberlain, and Genie, rather than manufacturing its own.
This means the process for resetting your opener will depend on the actual brand of the motor unit in your garage. This guide is designed to demystify that process. The term “reset” can refer to several different procedures, from simply clearing the remote controls to recalibrating the door’s travel limits or even performing a full factory reset. Learning how to reset precision garage door opener systems—whatever brand they may be—is a crucial troubleshooting skill that can solve many common problems without the need for a service call. This guide will make the process easy to understand and execute.
Understanding What “Reset” Means for Your Garage Door Opener
Before you start, it is important to clarify what you are trying to achieve, as “reset” can mean different things in the context of a garage door opener. Identifying your specific need will help you follow the correct procedure and avoid creating more work for yourself.
Clearing and Reprogramming Remotes
This is the most common type of “reset” that homeowners need to perform. It involves erasing all the synced remote controls, keypads, and vehicle HomeLink systems from the opener’s memory. This is the go-to solution for security concerns, such as after you have lost a remote, or for troubleshooting connectivity issues when a remote becomes unresponsive. After clearing the memory, you re-link only the devices you want to authorize.
Resetting the Travel and Force Limits
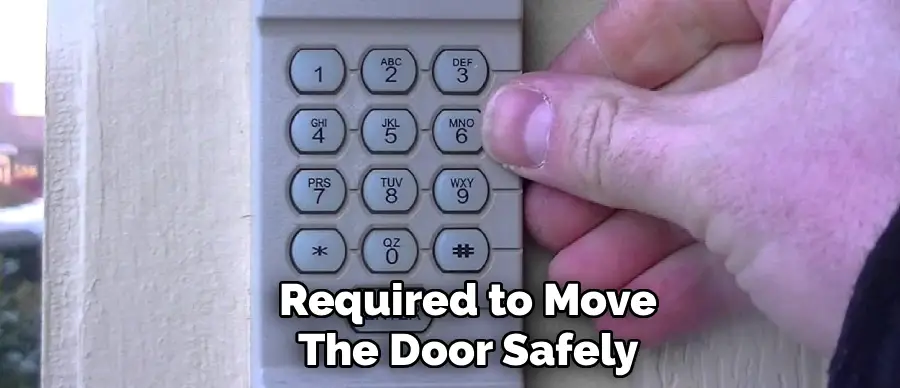
This is more of a recalibration than a reset. It is the procedure you need to follow when the door’s physical movement is incorrect. Common symptoms include the door stopping several inches short of the floor, reversing unexpectedly before it fully closes, or not opening all the way. This process “re-teaches” the opener the precise fully open and fully closed positions and allows it to learn the amount of force required to move the door safely.
Performing a Full Factory Reset
This is the most drastic option and is typically used as a last resort for complex troubleshooting. A full factory reset wipes all settings from the opener’s logic board, including all programmed remotes, wireless keypads, travel limits, and force settings. It essentially returns the unit to its out-of-the-box state, requiring you to set up everything from scratch.
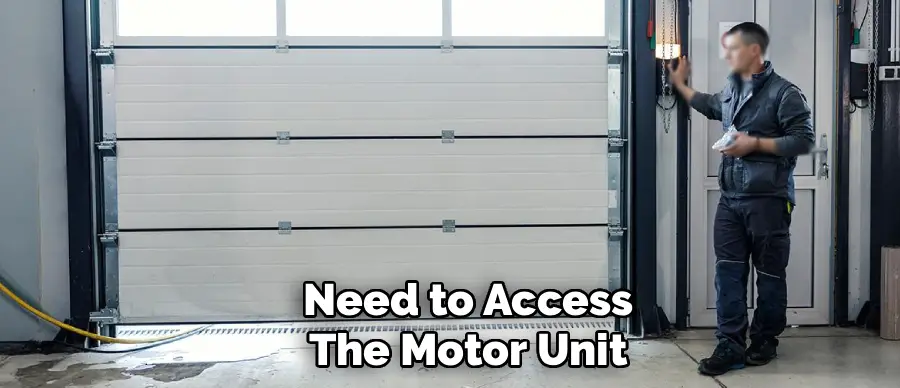
Identifying the Brand of Your Opener
Since Precision Garage Door services multiple brands, the very first step is to identify the actual manufacturer of your opener. The reset procedure is brand-specific, so this information is essential.
Locating the Brand Name and Model Number
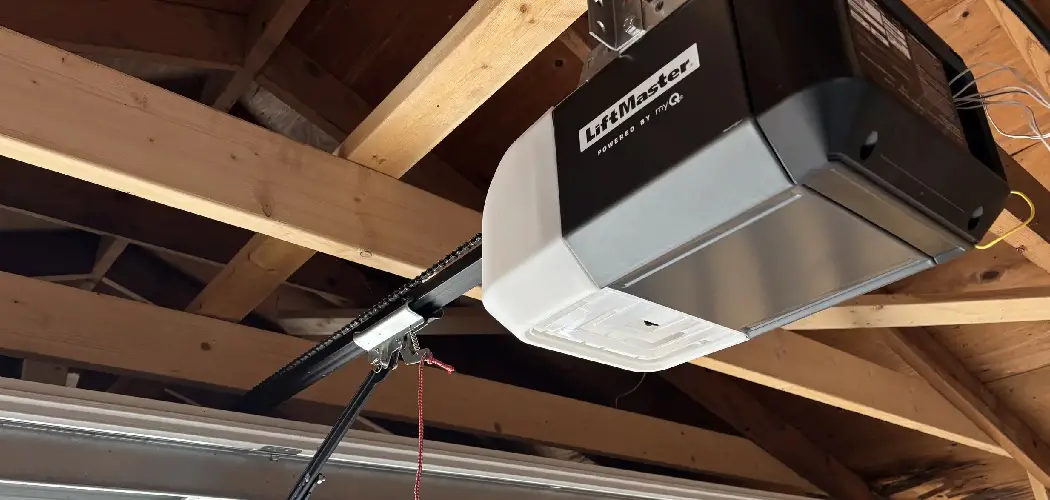
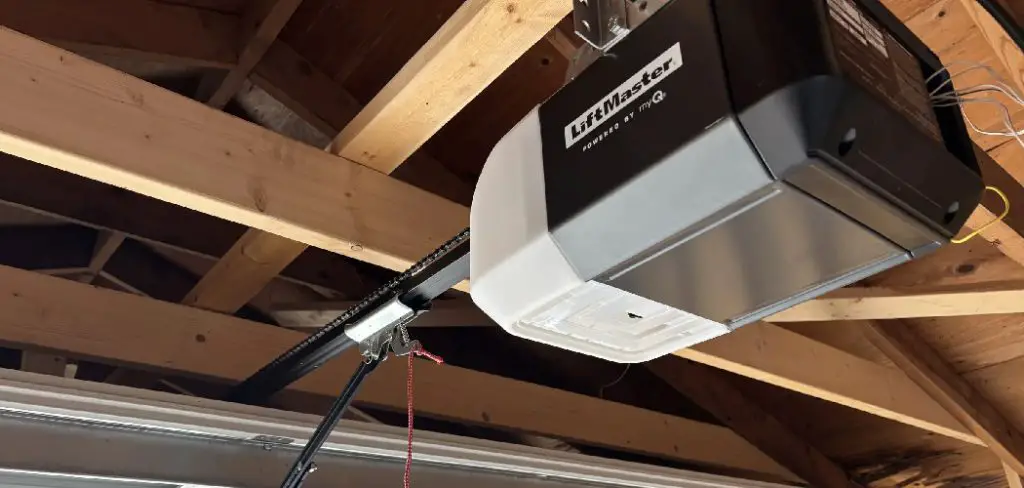
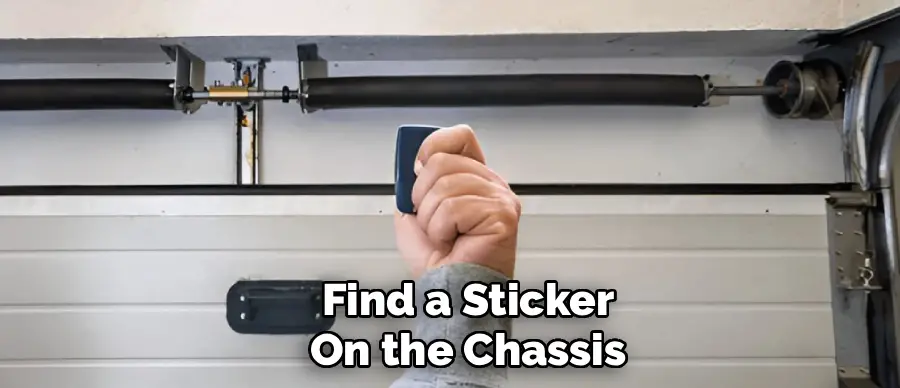
Take a moment to look at the garage door opener’s motor housing—the large unit hanging from the ceiling in your garage. The brand name, such as LiftMaster, Chamberlain, Genie, or Craftsman, will be prominently printed on the side or cover. You will also find a sticker on the chassis that contains the model number and manufacturing date. It is a good idea to take a picture of this sticker with your phone for future reference.
Finding the “Learn” Button
The “Learn” button is the gateway to most reset and programming functions on a modern garage door opener. Its location and appearance are key identifiers. It is typically a small, square button found on the back or side panel of the motor unit, often situated near an antenna wire and a small LED indicator light. On many LiftMaster and Chamberlain models, you may need to open or flip down a light cover to access it. The color of this button (e.g., Purple, Red/Orange, Green, or Yellow) is a crucial detail, as it corresponds to the specific generation of security technology the opener uses.
Safety Precautions Before You Begin Any Reset
Working on a garage door system, even for a simple electronic reset, requires caution. Your garage door is the largest and heaviest moving object in your home, so prioritizing safety is non-negotiable.
Clear the Door’s Path
Before you initiate any procedure that might cause the door to move, you must ensure that the door’s path is completely clear. Remove any people, pets, vehicles, ladders, tools, or other obstructions from the area directly underneath and around the door. This prevents accidents and damage in case the door moves unexpectedly during reprogramming.
Use a Sturdy Ladder
You will need to access the motor unit on the ceiling. Use a stable and secure A-frame ladder or a heavy-duty step stool. Make sure the ladder is placed on level ground and allows you to comfortably reach the controls on the motor unit without overextending yourself or standing on the top steps.
How to Reset Precision Garage Door Opener Remotes (The Most Common Reset)
This is the core instructional guide for the most frequently needed procedure: clearing the opener’s memory of all remote controls and then reprogramming them. This process is highly effective for solving remote issues and securing your system. The following steps are for the most common brands installed, LiftMaster and Chamberlain, which share the same technology.
Step 1: Locate the “Learn” Button
Safely position your ladder to access the motor unit. Find the square “Learn” button. As noted, you may need to open a light cover to see it. Note the color of the button, but for this reset process, the color does not matter—the procedure is the same for all of them.
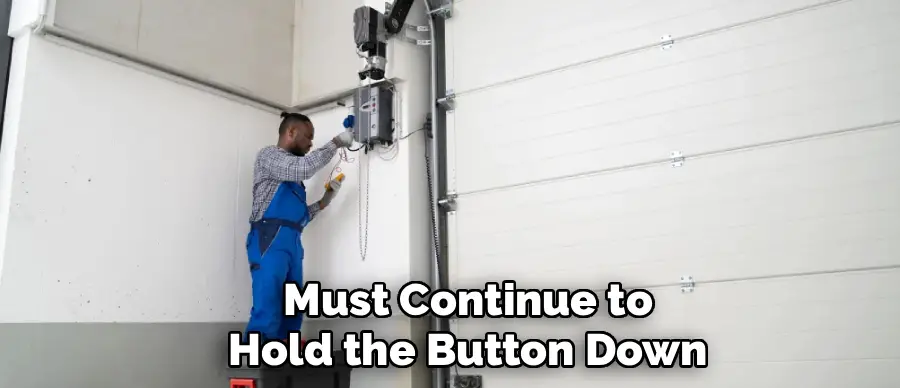
Step 2: Erase the Opener’s Memory
This step will wipe all paired devices from the opener. Press and hold the “Learn” button firmly. The small LED indicator light next to the button will turn on. You must continue to hold the button down. Do not release it yet. After approximately 6 to 10 seconds, the LED light will go out. The moment the light goes out, release the “Learn” button. This action confirms that the opener’s memory has been completely erased. If you were to try any of your old remotes at this point, they would no longer work.
Step 3: Begin the Reprogramming Process
Now that you have a clean slate, you will need to re-link each of your devices one by one. Start with one remote. Press and release the “Learn” button one time. Do not hold it down. The LED indicator will light up and stay lit for approximately 30 seconds. This signifies that the opener is in “pairing mode” and is ready to receive a new signal.
Step 4: Sync Your Remote Control
Within that 30-second window, take your handheld remote and press and hold the button you wish to program. You need to keep holding the button until you get a confirmation from the motor unit. On LiftMaster and Chamberlain models, this confirmation is typically the main light bulbs on the opener flashing once, accompanied by an audible click. Once you see the lights flash, you can release the button on your remote.
Step 5: Test the Connection
After receiving the confirmation flash, your remote should be paired. Release the remote button and then press it again to test the connection. The garage door should begin to operate. If it does, you have successfully programmed your first device.
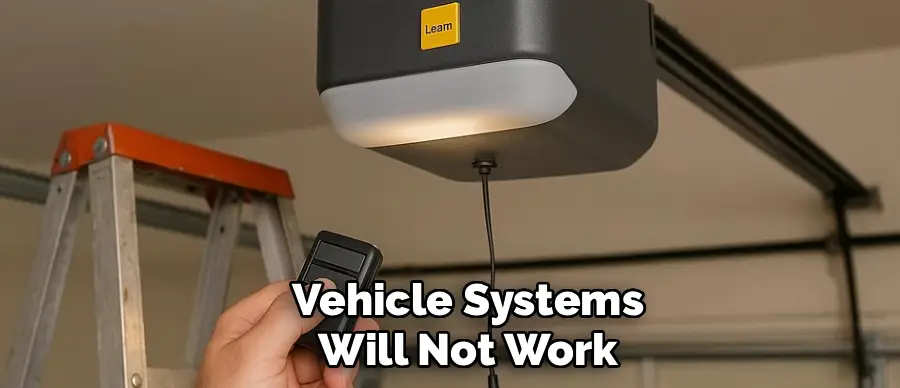
Step 6: Program Additional Devices
Your other remotes, keypads, and vehicle systems will not work until you repeat the process for each one. For each additional handheld remote, simply follow the same sequence again: press and release the “Learn” button, then press and hold the button on the new remote until the opener’s lights flash.
Resetting and Recalibrating Travel and Force Limits
If your issue is with the door’s movement—not opening or closing correctly—you need to reset the travel and force limits. The procedure for this varies more significantly between brands and models than the remote reset.
Entering Programming Mode
For most modern openers with an LCD screen or digital display, the process is menu-driven. For models with simple buttons, you typically need to press and hold an adjustment button to enter programming mode. On many LiftMaster models, this involves pressing and holding a square black adjustment button or a yellow arrow button until the unit beeps or an LED flashes.
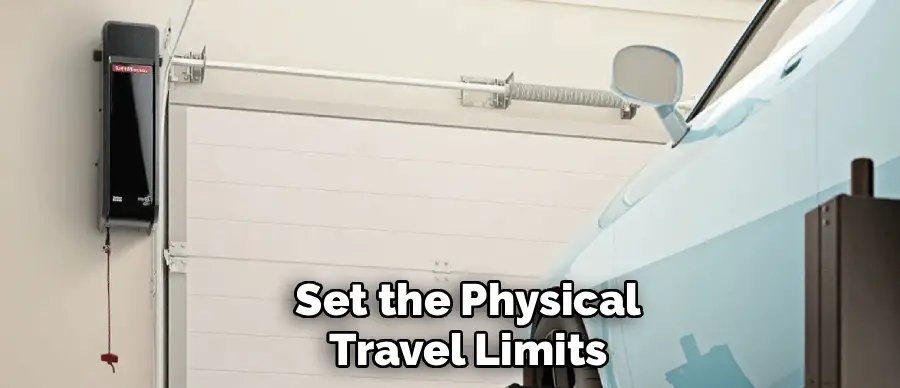
Setting the “Up” and “Down” Positions
Once in programming mode, you will use the “Up” and “Down” arrow buttons to manually move the door to the desired fully open position. Once it is in the perfect spot, you press the adjustment button again to set the “Up” limit. You then repeat the process, using the “Down” arrow to move the door until it is sitting snugly on the floor, and press the adjustment button to set the “Down” limit.
The Automatic Force Adjustment
After you have set the physical travel limits, the opener will typically need to learn the force required to move the door. For most models, the unit will automatically run a full open-and-close cycle. During this cycle, it measures the force needed at various points of travel and saves these settings in its memory. Do not interrupt this cycle.
Performing a Full Factory Reset (For Genie Models)
As an example of how different brands operate, here is a common factory reset procedure for many Genie models. This type of reset is more drastic as it usually clears all settings at once.
The Genie Reset Procedure
On many Genie openers, a full reset requires a specific sequence. You would press and hold the main program button until a blue LED light comes on, and then release it. Then, you would immediately press and hold the same program button again until that blue light goes out. This often clears both the remotes and the travel limits, requiring you to go through the entire initial setup process again, from programming remotes to setting the open and close limits. This highlights the importance of identifying your brand and consulting its manual if possible.
Troubleshooting Common Reset Issues
Even with a straightforward process, you might encounter a problem. Here are solutions for the most common issues.
Remote Fails to Re-Link
If you have cleared the opener’s memory, but a remote will not re-link, the problem is almost always the remote itself. The first and most common fix is to replace the battery in the handheld remote. A weak signal is the number one cause of pairing failure. If a new battery does not solve the problem, check to ensure the remote is compatible with your opener. The technology must match (e.g., Security+ 2.0 remote for a Yellow “Learn” button opener).
The “Learn” Button Does Not Respond
When you press the “Learn” button, its LED indicator should light up. If there is no response, it could signal a problem with the opener’s logic board. First, confirm the unit has power by checking if the wall control panel works. If the unit has power but the “Learn” button is completely dead, the logic board may have failed. This is a more complex repair that might require a service call from a professional technician.
Door Reverses After Setting Limits
If you have reset the travel limits but the door still reverses before closing, a limit reset will not fix the problem. This is a classic symptom of a safety sensor issue. The safety sensors are the two small “electric eyes” near the bottom of the door tracks. Check to make sure their alignment is correct. The LED lights on both sensors should be solid and not blinking. If one is blinking, it means the sensors are misaligned or obstructed, and the door is reversing as a safety precaution.
Conclusion
When your garage door opener acts up, knowing how to perform a reset can save you time, money, and frustration. The key is to understand that “resetting” can mean different things, and the first step is always to identify the brand of the opener installed in your garage. For most common issues with remotes or security, clearing the opener’s memory and re-linking your devices is the correct procedure. For problems with the door’s physical movement, recalibrating the travel and force limits is the solution.
By correctly identifying the problem, you can follow a simple and logical procedure to restore your system’s proper function. Knowing how to reset precision garage door opener systems is a valuable skill that empowers you to troubleshoot common issues yourself, ensuring your garage remains a secure and reliable entry point to your home. With the information in this guide, you can confidently manage your garage door’s operation and keep it running smoothly.
I am Rick. I grew up helping my dad with his handyman service. I learned a lot from him about how to fix things, and also about how to work hard and take care of business. These days, I’m still into fixing things- only now, I’m doing it for a living.
I’m always looking for new ways to help people grow and develop. That’s why I have created this blog to share all my experience and knowledge so
that I can help people who are interested in DIY repair.