A garage door opener is more than a convenience—it’s integral to the safety and day-to-day functionality of your home. For decades, Genie has maintained a strong reputation as one of the industry’s most reliable garage door opener brands. But like all household systems, even Genie openers are susceptible to wear, mechanical failures, or simply become outdated as technology evolves. If you’ve noticed erratic operation, loud noises, or regular malfunctions, it may be time for a replacement.
Whether you’re facing a sudden breakdown or proactively upgrading for enhanced features, learning how to replace Genie garage door opener systems puts you in control of your property’s security and convenience. This guide provides a comprehensive, step-by-step process that empowers you to handle the project safely and successfully, ensuring your new opener serves you reliably for years to come.
Understanding Genie Garage Door Openers
Overview of Genie Opener Models
Genie has developed a wide assortment of garage door openers to suit different needs and preferences. The main drive types include screw-driven, belt-driven, and chain-driven openers. Screw-driven models typically boast fewer moving parts, which can reduce maintenance and offer smooth performance. Belt-driven Genies are popular thanks to their ultra-quiet operation, making them ideal if your garage is attached to a living space.
Chain-driven options, meanwhile, are favored for heavy-duty lifting and long-term durability. Genie’s recent product lines also feature smart-enabled devices, enabling integration with Wi-Fi and home automation platforms. Familiarizing yourself with your existing model helps clarify both what you’re replacing and what new options may suit your home best.
Reasons for Replacement
Over time, Genie garage door openers can develop a range of issues that make replacement more cost-effective than repair. Outdated models may lack advanced safety features or remote connectivity, making them less user-friendly and potentially insecure. Frequent malfunctions, such as the motor burning out or the drive mechanism wearing down, signal the end of a unit’s useful life.
Physical damage—perhaps from accidental impact or electrical surges—may compromise safety or functionality. And in certain cases, significant noise or jerky door motion suggests wear that replacement addresses more thoroughly than patchwork repairs. Replacing an older Genie opener with a modern model often results in better performance, increased safety, and enhanced convenience.
Preparing for Replacement
Tools and Materials Needed
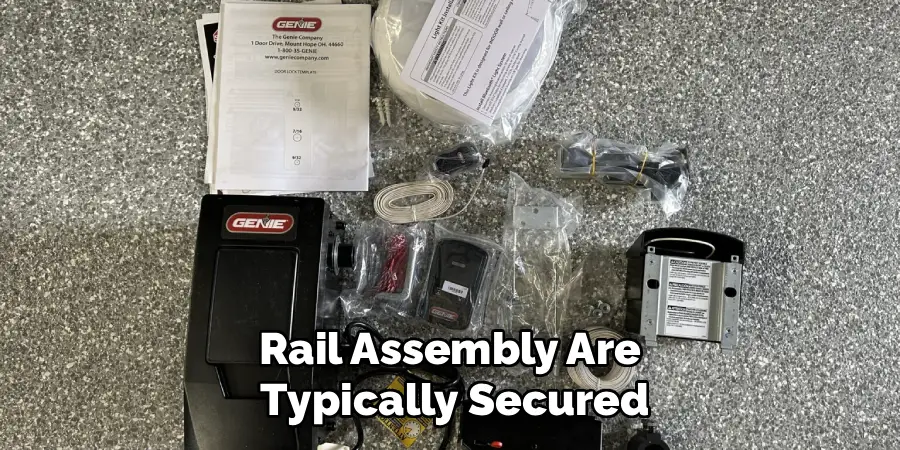
A successful replacement starts with solid preparation. Gather the essential tools you’ll need for the job. These typically include a Phillips and a flathead screwdriver, an adjustable wrench, and a pair of pliers. Having a sturdy stepladder is crucial for reaching ceiling-mounted components safely and comfortably. Naturally, you’ll also need your new Genie opener kit, including mounting brackets, rails, and any included remote controls or wall units. Keep the manufacturer’s instruction manual on hand for quick reference to diagrams and model-specific tips.
Safety Precautions
Safety should always be the priority when working with heavy mechanical systems and electrical components. Begin by disconnecting power to the existing opener at your circuit breaker or unplugging the unit from its outlet. This prevents accidental activation or electric shock as you work. Wear protective gloves and safety glasses to guard against dust, debris, or pinched fingers. Make sure the door is fully closed before starting removal or installation to reduce the risk of unexpected movement. If your opener operates a very heavy or commercial-grade door, consider enlisting assistance, as these systems can be difficult for one person to handle safely.

Removing the Old Genie Garage Door Opener
Step 1 – Disconnect Power to the Unit
With safety gear in place, your first task is to ensure that no power runs to the old opener. Turn off the dedicated circuit at the breaker panel or, if accessible, unplug the power cord from the ceiling socket. Test the wall control or remote to confirm the opener is fully deactivated before proceeding. This minimizes risks throughout the removal process.
Step 2 – Detach the Garage Door Opener from the Door
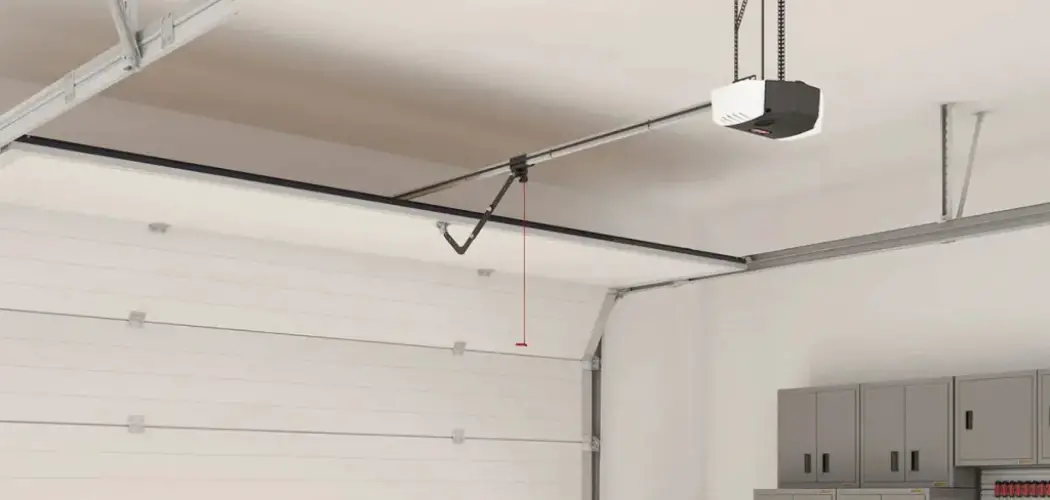
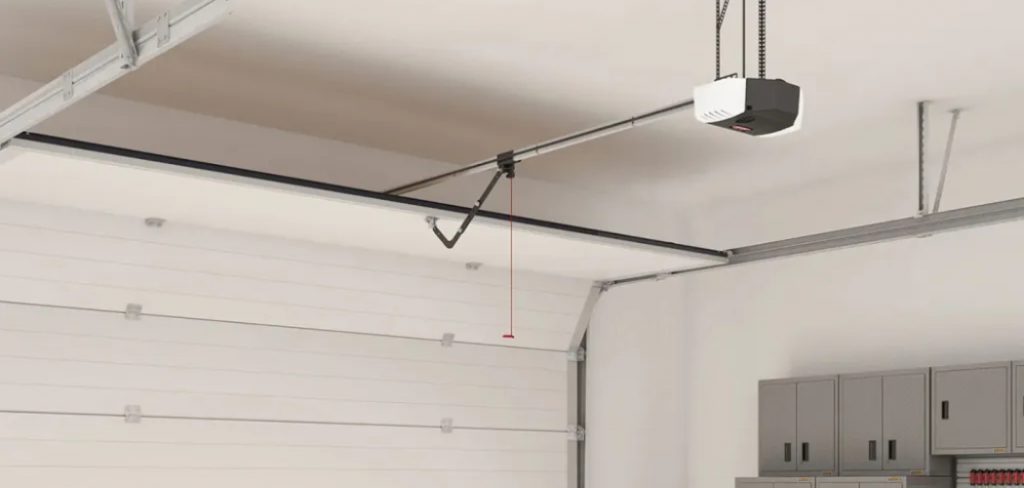
Next, locate the opener’s arm that connects the trolley to the garage door. Most Genie models employ a clevis pin or locking pin to keep this arm in place. Pull out the retaining pin and carefully separate the arm from the bracket on the garage door. This disengages the opener from the door itself, allowing manual movement as you continue.
Step 3 – Remove the Old Systems
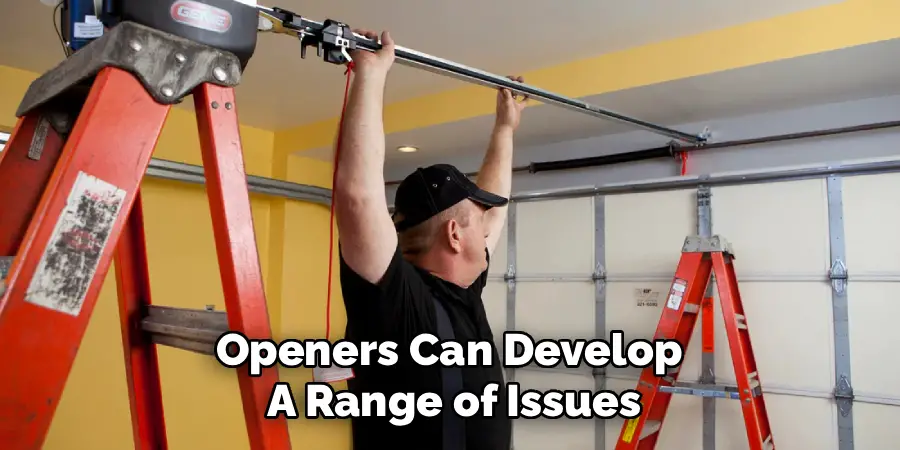
The opener motor and rail assembly are typically secured to the ceiling or a mounting beam via metal brackets and bolts. Using your wrench and screwdriver, methodically remove the hardware that holds these components in place. Carefully lower the motor from its brackets and slide the rail from its mounting position.
Take your time during this process—older hardware can sometimes be rusted or stuck, requiring patience and gradual persuasion. Set aside all removed parts, as some hardware may be reused for the new installation, depending on compatibility and condition. Dispose of the old unit according to local electronic recycling guidelines.
Choosing a New Genie Garage Door Opener
Comparing Genie Models
With your old opener removed, it’s time to select a replacement suited to your needs. Newer Genie models come equipped with a range of innovations, like integrated Wi-Fi, which enables you to operate your garage from a smartphone or voice assistant. Many also include updated safety monitoring features, battery backup for power outages, and ultra-quiet motors.
Evaluate your household’s needs—such as noise levels, door weight, or compatibility with existing smart home systems—when choosing among the screw, chain, or belt-driven models. Reviewing model specifications ensures your new opener meets your expectations for performance, convenience, and future upgrades.
Understanding Compatibility
Before purchasing your new unit, double-check that it is compatible with your existing garage door. Take note of the door’s size and weight—heavier or oversized doors require more powerful motors. Consider the available ceiling space and mounting points in your garage as well. Ensure your new Genie opener uses a rail and arm system suited to your door’s design. Additionally, verify that your household wiring and outlet placement align with the opener’s power requirements. Investing a little time in compatibility checks prevents installation hiccups and disappointment later.
How to Replace Genie Garage Door Opener: Installing Process
Step 1 – Assemble the New Opener Unit
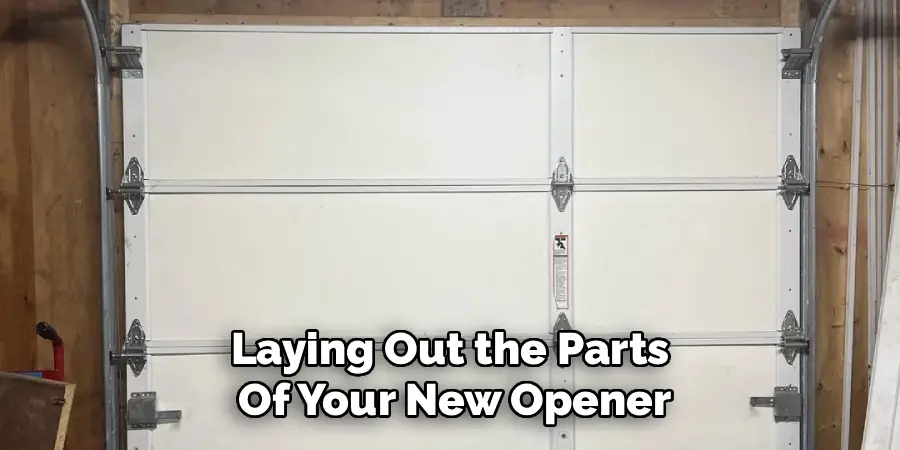
Begin by laying out the parts of your new opener, following the assembly diagram in the manufacturer’s manual. Attach the rail sections, connecting the trolley or carriage and sliding it along the track. Secure the rail to the motor head as directed, making sure bolts and connectors are tight but not over-torqued. Install the included safety sensors onto their mounting brackets, but wait to finalize placement until the opener is fully installed.
Step 2 – Mount the Opener to the Ceiling
With the main assembly connected, lift the unit into position below your garage ceiling. Attach the motor’s mounting bracket to either the existing support beam or a new one, following the opener’s specific instructions. The rail should be level with the door and extend to the wall above it; use a level to double-check alignment. Secure the rail’s front end above the door using the provided bracket, ensuring it is firmly anchored to a solid structural point. Double-check all mounting points for security and stability before moving on.
Step 3 – Attach the Opener to the Garage Door
Reconnect the opener arm to your garage door, using the appropriate pins or fasteners included with your kit. Adjust the arm’s length as needed so the door can move fully from closed to open positions without binding or excess slack. Ensure the arm and trolley are aligned properly to avoid stress during operation. Tighten all fasteners and make sure the door can be moved by hand—first without the opener’s drive—so you’re confident in the mechanical integrity of your setup.
Step 4 – Connect Power and Test Operation
With all physical installation steps complete, plug the new opener into the appropriate outlet or restore power at the breaker. Many Genie openers perform a self-check or initialization routine upon first connection. Using either the wall control or remote, test the opener through a full cycle—open and close the garage door, observing any irregularities. The safety sensors should be positioned just above floor level on either side of the door. Fine-tune their alignment so their indicator lights are solid, confirming they are communicating properly. If the sensors detect an obstruction, the door should stop or reverse for safety.
Adjusting the New Opener for Optimal Performance
Configuring Remote Controls and Keypads
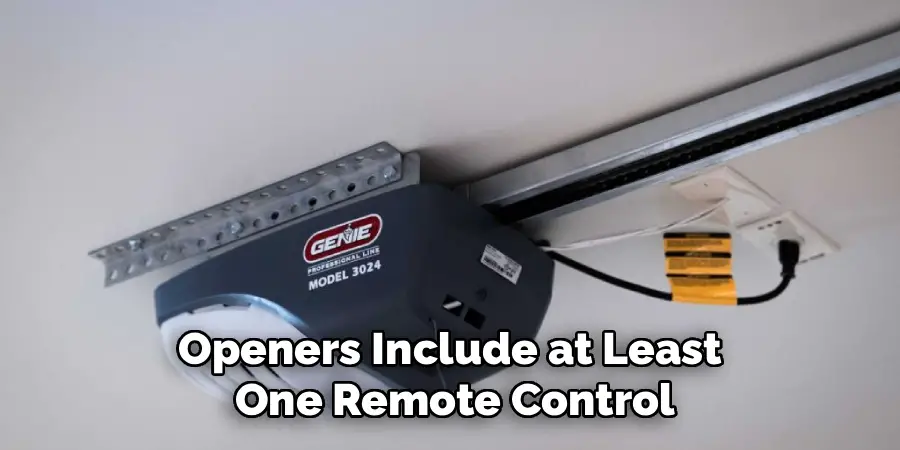
Most new Genie openers include at least one remote control and may come with a wall-mounted keypad. Pair these devices following the opener’s programming sequence, usually involving pressing a “learn” button on the motor unit and initiating pairing from the remote or keypad. For keypads, enter a secure PIN and ensure it’s working by testing door operation. Take this opportunity to test all control devices from various ranges within and outside the garage to confirm signal strength.
Fine-Tuning Sensitivity Settings
It’s essential to adjust your new opener’s sensitivity and force settings for safe and smooth operation. Consult your manual for the exact method—often involving dial adjustments on the motor housing. The door should close firmly but immediately reverse if it encounters resistance, confirming both safety and reliability. Similarly, set the travel limits so the door opens and closes fully without straining the opener or leaving gaps. Testing and adjusting these variables ensures your system operates efficiently and safely in all conditions.
Troubleshooting Common Issues
Immediate Post-Installation Problems
Sometimes, you might notice issues right after installation. A door that moves noisily, binds during operation, or fails to retract fully may indicate slight misalignment or improper mounting. Double-check your hardware, making sure all bolts are secure and that the rail and opener arm are parallel to the ground. In rare cases, the new opener may be incompatible with certain garage doors or springs. Consult Genie’s installation support resources or seek assistance if you can’t quickly resolve these concerns.
Diagnosing Error Codes
Some modern Genie openers display error codes on their light panel or via a companion smartphone app. These codes quickly identify issues such as sensor misalignment, obstruction detection, or internal faults. Refer to your unit’s troubleshooting chart to interpret the codes and take corrective actions, which may range from realigning sensors to resetting the main circuit board.
Maintenance Tips for Longevity
Routine Maintenance
Consistent upkeep extends the lifespan of your new Genie opener. Regularly check that mounting and connection points remain secure. Lubricate the opener’s rail, rollers, and hinges every few months, especially if you hear squeaking or notice stiffer movement. Inspect electrical and sensor wiring for signs of wear or fraying. Tighten any screws or bolts that loosen over time and remove cobwebs or debris around the opener and sensors to ensure unobstructed operation.
Annual Servicing
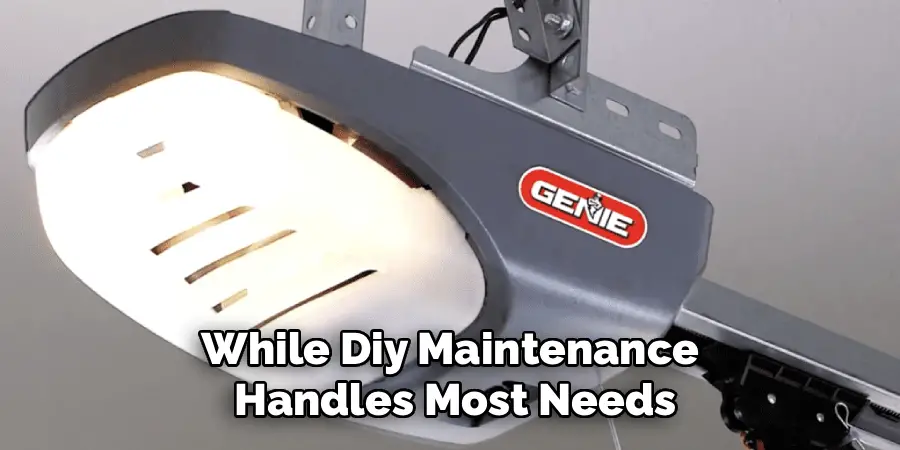
While DIY maintenance handles most needs, a professional inspection once per year is a wise investment. Technicians can spot early signs of wear, test balance and spring tension, and calibrate opener settings for optimal performance. Scheduling annual service, especially leading into winter or after heavy usage periods, helps prevent unexpected failures and costly emergency repairs.
Frequently Asked Questions
What is the Average Lifespan of a Genie Garage Door Opener?
Genie garage door openers are built for longevity, with most models lasting between 10 and 15 years. Usage patterns, climate, and quality of maintenance can extend or shorten this period. If you notice a steady uptick in breakdowns or new technology features seem appealing, it may be time for a replacement.
Can I Replace My Opener Myself, or Should I Hire a Professional?
DIY replacement is feasible for most homeowners, particularly if you follow the manufacturer’s instructions closely and take necessary safety precautions. Benefits include cost savings, scheduling flexibility, and a sense of accomplishment. That said, if your garage door is very heavy, features complex hardware, or if you don’t feel confident working with electrical components, enlisting a professional ensures safety and peace of mind. Pros can often complete installation in just a few hours and will handle any custom adjustments required by unique doors or garage layouts.
Are Genie Openers Compatible with Smart Home Systems?
Many recent Genie openers are “smart-ready,” meaning they easily integrate with home automation platforms such as Alexa, Google Home, or proprietary Genie apps. If you prioritize remote access, scheduling, and real-time alerts, check product labels or Genie’s website for compatibility with your preferred smart technology ecosystem before buying.
Final Thoughts
Tackling the task of replacing your Genie garage door opener may seem daunting at first, but armed with the right information and tools, it’s a manageable project that pays dividends in safety and convenience. By following each step carefully—from preparing your workspace and gathering tools, to removing the old unit and installing a modern replacement—you ensure reliable and efficient operation for years to come.
Remember to follow all safety guidelines, test your new system thoroughly, and keep up with routine maintenance so your opener remains in top condition. With patience and careful attention to detail, you’ll discover that learning how to replace Genie garage door opener systems isn’t just achievable—it can be an empowering home improvement experience. Now is the perfect moment to upgrade your system and enjoy the smooth, secure access a new Genie opener provides.
I am Rick. I grew up helping my dad with his handyman service. I learned a lot from him about how to fix things, and also about how to work hard and take care of business. These days, I’m still into fixing things- only now, I’m doing it for a living.
I’m always looking for new ways to help people grow and develop. That’s why I have created this blog to share all my experience and knowledge so
that I can help people who are interested in DIY repair.