
If your garage door opener has stopped working or is making strange, grinding noises, it might be time to replace its gear. Worn-out gears are one of the most common reasons for garage door opener failures, yet replacing them is a straightforward process that you can handle without calling a professional. Learning how to replace garage door opener gear will not only save you money on repairs but also ensure your garage door operates smoothly for years to come.
Before starting, make sure you have the necessary tools and replacement parts on hand. You will need a screwdriver set, a wrench, a replacement gear kit, and safety gloves. Begin by disconnecting the garage door opener from the power source to ensure safety during the repair process. Next, locate the gearbox inside the opener unit. Carefully remove the motor assembly and open the gearbox housing to access the damaged gear. Once visible, gently detach the worn-out gear and install the new one, ensuring it fits securely. Reassemble the unit, reconnect the power, and test the garage door to confirm it operates smoothly.
This guide is designed to walk beginners through the process, step by step, so you can confidently restore your garage door opener to full functionality. We’ll also touch on why replacing the gear is essential and address common questions to set you up for success.
Why Replacing Garage Door Opener Gear is Important
The garage door opener gear plays a critical role in transferring the motor’s power to lift and lower the door. Over time, the gear can wear out due to constant use, lack of maintenance, or exposure to debris. When the gear falters, the garage door opener may struggle to function properly, leading to symptoms like grinding noises, incomplete door movements, or total system failures.
Replacing the gear is crucial because a malfunctioning garage door opener poses significant safety risks. For instance, if the opener is unable to lift the door securely, it could fail to stop during emergencies or drop unexpectedly. Additionally, replacing the gear promptly can prevent damage to other components within the opener, such as the motor assembly or chain drive, saving you from costly repairs or replacements in the future.
By addressing the issue as soon as possible, you can ensure your garage door remains safe, reliable, and convenient to use while protecting your investment in the opener system.
Step-by-Step Guide on How to Replace Garage Door Opener Gear
Replacing a garage door opener gear requires attention to detail but is manageable with the right tools and instructions. Follow the steps below to complete the process seamlessly.
Step 1: Disconnect the Power Supply
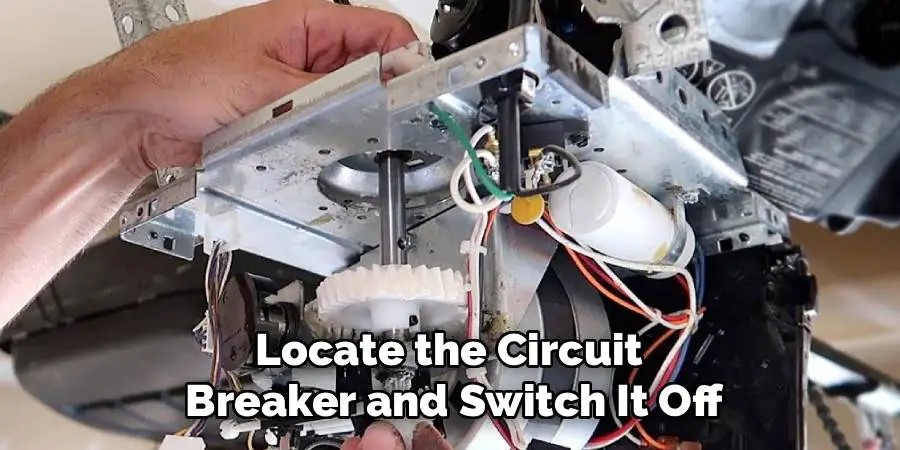
Safety should always come first. Begin by unplugging the garage door opener from the power outlet to eliminate the risk of electrocution or accidental activation during the repair. If your opener is wired directly, locate the circuit breaker and switch it off.
Once the power is disconnected, manually release the garage door by pulling the emergency release handle. This ensures that the door won’t accidentally move while working on the opener. Keeping the door in the closed position will further prevent any injuries or complications while you replace the gear.
Step 2: Open the Motor Housing
Next, access the motor assembly by removing the cover of the garage door opener unit. Use a screwdriver to loosen the screws securing the plastic or metal housing in place. Once removed, you’ll be able to see the internal components, including the motor, drivetrain, and – most importantly – the gear mechanism that needs replacement.
Inspection at this stage is crucial. Examine the gear and look for signs of wear such as stripped or damaged teeth. If the gear appears to be the culprit of your garage door problems, you’re on the right track to resolving the issue.
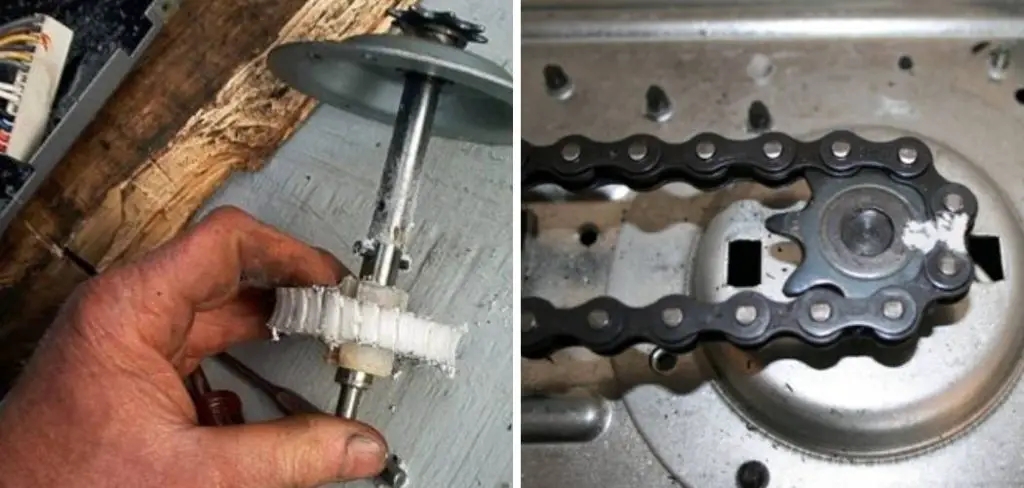
Step 3: Remove the Old Gear Assembly
To remove the worn gear, locate the gear bracket within the motor assembly. Begin by detaching the chain or belt drive from the sprocket, which is typically positioned above the gear. Carefully remove any retaining clips, bolts, or washers securing the gear to the shaft using the appropriate tools.
Once these components are removed, slide the old gear off the shaft. Be mindful of small parts, as they will need to be reinstalled during the reassembly process. If there is any debris or grease residue remaining inside the motor housing, clean it with a rag before proceeding.
Step 4: Prepare the Replacement Gear
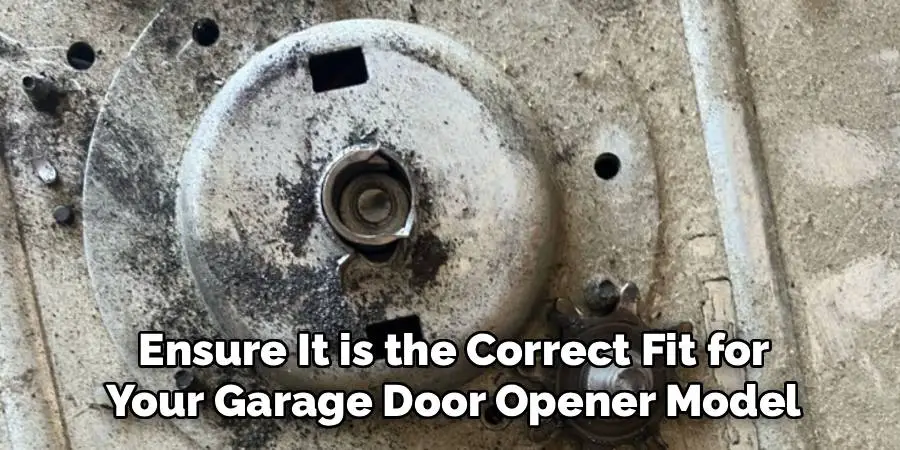
Before installing the new gear, ensure it is the correct fit for your garage door opener model. Inspect the replacement part for quality and compatibility. Many gear kits come with necessary accessories such as grease or sleeves, which should be applied according to the manufacturer’s instructions.
Lubricate the shaft and gear teeth with the provided grease. This reduces friction and prolongs the life of the newly installed component. Taking the time to prepare the replacement gear correctly ensures optimal performance post-replacement.
Step 5: Install the New Gear
Slide the replacement gear onto the shaft, ensuring it aligns properly with other components, particularly the belt or chain drive. Secure the gear with any nuts, bolts, or washers removed earlier, and tighten them firmly to prevent movement.
Once the gear is installed, reattach the belt or chain to the sprocket. Adjust the tension as needed to ensure the drive operates smoothly. Some systems may require fine-tuning to achieve the ideal balance between too tight and too loose.
Step 6: Reassemble the Motor Housing
After successfully installing the new gear, it’s time to put the garage door opener back together. Replace the motor housing cover and secure it with screws. Double-check that all components are reinstalled correctly to avoid further complications.
Once sealed, take a moment to clean the outer surface of the unit and ensure the surrounding area is free from tools or debris. A tidy work setup minimizes the risk of accidents and keeps your workspace organized.
Step 7: Test the Garage Door Opener
Reconnect the power supply and turn on the garage door opener. Operate the opener using the remote or wall-mounted controls, and observe its performance. The door should open and close smoothly without any grinding noises or jerky movements.
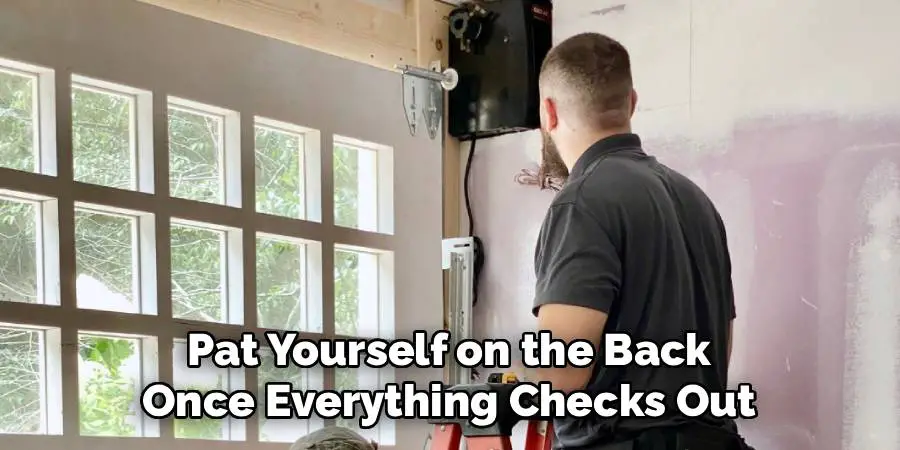
If the system malfunctions at this stage, revisit the previous steps to verify that all components are installed properly. Adjustments to the belt or chain tension may also resolve minor issues. Pat yourself on the back once everything checks out – you’ve successfully replaced your garage door opener gear!
Maintenance Tips for Longevity
To keep your garage door opener running smoothly for years to come, regular maintenance is key. Here are a few tips to ensure its longevity:
Inspect and Lubricate Moving Parts
Periodically inspect all moving parts, such as the chain, belt, and rollers, for signs of wear or damage. Apply a high-quality lubricant to reduce friction and prevent premature wear.
Test the Safety Features
Regularly check the auto-reverse mechanism by placing a small object in the door’s path. If the door doesn’t reverse upon contact, adjust the settings or consult the manufacturer’s instructions.
Tighten Hardware
Over time, vibrations can loosen the screws and bolts on your garage door and opener. Use a wrench to tighten all hardware and ensure stable operation.
Keep the Tracks Clean
Dust and debris can accumulate in the tracks, leading to misalignments. Use a damp cloth to clean the tracks and ensure the door operates smoothly.
Replace Batteries and Bulbs
Check the batteries in your remote control and replace them as needed. Similarly, replace burnt-out bulbs in the opener to ensure proper lighting.
By following these maintenance practices, you can extend the lifespan of your garage door opener and minimize the need for costly repairs.
Frequently Asked Questions
How can I identify if my garage door opener gear is broken?
Signs of a broken gear include grinding noises, the opener operating without moving the door, or erratic door movements. Inspect the motor assembly for worn gear teeth or damaged components.
What tools do I need to replace a garage door opener gear?
You’ll need common tools such as screwdrivers, pliers, and wrenches. A gear replacement kit, often including grease and replacement parts, is also essential for the job.
How long does it take to replace a garage door opener gear?
Replacing the gear typically takes 15 minutes to a couple of hours, depending on your experience level. This includes preparation, removal, installation, and testing.
Can I use my garage door opener with a damaged gear?
It’s not recommended, as a damaged gear can cause further strain on the motor and other components, potentially leading to costlier repairs or complete system failure.

Is it better to repair or replace the entire garage door opener?
If the gear is the only issue, replacement is usually cost-effective. However, if other components like the motor or chain drive are also damaged, replacing the whole opener may be more practical.
Conclusion
Replacing a garage door opener gear might seem intimidating, but with the right instructions and tools, it’s a manageable task for beginners. By learning how to replace garage door opener gear, you can save money, extend the life of your opener, and ensure your garage door operates safely and smoothly.
Regular maintenance can help prevent gear damage and extend the lifespan of your garage door opener. Lubricating moving parts, checking for misaligned components, and addressing unusual noises promptly are simple steps that can minimize wear and tear. Developing a routine maintenance schedule ensures your garage door system remains reliable and functions efficiently over time.
Don’t wait for the problem to escalate. Restore your garage door opener today and enjoy the convenience of a reliable system!
I am Rick. I grew up helping my dad with his handyman service. I learned a lot from him about how to fix things, and also about how to work hard and take care of business. These days, I’m still into fixing things- only now, I’m doing it for a living.
I’m always looking for new ways to help people grow and develop. That’s why I have created this blog to share all my experience and knowledge so
that I can help people who are interested in DIY repair.