
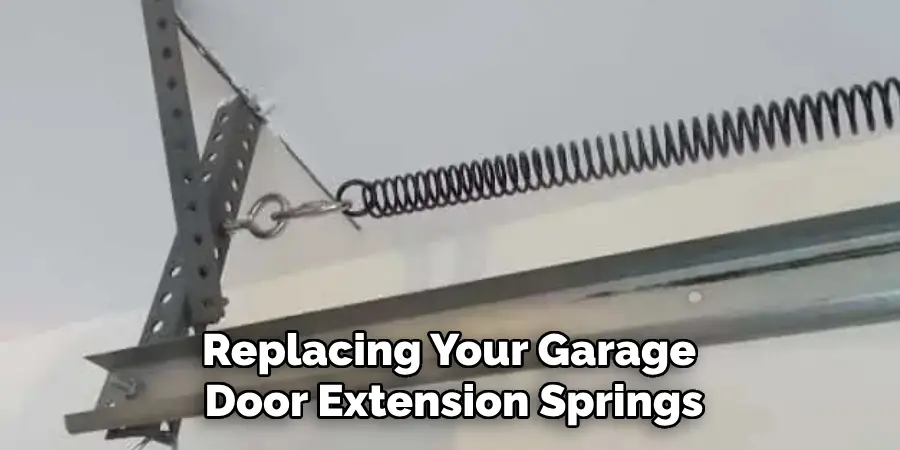
Replacing garage door extension springs is a crucial maintenance task that ensures the safe and efficient operation of your garage door. These springs play a vital role in counterbalancing the weight of the door, making it easy to open and close.
Over time, extension springs can wear out due to repeated use, leading to potential safety hazards and operational issues. This guide aims to provide you with a step-by-step process of how to replace garage door extension springs, equipping you with the knowledge and confidence to tackle this project safely and effectively.
Whether you’re a seasoned DIYer or a homeowner looking to save on repair costs, understanding how to replace these springs is an invaluable skill.
What are Extension Springs?
Extension springs are a type of mechanical spring that is designed to absorb and store energy. They work by being stretched, providing tension that helps counterbalance the weight of a garage door as it opens and closes. Typically made from high-carbon steel, these springs are coiled in a way that allows them to extend and contract efficiently.
In garage door systems, extension springs are usually placed on either side of the door tracks, and their proper functioning is essential for the smooth operation of the door. When these springs are in good condition, they enable the user to lift the door with minimal effort, contributing to the overall safety and functionality of the garage entryway.
Tools and Materials Needed
Before you begin the process of replacing your garage door extension springs, it’s important to gather all the necessary tools and materials to ensure a smooth and efficient project. Here’s a list of what you will need:
Tools
- Safety Glasses: To protect your eyes during the replacement process.
- Work Gloves: For hand protection and improved grip when handling springs.
- Wrenches: An adjustable wrench or socket wrench set for loosening and tightening bolts.
- Screwdrivers: Both flathead and Phillips screwdrivers to remove screws and components.
- Pliers: To grip, bend, or manipulate wires and components.
- Ladder: A sturdy ladder to reach high areas if necessary.
Materials
- Replacement Extension Springs: Ensure you purchase the correct size and type of springs compatible with your garage door.
- Safety Cable: Often recommended to add an extra layer of safety to prevent injury in case a spring breaks.
- Lubricant: A silicone-based lubricant to apply on the springs after installation for improved performance.
Having these tools and materials ready will help make the replacement process straightforward and safe.
10 Methods How to Replace Garage Door Extension Springs
1. Understand the Purpose of Extension Springs
Before diving into the replacement process, it’s essential to understand the purpose and function of garage door extension springs. These springs are typically mounted on the sides of the garage door and help counterbalance the weight of the door, making it easier to open and close.
Extension springs stretch as the door closes and contract as it opens, storing energy that assists in lifting the door. Recognizing their critical role helps you approach the replacement process with the necessary caution and respect for safety, as these springs are under significant tension.
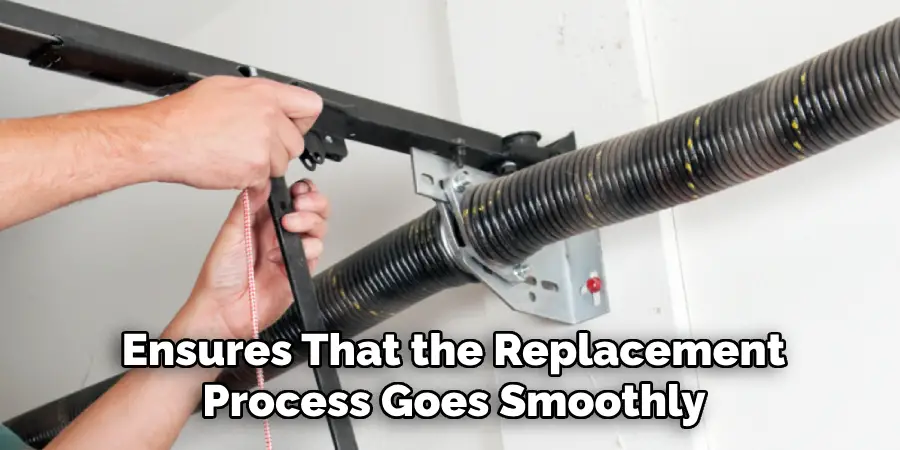
2. Gather Necessary Tools and Materials
Replacing garage door extension springs requires specific tools and materials. Before starting, gather a set of winding bars, a socket wrench set, pliers, safety glasses, gloves, and a sturdy ladder. Additionally, you’ll need new extension springs that match the specifications of your existing ones.
Having the right tools and materials on hand ensures that the replacement process goes smoothly and safely. Being well-prepared minimizes delays and reduces the risk of injury by ensuring you have everything needed to complete the job correctly.
3. Ensure Safety Precautions
Safety is paramount when working with garage door springs, as they are under high tension and can cause injury if mishandled. Begin by disconnecting the garage door opener to prevent accidental operation while you’re working. Next, position the garage door fully open, securing it in place with C-clamps or locking pliers on the tracks just below the bottom rollers.
Wearing safety glasses and gloves is crucial to protect yourself from potential hazards such as snapped springs or falling debris. Ensuring proper safety precautions greatly reduces the risk of accidents during the replacement process.
4. Identify and Measure the Existing Springs
Before removing the old springs, take note of their specifications to ensure that the new springs you install are identical in terms of length, diameter, and wire gauge. Most extension springs are color-coded to indicate their strength or weight rating, so pay attention to these markings.
Use a tape measure to confirm the length of the springs when they are fully extended, as well as their coil diameter. Accurately identifying and measuring the existing springs ensures that the replacements you choose will provide the same level of performance and safety.
5. Disconnect the Safety Cables
Garage door extension springs typically have safety cables running through them to prevent the springs from flying across the garage if they break. Before removing the old springs, carefully disconnect the safety cables from their anchors or attachment points. Use pliers or a socket wrench to remove the fasteners securing the cables.
Be sure to keep track of the hardware, as you’ll need to reattach the safety cables when installing the new springs. Properly disconnecting the safety cables is essential for safely removing the old springs and installing the new ones.

6. Remove the Old Extension Springs
With the safety cables disconnected, you can now remove the old extension springs. Carefully unhook the spring from the eye bolt or pulley at one end, and then detach it from the garage door track at the other end. Use caution when handling the springs, as they may still hold some residual tension.
If the springs are particularly worn or broken, handle them gently to avoid injury. Removing the old extension springs is a critical step in the replacement process, and doing so carefully ensures that you can install the new springs without complications.
7. Install the New Extension Springs
Once the old springs are removed, it’s time to install the new extension springs. Start by attaching one end of the spring to the bracket on the garage door track. Ensure that the spring is properly aligned and that the attachment point is secure.
Next, stretch the spring and hook the other end onto the eye bolt or pulley. Take care to install the springs in the correct orientation, as reversing them can affect the door’s operation. Installing the new extension springs correctly is crucial for restoring the door’s balance and ensuring smooth operation.
8. Reattach the Safety Cables
After the new springs are installed, reattach the safety cables through the center of each spring. Secure the cables to the appropriate anchors or attachment points using the hardware you removed earlier.
The safety cables should run the full length of the spring and be securely fastened at both ends. These cables are a vital safety feature that prevents the springs from causing damage or injury if they break, so it’s essential to ensure they are properly installed. Reattaching the safety cables is a critical step in completing the spring replacement safely.
9. Test the Garage Door’s Balance and Operation
With the new springs and safety cables in place, it’s important to test the garage door to ensure that it is balanced and operating correctly. Remove the C-clamps or locking pliers from the tracks, and slowly lower the garage door.
The door should move smoothly and remain in place at any position when manually operated. If the door feels heavy or difficult to open, the springs may need further adjustment. Testing the garage door’s balance and operation ensures that the springs are providing the correct amount of tension and that the door functions safely.
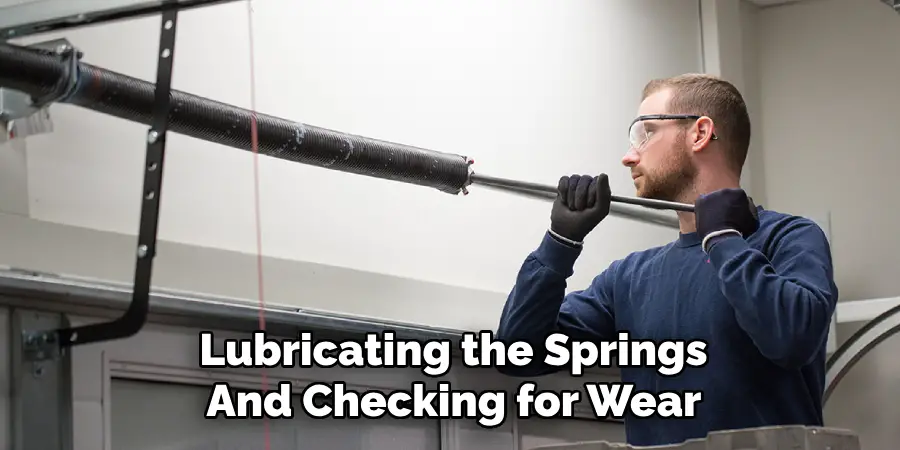
10. Make Final Adjustments and Perform Regular Maintenance
After testing, make any necessary adjustments to the spring tension to achieve the desired balance. This may involve adjusting the position of the springs on the brackets or tightening/loosening the attachment points. Once you’re satisfied with the door’s operation, perform a final inspection to ensure all components are securely fastened and in good working order.
Regular maintenance, such as lubricating the springs and checking for wear, will extend the life of your garage door system and prevent future issues. Making final adjustments and committing to regular maintenance ensures long-term safety and performance.
Conclusion
Replacing garage door extension springs is a crucial task that enhances the safety and functionality of your garage door system. By following the outlined steps, from ensuring safety precautions to regular maintenance, homeowners can effectively manage this process without the need for professional assistance.
A properly functioning garage door not only provides convenience but also ensures the safety of your property and loved ones. Thanks for reading, and we hope this has given you some inspiration on how to replace garage door extension springs!
I am Rick. I grew up helping my dad with his handyman service. I learned a lot from him about how to fix things, and also about how to work hard and take care of business. These days, I’m still into fixing things- only now, I’m doing it for a living.
I’m always looking for new ways to help people grow and develop. That’s why I have created this blog to share all my experience and knowledge so
that I can help people who are interested in DIY repair.