
A garage door opener is a vital component of modern home convenience, allowing easy access to your garage without the hassle of manual lifting. However, like any mechanical device, it can experience issues that might require re-engagement.
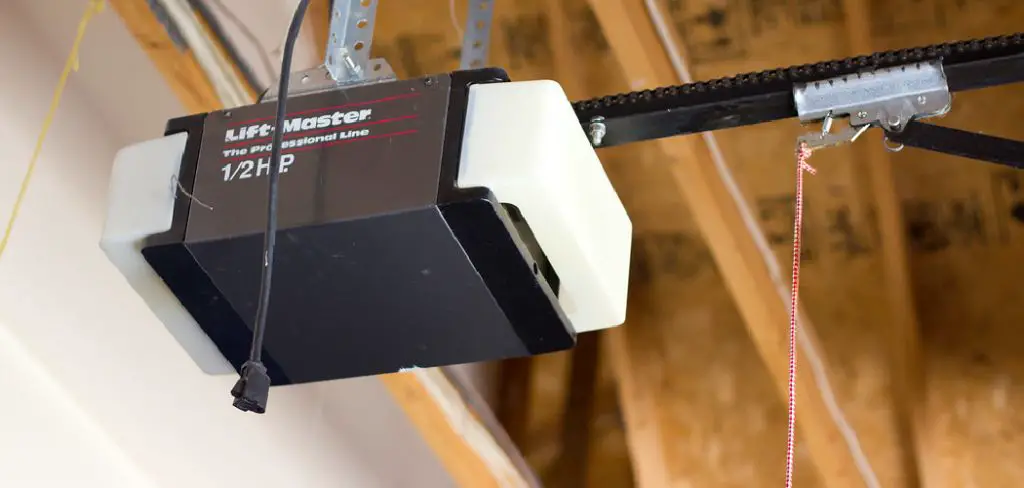
Whether due to a power outage, a malfunction, or simply a need for a reset, knowing how to re-engage your garage door opener can save you time and frustration. In this guide, we will walk you through how to re-engage a garage door opener, ensuring that you can return to the ease of automated entry into your garage.
What It Means to Re-Engage a Garage Door Opener
Re-engaging a garage door opener refers to the process of returning the garage door system to its automated functionality after it has been disconnected or disengaged. There are several reasons why this disconnection might occur, such as manual operation during a power outage or a temporary disengagement to troubleshoot problems.
When re-engaged, the opener’s mechanism aligns with the door, allowing it to respond to commands from the remote or wall switch again. Understanding this process is essential for maintaining the convenience and functionality of your garage door system.
Importance of Proper Re-Engagement
Proper re-engagement of a garage door opener is crucial for several reasons. Firstly, it ensures the safe and efficient operation of your garage door, reducing the risk of accidents caused by malfunctioning mechanisms. An improperly re-engaged door may not close fully, posing safety hazards for pets, children, or vehicles.

Secondly, maintaining the functionality of your garage door opener enhances the overall security of your home, as a disconnected garage door may leave your property vulnerable to intruders.
Additionally, regular practice of proper re-engagement can prolong the lifespan of the opener and its components, safeguarding your investment and ensuring you continue to benefit from the convenience of automated entry. Therefore, understanding and executing the correct re-engagement process is essential for optimal garage door performance.
10 Methods How to Re-Engage a Garage Door Opener
1. Identify the Issue
Before attempting to re-engage your garage door opener, it’s essential to identify why it became disengaged in the first place. Common issues that can cause the opener to disengage include power outages, mechanical failures, or accidental disengagement.
Look for signs such as the door being stuck, the opener making unusual noises, or the remote not working. Understanding the underlying issue helps you address it effectively and prevents future occurrences. By diagnosing the problem, you can tailor your approach to re-engage the opener properly.
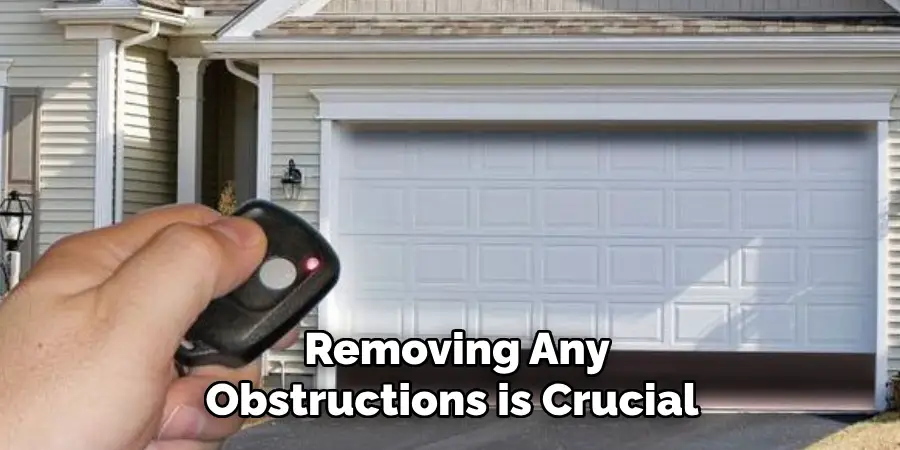
2. Check for Obstructions
One of the first steps in re-engaging your garage door opener is to ensure that there are no obstructions blocking the door’s path. Examine the area around the garage door for any items, debris, or obstacles that could prevent the door from closing or moving freely.
Sometimes, small objects or debris can interfere with the door’s operation and cause it to disengage. Removing any obstructions is crucial to ensure that the door can move smoothly and engage with the opener mechanism without interference.
3. Inspect the Garage Door Opener’s Gear and Sprocket
The gear and sprocket assembly in your garage door opener plays a critical role in engaging and disengaging the door. Inspect this assembly for any signs of wear, damage, or misalignment.
If the gears or sprockets are damaged or worn out, they may not engage properly, causing the door to become disengaged. Look for any broken or stripped gears, and check that the sprockets are properly aligned with the door’s chain or belt. Repairing or replacing damaged components in the gear and sprocket assembly can resolve engagement issues.
4. Reconnect the Garage Door to the Opener
If your garage door has become disconnected from the opener, you will need to manually reconnect it. Start by manually lifting the garage door to the fully open position. Locate the trolley or carriage on the opener rail, which is connected to the door’s lift mechanism.
Align the trolley with the door’s header bracket or lift arm, ensuring that the connection points are properly engaged. Pull the release handle or lever to reconnect the door to the opener’s trolley. This manual re-engagement will often restore the automatic functionality of the door.
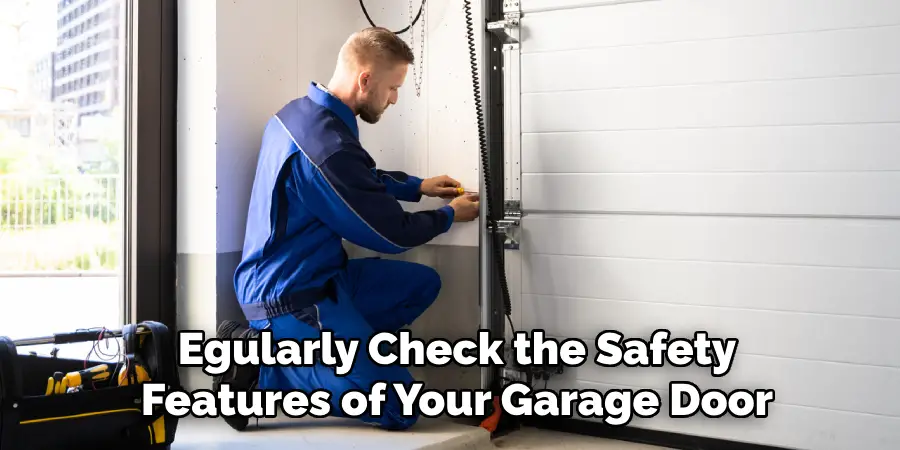
5. Check the Safety Sensors
Safety sensors, located near the bottom of the door tracks, play a crucial role in ensuring the safe operation of your garage door opener. If these sensors are misaligned or obstructed, they can prevent the door from engaging properly.
Check the sensors to ensure they are aligned directly across from each other and that their lenses are clean and free of obstructions. Adjust the sensors as needed to ensure proper alignment. Properly functioning sensors are essential for the garage door opener to operate safely and effectively.
6. Test the Manual Release Mechanism
Most garage door openers are equipped with a manual release mechanism that allows you to operate the door manually in case of a power outage or malfunction. Test the manual release mechanism by pulling the release cord or lever, then manually operate the door.
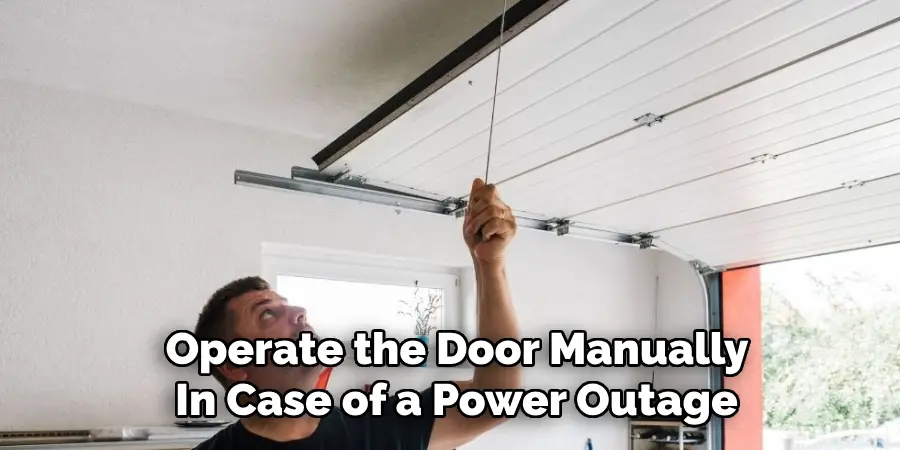
Ensure that the manual release mechanism is functioning correctly and that the door moves smoothly. After testing, re-engage the door by pushing it back into alignment with the opener’s trolley. Testing and re-engaging the manual release mechanism can help identify and resolve issues with the opener’s operation.
7. Check the Garage Door Opener’s Chain or Belt
The chain or belt that drives the garage door opener is a crucial component for proper operation. Inspect the chain or belt for any signs of slack, damage, or misalignment. If the chain or belt is loose, it may not properly engage with the door, causing issues with operation.
Adjust the tension of the chain or belt according to the manufacturer’s specifications to ensure proper engagement. A properly tensioned chain or belt is essential for the smooth operation of the garage door opener and effective re-engagement.
8. Examine the Door Springs
The door springs, whether torsion or extension springs, provide the necessary counterbalance to lift the garage door. If the springs are broken or out of adjustment, they can cause the door to become disengaged or operate improperly. Inspect the springs for any signs of damage or wear.
If the springs are broken or misaligned, they may need to be repaired or replaced by a professional. Properly functioning door springs are essential for the safe and efficient operation of the garage door opener.
9. Reset the Garage Door Opener
If you’ve tried all other methods and the garage door opener still isn’t engaging properly, consider performing a reset. To reset the opener, unplug it from the power source and wait for about 30 seconds before plugging it back in.
This action will clear any temporary glitches or errors in the system. After resetting, follow the manufacturer’s instructions to reprogram any remote controls or keypads if necessary. Resetting the garage door opener can resolve issues and restore proper functionality.
10. Consult a Professional
If you’ve followed all the steps and your garage door opener still isn’t engaging properly, it may be time to consult a professional. A certified garage door technician can diagnose and repair more complex issues that may not be easily identifiable or fixable by a DIY approach.
Professional technicians have the expertise and tools to address problems with the opener’s motor, electronics, or other components that could be affecting engagement. Seeking professional assistance ensures that any underlying issues are thoroughly addressed and resolved.
Things to Consider When Maintaining Your Garage Door Opener
- Regular Inspections: Schedule regular inspections of your garage door opener to catch any potential issues early. This will help prolong the lifespan of your opener and ensure safe operation.
- Weather Conditions: Be mindful of extreme weather conditions, as they can affect the operation of your garage door opener. Excess moisture can lead to rust, while extreme cold can cause lubricants to thicken, impacting performance.
- Lubrication: Keep all moving parts of the garage door opener properly lubricated. This includes hinges, rollers, and the chain or belt. Regular lubrication reduces friction and wear, ensuring smoother operation.
- Safety Features: Regularly check the safety features of your garage door opener, such as the auto-reverse function and safety sensors. Ensure they are functioning correctly to prevent accidents and ensure safe usage.
- Power Supply: Ensure that the power supply is reliable and not subject to frequent outages. Consider installing a backup power source if your area is prone to power interruptions, as this can help keep your garage door functional.
- User Manuals and Guides: Keep the user manual handy for reference on maintenance and troubleshooting. Familiarising yourself with the specific requirements of your model can aid in effective care.
Conclusion
In summary, ensuring the proper operation of your garage door opener is essential for both convenience and safety. By regularly inspecting and maintaining key components such as the gear and sprocket, safety sensors, and door springs, you can prevent common issues that lead to disengagement.
If problems arise, following the outlined steps can often resolve the situation without the need for professional assistance. Thanks for reading, and we hope this has given you some inspiration on how to re-engage a garage door opener!
I am Rick. I grew up helping my dad with his handyman service. I learned a lot from him about how to fix things, and also about how to work hard and take care of business. These days, I’m still into fixing things- only now, I’m doing it for a living.
I’m always looking for new ways to help people grow and develop. That’s why I have created this blog to share all my experience and knowledge so
that I can help people who are interested in DIY repair.