How to program HomeLink to genie garage door opener with the HomeLink system can seem intimidating, but it’s a simple process that anyone can do. Whether you want the convenience of a universal garage door control or plan to streamline your home automation setup, this guide will walk you through every step. The HomeLink system works seamlessly with Genie openers, giving you quick and reliable access to your garage door straight from your vehicle.
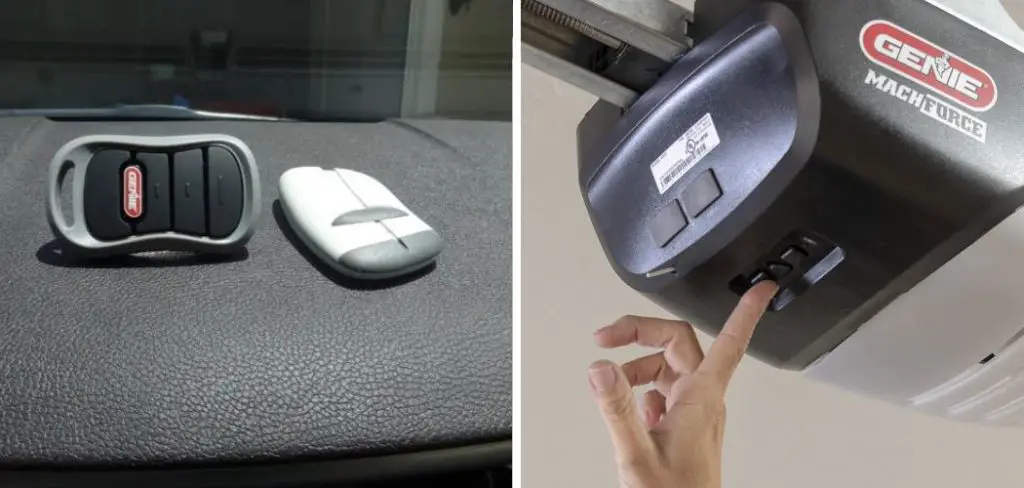
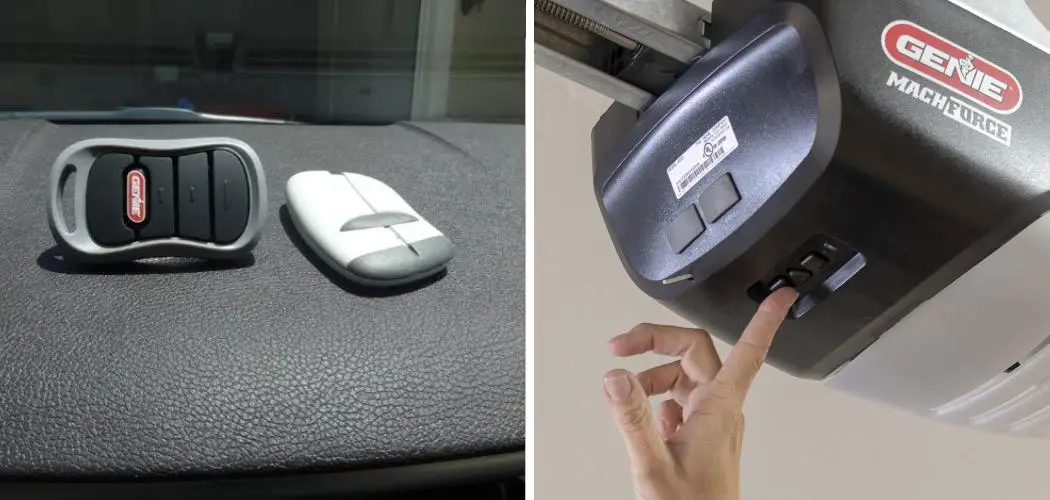
Before you begin, ensure that your Genie garage door opener is compatible with the HomeLink system. Most Genie models support HomeLink, but checking your opener’s user manual or the HomeLink compatibility website can save time. Additionally, locate the “Learn” or “Program” button on your Genie garage door opener, which is typically found on the motor housing. You will also need your vehicle parked close to the garage with the engine off to prevent any interruptions during the process.
This guide will take you step-by-step through how to program HomeLink to Genie garage door opener, ensuring you’re equipped to complete the process safely and efficiently. By following these clear instructions, you’ll be enjoying easier access to your garage in no time.
Why Programming HomeLink is Essential
The HomeLink system is more than just a convenient feature—it simplifies your life and integrates your car with your home security systems. When you program a Genie garage door opener to HomeLink, you eliminate the need for multiple remote controls and reduce the risk of misplacing them. This can make vehicle-to-home connectivity effortless.
Additionally, knowing how to program HomeLink ensures you can upgrade or reprogram it anytime you make changes—such as switching vehicles, adding a new garage door opener, or moving into a new home. It’s an important skill that enhances both the security and usability of your daily life.
Perhaps most critically, programming HomeLink improves safety by allowing you to open or close the garage without fumbling for a separate remote, especially during bad weather or nighttime. This makes it not just a luxury but a practical tool for everyday use.
Step-by-Step Guide to How to Program HomeLink to Genie Garage Door Opener
Follow these steps to successfully program your HomeLink system to work with your Genie opener.
Step 1. Prepare Your HomeLink System for Programming
Start by checking your vehicle’s HomeLink system. Most cars with HomeLink include three buttons located on the overhead console, rearview mirror, or visor. Identify the button you want to program.
To begin, press and hold your chosen button and the “Program” button simultaneously to erase any previous programming. You will usually see a light indicator flashing quickly, confirming the system is ready.
Make sure your Genie remote and garage door opener are also handy. Familiarize yourself with the location of the “Learn” button on your Genie opener, typically found near the antenna wire. This preparation phase ensures you can transition smoothly through the next steps without interruptions.
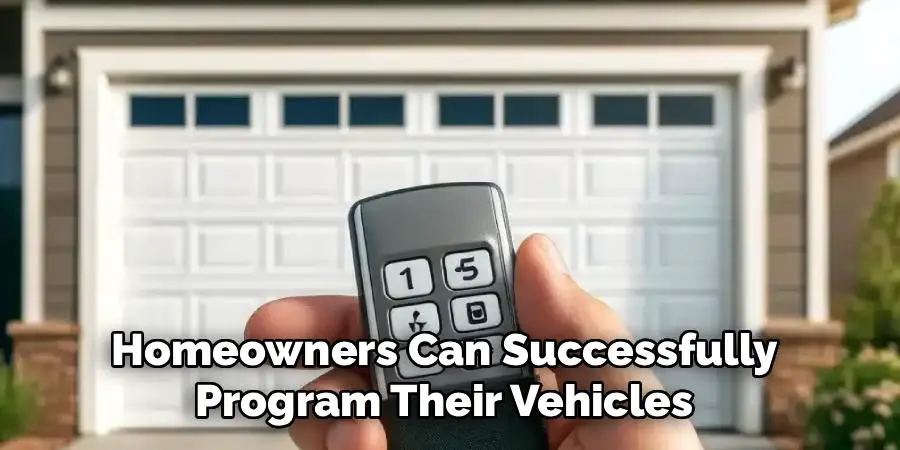
Step 2. Activate the “Learn” Button on Your Genie Opener
Locate the “Learn” button on your Genie garage door opener. This button is often red, orange, or purple and is located at the back or side of the opener near the antenna. Press and release the button; this activates the device’s programming mode.
You’ll have around 30 seconds to complete the next step, so be ready to proceed quickly. If you miss the window, simply press the “Learn” button again. This stage is crucial for linking your Genie opener with your HomeLink system.
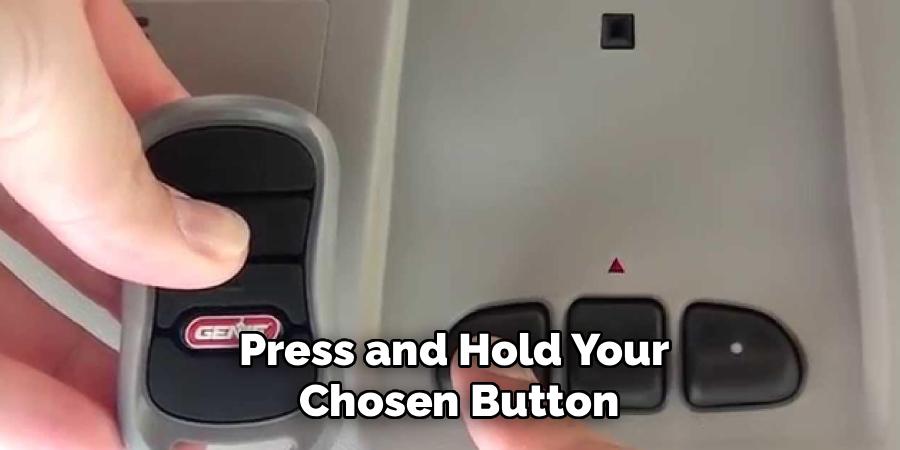
Step 3. Pair the HomeLink With Your Genie Remote
Grab your Genie remote. Standing a few feet away from your vehicle, press and hold the remote’s “Open” button while simultaneously pressing and holding your selected HomeLink button in the car.
Hold the buttons until the indicator light on the HomeLink system begins to flash more rapidly. The system is now learning the frequency of your Genie remote. This process captures and stores the same signal your remote uses to operate the garage door.
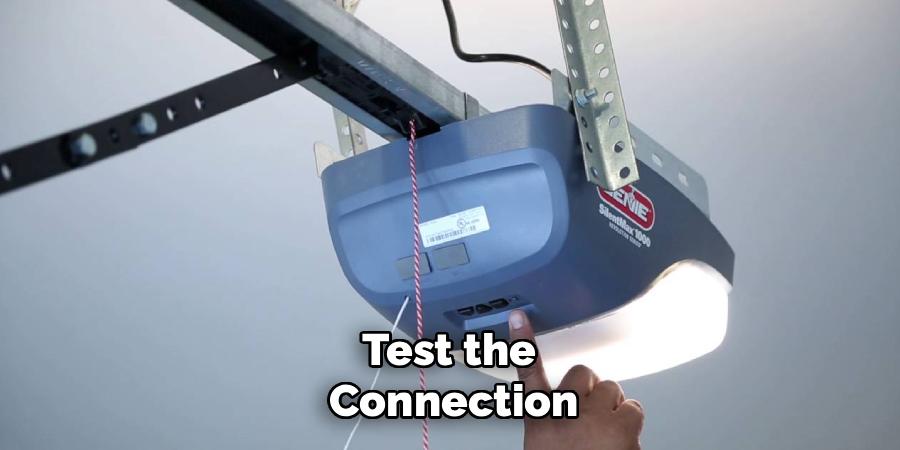
Step 4. Test the Connection
Once the indicator on your HomeLink button flashes rapidly, release both buttons. Then, press the programmed HomeLink button alone to test the connection. If the garage door responds, you’ve programmed it successfully.
If the garage doesn’t respond, repeat Step 3 to ensure the frequency signal was captured correctly. Occasionally, this step may require a second attempt, especially if you’re programming your system for the first time.
Step 5. Reprogram for Rolling Code Openers
Many Genie openers use a rolling code system for added security. After initial programming, return to your Genie “Learn” button and press it once more. Then, within 30 seconds, press and hold the initially programmed HomeLink button for at least two seconds.
This additional step ensures your HomeLink system can recognize the rolling code feature and operate correctly. Rolling codes frequently change for added security, so this step is vital if your opener includes this feature.
Step 6. Confirm Compatibility and Troubleshoot
If you encounter any issues, double-check that your Genie opener is compatible with HomeLink. Most modern Genie openers and vehicles made after 2008 integrate seamlessly. If your opener is older, you might need an external HomeLink compatibility bridge.
Additionally, ensure that your vehicle is parked close enough to the garage during programming. Distance can sometimes interfere with signal strength, causing failed attempts to pair the devices.
Step 7. Finalize and Secure the Setup
Once your HomeLink buttons are successfully programmed, test the system several times to ensure consistency. Always double-check your garage door’s response, particularly its range and frequency accuracy.
If everything functions smoothly, you’re finished! By taking the time to understand how to program HomeLink to Genie garage door opener, you’ve simplified your routine and enhanced your home access system.
Safety Warning
When programming your HomeLink to a Genie garage door opener, always prioritize safety. Ensure that no one is near the garage door while testing its operation to avoid accidents or injuries. Keep hands and objects clear of the garage door’s path, and never attempt to program the system while the door is in motion. Always follow the manufacturer’s instructions carefully to maintain a secure and reliable setup.
Troubleshooting Tips
If you encounter any issues while programming your HomeLink system, there are a few troubleshooting tips that may help resolve the problem:
- Make sure that you are within range of your garage door opener and not blocked by any obstacles. Move closer to the garage door if necessary.
- Check the batteries in the remote control and replace them if needed.
- Double-check that you are following the correct steps for programming your specific model of HomeLink and garage door opener.
- Clear the memory of your HomeLink system and start from scratch if all else fails.
If none of these troubleshooting tips seem to be working, it may be time to consult a professional. A garage door repair technician will have the necessary knowledge and tools to diagnose and fix any issues with your garage door opener or HomeLink system. They can also provide additional guidance on how to properly program your specific model.
Another option is to reach out to the manufacturer of your garage door opener or HomeLink system for assistance. Many companies have customer support hotlines or online resources available for troubleshooting and programming help.

Lastly, it’s important to remember that safety should always come first when dealing with a malfunctioning garage door opener. If you suspect there may be an issue with the mechanical or electrical components of
Frequently Asked Questions
Does HomeLink work with all Genie garage door openers?
HomeLink is compatible with most Genie garage door openers manufactured after 1995. However, older Genie models or systems using fixed codes may require an additional bridge accessory. Always consult your Genie opener’s manual for compatibility details.
What do I do if programming fails?
If programming doesn’t work, ensure that both your HomeLink system and Genie remote have working batteries. Additionally, confirm you’re following the correct steps based on whether your Genie opener uses rolling codes or fixed codes. Repeating the steps often resolves minor errors.
Can I program multiple garage doors to my HomeLink system?
Yes, HomeLink allows programming of up to three devices. Simply choose a separate button for each additional door and repeat the programming process for the different openers. This is a convenient feature for multi-garage households.
How can I reset my HomeLink system?
To reset your HomeLink system, press and hold the two outer buttons simultaneously for about 20 seconds. The indicator light will blink rapidly when the reset is complete. This erases all prior programming, so you can start fresh.
Do I need a professional to program my HomeLink?
Not at all! Programming HomeLink is designed to be beginner-friendly. With a bit of patience and attention to detail, homeowners can successfully program their vehicles and Genie openers without professional help.
Conclusion
Programming your garage door opener doesn’t have to be daunting. By following this detailed guide on how to program HomeLink to Genie garage door opener, you’ve learned that the process is straightforward and highly rewarding. You’ve not only enhanced your vehicle’s utility but also improved your daily convenience and home security.
With your HomeLink system now synced to your Genie garage door opener, you can enjoy seamless access to your garage at the touch of a button. Always remember to test the system for proper functionality after programming and make any necessary adjustments if needed. This small setup effort goes a long way in simplifying your routine and ensuring reliable performance over time.
Don’t hesitate to follow these steps and make your life easier. With HomeLink programmed to your Genie opener, your garage door responds at the touch of a button—no additional remotes or complicated systems required. Now that you know what to do, it’s time to program yours and enjoy the benefits firsthand!
I am Rick. I grew up helping my dad with his handyman service. I learned a lot from him about how to fix things, and also about how to work hard and take care of business. These days, I’m still into fixing things- only now, I’m doing it for a living.
I’m always looking for new ways to help people grow and develop. That’s why I have created this blog to share all my experience and knowledge so
that I can help people who are interested in DIY repair.