Programming a Chevrolet garage door opener can seem like a daunting task, but it is a straightforward process that enhances the convenience and security of your garage. Whether you are replacing an old opener or setting up a new one, understanding the steps involved ensures a smooth setup.
This guide on how to program chevrolet garage door opener will walk you through the necessary actions to pair your Chevrolet vehicle with your garage door opener, enabling you to open and close your garage with just the press of a button.
By following the detailed steps outlined, you can enjoy the comfort of seamless access to your garage without the hassle of traditional remote controls.
Why Program Your Chevrolet Garage Door Opener?
Programming your garage door opener to work with your Chevy vehicle has numerous benefits. First and foremost, it eliminates the need for an additional remote control, reducing clutter in your car and minimizing the risk of losing the remote.
Additionally, programming allows you to open and close your garage without having to get out of your car, making it a convenient option for individuals with mobility issues or those who are frequently on the go.
Moreover, programming creates an added layer of security by ensuring that only your vehicle can access your garage. This feature prevents unauthorized entry from anyone trying to use a generic garage door opener or attempting to manually open the garage. Overall, programming offers convenience, safety, and peace of mind.
You’ll Need
- Your Chevrolet Vehicle With a Compatible Homelink® System (Usually Found in Mirrors or Visors)
- A Functioning Garage Door Opener With Its Remote Control
- A Ladder (If Needed)
- Assistance of Another Person (If Needed)
- Patience and Attention to Detail
- Clear Instructions (Such as This Guide)
- Good Lighting
- Safety Equipment (Gloves, Goggles, Etc.)
8 Steps on How to Program Chevrolet Garage Door Opener
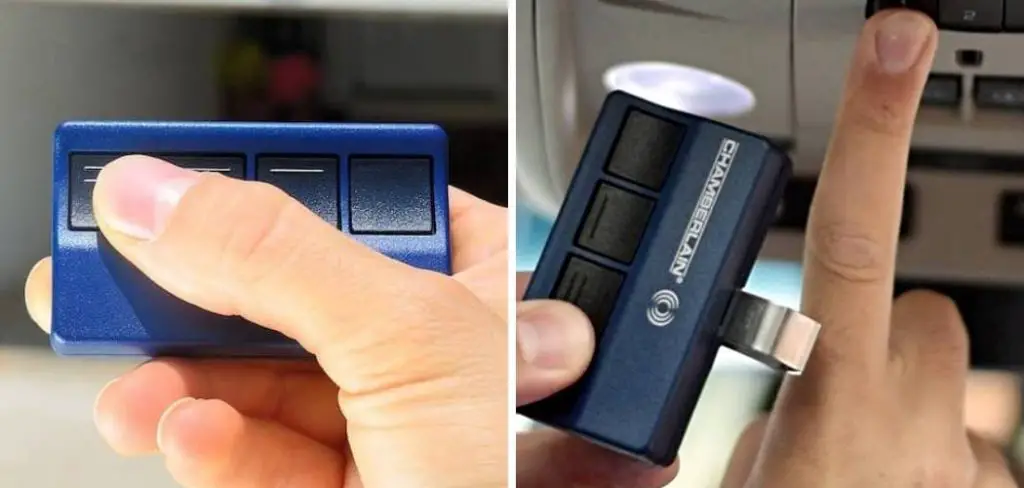
Step 1: Locate the Homelink® Buttons in Your Vehicle
To begin the programming process, identify the Homelink® buttons in your Chevrolet vehicle. These buttons are typically located in the overhead console, which may include the rear-view mirror or visor area. You should see three buttons arranged in a row, often marked with icons representing a house or garage.
Ensure your vehicle is in the “Run” position, but the engine does not need to be started. Once you’ve located the Homelink® buttons, you’re ready to proceed to the next step of programming your garage door opener.
Step 2: Reset the Homelink® Buttons (If Needed)
If your Homelink® buttons have been previously programmed to work with another garage door opener, you will need to reset them before proceeding. To do this, press and hold the two outer buttons on your Homelink® console until the LED light begins to flash rapidly. This process may take up to 20 seconds.
Once the light is flashing quickly, release both buttons and proceed to Step 3.
Step 3: Prepare Your Remote Control
Before you can program your garage door opener, you need to have the remote control handy for your existing garage door opener. Make sure the remote is functioning properly and has a fresh battery if necessary.
This is crucial, as a weak battery may cause programming issues. Position yourself within range of the garage door opener, ideally at a distance of about one to three feet. With the remote control ready, you can move on to the next step in the programming process.
Step 4: Press and Hold the First Homelink® Button
With your remote control ready and within range, the next step is to press and hold the first Homelink® button that you wish to program. While holding the button, simultaneously press and hold the button on your garage door remote control. Keep both buttons pressed until the Homelink® LED light changes from a slow blink to a rapid blink.
This change indicates that the programming signal is being received and that the Homelink® system is successfully learning the code from your garage door opener remote. Once the LED light blinks rapidly, release both buttons, and you’re ready to move on to the next step.
Step 5: Repeat the Process for the Remaining Buttons
Now that you have successfully programmed the first Homelink® button, you can continue this process for any additional buttons you wish to configure. Simply select the next Homelink® button you want to program and repeat the steps outlined in Step 4. Hold the chosen Homelink® button while pressing and holding the corresponding button on your garage door remote.
Again, wait for the LED light to change from a slow blink to a rapid blink, indicating that the programming has been successful. Ensure each button is programmed to the desired function—this could include different garage doors or gates if needed. Once you have completed programming all desired buttons, you can proceed to the final step of the process.
Step 6: Test Your Homelink® Buttons
Now that you’ve programmed your Homelink® buttons, it’s essential to test them to ensure everything is functioning correctly. Start by positioning your vehicle within range of the garage door. Once you’re situated, press the first Homelink® button you programmed. Observe the garage door—if it opens or closes as expected, the programming was successful.
Repeat this process for any additional buttons you have programmed to confirm they are all functioning properly. If any buttons do not work, revisit the previous steps to ensure you followed the programming instructions accurately, and consider resetting the buttons again if necessary.
Proper testing guarantees that your new setup provides the convenience and security you desire.
Step 7: Enjoy Your Garage Door Opener
Congratulations! You have successfully programmed your Chevrolet garage door opener and can now enjoy the convenience of seamless access to your garage. No more fumbling with separate remote controls or struggling to manually open the door in inclement weather. With just a press of a button, you can easily enter and exit your garage without hassle.
Step 8: Troubleshooting Tips
If you encounter any issues during the programming process, here are some troubleshooting tips that may help:
- Ensure your vehicle is within range of the garage door opener.
- Double-check that you are pressing and holding both Homelink® and remote buttons simultaneously.
- If the LED light on your Homelink® buttons stays on or does not turn on at all, try resetting the buttons again.
- If you have recently had a power outage or changed the batteries in your garage door remote, you may need to reprogram your Homelink® buttons.
- Consult your vehicle owner’s manual for specific instructions and troubleshooting tips for your particular make and model of Chevrolet.
By following these steps and troubleshooting tips on how to program chevrolet garage door opener, you should be able to successfully program your Chevrolet garage door opener without any issues. Enjoy the convenience and security of easily accessing your garage with just the press of a button!
Frequently Asked Questions
Q: Can I Program My Chevrolet Garage Door Opener With a Universal Remote Control?
A: Yes, most universal remote controls can be programmed to work with your Chevrolet garage door opener. Please consult the instructions for your specific universal remote for programming steps. If you encounter any issues, refer to your vehicle owner’s manual or contact the manufacturer for assistance.
Q: Can I Program More Than One Garage Door Opener With My Homelink® Buttons?
A: Yes, you can program up to three garage door openers or gate operators with your Homelink® buttons. Simply follow the steps outlined above for each additional opener or operator. You can also reprogram the buttons at any time if you need to change or add a new opener.
Q: What Should I Do If My Chevrolet Garage Door Opener Is Not Working After Programming?
A: Try resetting your Homelink® buttons and reprogramming them again. Make sure you are following the correct programming steps and that your vehicle is within range of the garage door opener. If the issue persists, consult your vehicle owner’s manual or contact a professional for assistance.
Q: How Often Should I Replace the Batteries in My Chevrolet Garage Door Opener Remote?
A: It is recommended to replace the batteries in your garage door opener remote at least once a year or whenever they start to show signs of weakness. This will ensure optimal performance and avoid any programming issues.
Conclusion
Programming your Chevrolet garage door opener with Homelink® can greatly enhance the convenience and efficiency of accessing your garage. By following the outlined steps and troubleshooting tips on how to program chevrolet garage door opener, you can ensure a smooth setup and enjoy seamless operation of your garage door opener.
The ease of control with just the push of a button not only saves you time but also adds an extra layer of security to your home.
Should any issues arise, refer back to the troubleshooting section or seek assistance for a quick resolution. Embrace the modern functionality of your vehicle with the comfort of automatic garage access!
I am Rick. I grew up helping my dad with his handyman service. I learned a lot from him about how to fix things, and also about how to work hard and take care of business. These days, I’m still into fixing things- only now, I’m doing it for a living.
I’m always looking for new ways to help people grow and develop. That’s why I have created this blog to share all my experience and knowledge so
that I can help people who are interested in DIY repair.