
Installing a garage door screen can transform your garage into a functional living space while improving ventilation and keeping bugs out. Whether you’re looking to create a workshop, home gym, or simply enjoy fresh air without pests, a garage door screen is a simple and effective solution.

Before beginning the installation process, ensure you have all the necessary tools and materials. Common items you will need include a measuring tape, screwdriver, drill, and the how to install garage door screen kit. Start by measuring the dimensions of your garage door opening to ensure the screen fits correctly. Once the measurements are confirmed, unpack the screen kit and familiarize yourself with the components, such as the mounting brackets and retractable screen panel. Proper preparation will make the installation straightforward and efficient.
If you’re curious about how to install a garage door screen, this guide breaks down the process into manageable steps. With a few tools and some basic DIY knowledge, you’ll soon have a screen that improves your garage’s usability and creates a more enjoyable environment. Follow along to make your installation seamless and hassle-free!
Why Consider Installing a Garage Door Screen
Adding a garage door screen offers multiple benefits beyond insect protection. These screens are designed to create a hybrid indoor-outdoor space, combining utility and leisure. They encourage airflow, making garages more comfortable during warm seasons. Additionally, they enhance privacy and reduce glare while maintaining a connection to the outdoors.
For families and DIY enthusiasts, garage door screens extend usable space at an affordable cost compared to full-scale renovations. Fitness buffs can use their garages for workouts without feeling suffocated, while hobbyists get more natural light for creativity. Given their versatility, garage door screens have become a popular upgrade for homeowners everywhere.
Step-by-Step Guide: How to Install Garage Door Screen
Step 1: Measure Your Garage Door
The first and most important step is getting accurate measurements. Using a reliable tape measure, record the width and height of the garage door opening. Pay close attention to both dimensions to ensure the screen fits snugly without leaving any gaps that could compromise its functionality.
It’s important to measure at multiple points—near the bottom, middle, and top of the garage door. This helps account for any irregularities in the frame that might affect installation. Once you have all your dimensions, refer to the screen manufacturer’s sizing guide to select the right product. If your measurements don’t align perfectly with standard sizes, opt for an adjustable screen or one that can be trimmed to fit.

Step 2: Choose the Right Screen Material
Garage door screens are available in various materials, including polyester, fiberglass, and PVC-coated mesh. Fiberglass screens are popular due to their durability and resistance to tears, while polyester tends to offer excellent flexibility and UV protection.
When selecting your screen, consider how you’ll use the space. If you live in a mosquito-prone area, a fine mesh may be ideal for keeping bugs out. However, if airflow and visibility are top priorities, a wider mesh might suit your needs. Always check the product’s specifications to ensure it meets your expectations for quality and durability.
Step 3: Assemble the Screen Frame
Most garage door screens include a pre-designed frame or adhesive strips for easy mounting. Follow the manufacturer’s assembly instructions carefully. If additional tools are required—such as a screwdriver or drill—keep them handy before starting.
Fit the screen material into the frame, ensuring it’s taut and wrinkle-free. A loosely installed screen can cause gaps or sagging, which diminishes its effectiveness. Some kits use magnetic closures, while others have zippers—ensure these mechanisms are aligned properly for seamless operation once installed. Confirm all fasteners are secure before proceeding to the next step.
Step 4: Clean the Mounting Surface
Before affixing the screen to the garage doorframe, thoroughly clean the mounting surface. Dust, dirt, or grease may affect adhesive strength and longevity, particularly with screen kits that use adhesive Velcro strips or mounting brackets.
Use a damp cloth and mild detergent to wipe down the entire perimeter of the garage doorframe. Once dust and grime are removed, dry the area with a clean towel. For best results, allow the surface to air dry completely before attaching any adhesive components. Clean preparation ensures durability and reduces the chance of the screen dislodging over time.

Step 5: Attach the Screen to the Doorframe
Begin aligning the screen with the garage door opening, ensuring all corners of the screen material match the edges of the frame dimensions. Use provided mounting hardware, adhesive strips, or brackets to secure the screen.
For magnetic garage door screens, simply line up the screen’s sides with the frame and attach the magnets along the edges. If the system uses zippers, secure these firmly to avoid openings where insects might enter. Adjust as necessary to ensure the entire screen hangs evenly, creating a tight seal. Consistency in placement makes all the difference to maintaining the integrity of the setup.
Step 6: Secure the Bottom Edges
To prevent the screen from flapping in strong winds or creating openings at the ground level, pay attention to securing the bottom edges. Many screens come with weighted bottoms or specific fasteners designed for this purpose.
Place any provided weights evenly across the lower edge of the screen. If your kit doesn’t include weights, consider using DIY alternatives such as sandbags or filled tubing to hold the material in place. Ensuring the bottom is heavy yet flexible makes it easy for people or pets to pass through the screen while minimizing unwanted drafts.
Step 7: Adjust for Accessibility
If your screen includes a center-split access point (often magnetic or zipped), test its ease of operation. Adjust the alignment if needed to ensure you can open and close the screen without resistance.
These access points allow for smooth transitions in and out of the garage without needing to retract the screen entirely. Confirm that people of all heights can comfortably use the entry system, and check if it’s pet-friendly if you have animals frequently accessing the area. Proper adjustments here add significant convenience to the overall setup.
Step 8: Test Ventilation and Light
One key benefit of a garage door screen is improved airflow and natural light—test whether the installed screen delivers on this promise. Open the garage door fully, and note how the screen suppresses sunlight glare while still allowing adequate illumination for indoor activities.
Additionally, feel for airflow. The screen should provide circulation without sudden gusts or uneven patterns caused by openings along the mount. If anything feels off, inspect the edges once more for gaps, and secure any areas where the frame might be loose. Regular testing aids in perfecting setups that suit your needs completely.
Step 9: Maintain Your Garage Door Screen
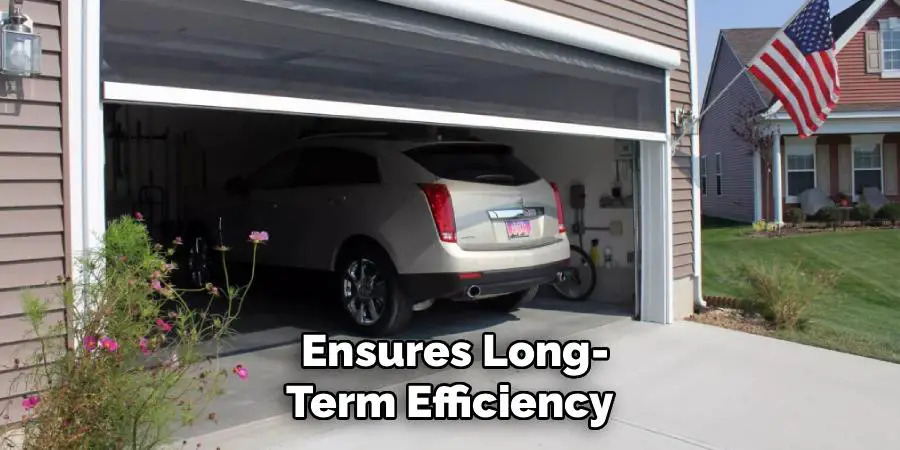
Once installed, maintaining your garage door screen ensures long-term efficiency. Inspect it periodically for wear or damage—frayed edges, holes, or loose fastenings should be addressed promptly.
To clean the screen, lightly vacuum or wipe it down with a damp cloth to remove accumulated dust or debris. Avoid using harsh chemicals that might degrade the material, especially if you chose a screen made from polyester or fiberglass. With proper care, your newly installed garage door screen will provide ongoing comfort and functionality.
Screen Maintenance Tips
Proper maintenance of your garage door screen not only extends its lifespan but also ensures it continues to function optimally. Begin by regularly inspecting the screen for debris buildup, especially in areas with heavy pollen or dirt exposure. Clean the screen monthly using mild soap and water, and gently scrub with a soft bristle brush to avoid damaging the material. Additionally, check the frame and fastenings for any signs of wear or loosening, tightening screws or replacing clips as needed.
Lubricating the track or zippered edges (if applicable) with a silicone-based spray can also help maintain smooth operation. Lastly, during extreme weather, consider removing or retracting the screen to prevent unnecessary stress on the material. With consistent care, your garage door screen will remain in excellent condition for years to come.
Frequently Asked Questions
1. What tools do I need to install a garage door screen?
Most garage door screens come with a complete installation kit. However, standard tools like a tape measure, screwdriver, and drill may be necessary. For adhesive-mounted screens, cleaning supplies like a sponge and detergent are also helpful for preparing the mounting surface.
2. Can a garage door screen work with an automatic garage door?
Yes, most garage door screens are designed to be compatible with automatic doors. They are set up to hang independently from the garage door’s mechanical system, allowing the main door to operate while keeping the screen in place.
3. Are garage door screens pet-friendly?
Many garage door screens are pet-friendly due to magnetic closures or easy-to-operate zippers, which allow animals to pass through independently. Look for screens specifically labeled as pet-friendly for added durability and convenience.
4. How long does it take to install a garage door screen?
For most DIY enthusiasts, installation can be completed within one to two hours. The exact time varies based on experience level and the complexity of the screen design. Pre-measuring and following manufacturer instructions can streamline the process.
5. Can I leave the garage door screen up year-round?
This depends on climate and screen material. Durable options like fiberglass can handle year-round exposure, but manual removal during extreme weather conditions (e.g., heavy snow or storms) may extend the screen’s lifespan.

Conclusion
Adding a garage door screen to your home is a great way to enhance functionality, comfort, and ventilation in your garage. Learning how to install garage door screen is a straightforward process that transforms this space into a versatile, bug-free zone.
Follow these step-by-step instructions to set up a garage door screen effectively and enjoy improved airflow and usability. With regular maintenance and proper care, your garage will become a favorite spot for work, exercise, or leisure activities. Start your installation today—you’ll love the added convenience and comfort it brings to your home!
I am Rick. I grew up helping my dad with his handyman service. I learned a lot from him about how to fix things, and also about how to work hard and take care of business. These days, I’m still into fixing things- only now, I’m doing it for a living.
I’m always looking for new ways to help people grow and develop. That’s why I have created this blog to share all my experience and knowledge so
that I can help people who are interested in DIY repair.