
How to install a subpanel in garage can be a crucial step in enhancing your home’s electrical system, especially if you need additional power for tools, vehicles, or other equipment.
A subpanel allows for greater flexibility and convenience by providing dedicated circuits for various appliances and devices, reducing the load on your main panel. In this guide, we’ll walk you through the essential steps to safely and effectively install a subpanel in your garage, ensuring you understand the electrical requirements and safety precautions necessary for a successful project.
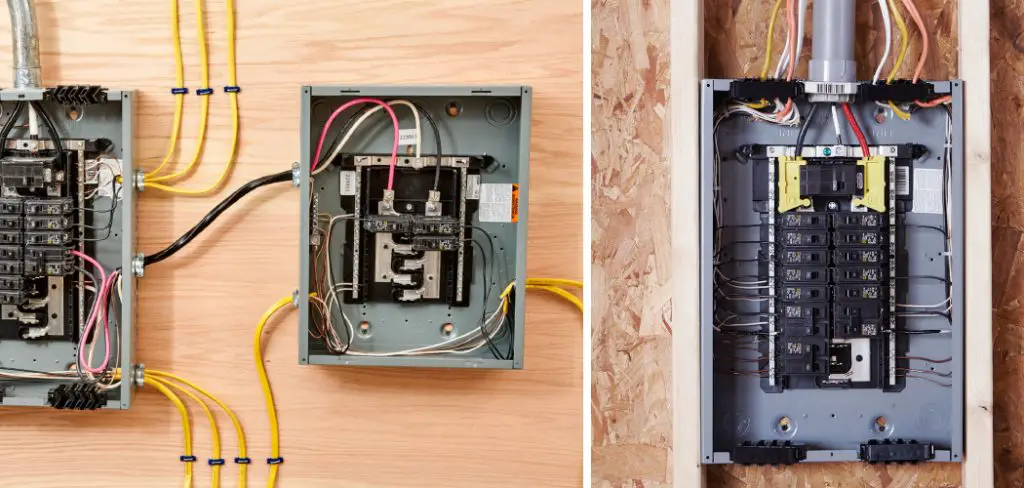
Whether you’re a seasoned DIYer or a beginner looking to expand your skills, this installation process can help you better manage your garage’s electrical needs. Let’s get started!
What are the Benefits of Installing a Subpanel in Garage?
Installing a subpanel can bring several benefits to your home, including increased capacity and convenience. Here are some of the main advantages you’ll experience with a sub panel in your garage:
- Additional Circuits: A subpanel allows you to add more circuits for appliances and devices, reducing the load on your main panel and preventing overloading. This can also give you more flexibility in organizing your garage space.
- Dedicated Circuits: A subpanel allows you to have dedicated circuits for specific appliances or equipment, which is especially beneficial for power-hungry tools like welders or air compressors. This improves performance and enhances safety by avoiding potential circuit overloads.
- Separation of Electrical Systems: A separate sub panel in your garage can keep the electrical systems of your home and garage separate. This can be particularly useful for insurance purposes and improve overall safety.
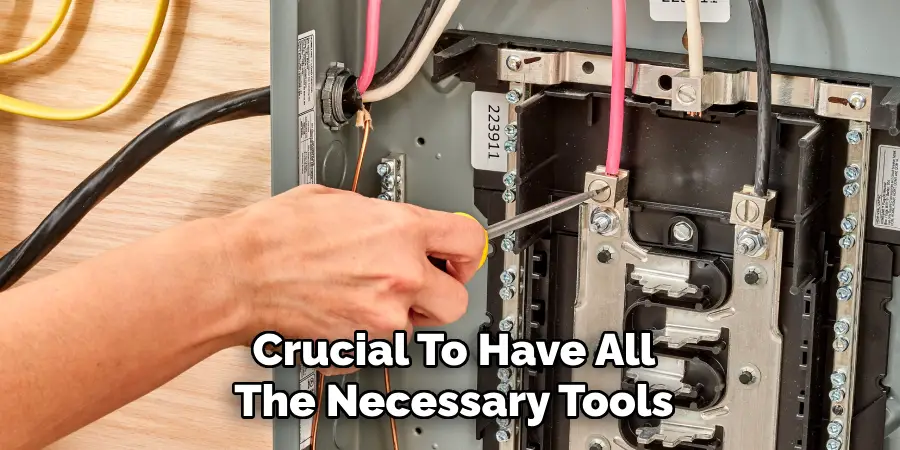
Gather Your Tools and Materials
Before you begin, it’s crucial to have all the necessary tools and materials on hand. This will ensure a smooth installation process without any delays or interruptions. Here are some of the essential items you’ll need:
- Subpanel box (ensure it has enough slots for your circuits)
- 100 amp double-pole breaker
- Appropriate-sized feeder wires (based on subpanel capacity)
- Grounding wire
- Wire strippers
- Cable clamps
- Screwdriver set
- Hammer drill and bits
- Drill/driver set
- Plan for wiring layout
It’s also important to note that, depending on your specific subpanel and garage setup, you may require additional tools, so be sure to research and gather all necessary items beforehand.
10 Easy Steps on How to Install a Subpanel in Garage
Step 1: Plan Your Installation Site
Begin by selecting the ideal location for your subpanel. It should be easily accessible, away from moisture, and near your main electrical panel. Ensure enough space to accommodate both the subpanel and any necessary wiring. Check local codes and regulations to confirm that your chosen location meets all safety requirements. Mark the area where you will mount the subpanel, typically at a height that is easy to reach while still allowing for proper ventilation.
Step 2: Turn Off the Power at the Main Panel
Before you begin the installation, safety is paramount. Locate your main electrical panel and turn off the power to ensure there is no risk of electrical shock during the installation process. It’s advisable to use a voltage tester to verify that no power is running in the area where you will be working. This precaution helps prevent accidents and protects you and your new subpanel from damage.
Step 3: Install the Subpanel Mounting Bracket
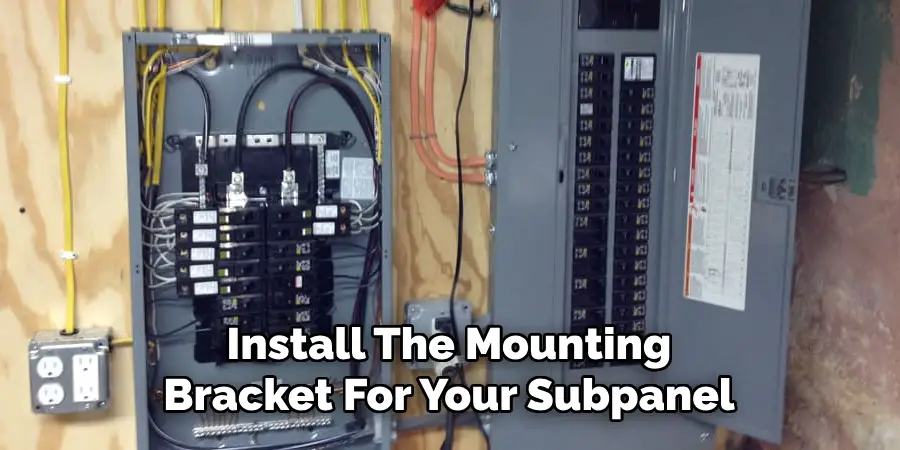
Once you have ensured that the power is off, the next step is to install the mounting bracket for your subpanel. This bracket is crucial as it will support the subpanel box securely. Begin by aligning the bracket with the markings you made earlier to ensure it is level and in the correct position. Use a stud finder to locate wall studs for a solid installation; if your garage wall doesn’t have suitable studs,
consider using wall anchors rated for the weight of the sub panel. After positioning the bracket, use a drill to firmly secure it to the wall. Ensure that it is tightly fastened, as any movement could impact the wiring inside the subpanel later. Double-check the levelness of the bracket before proceeding to the next step, as this will ensure a neat and professional-looking installation.
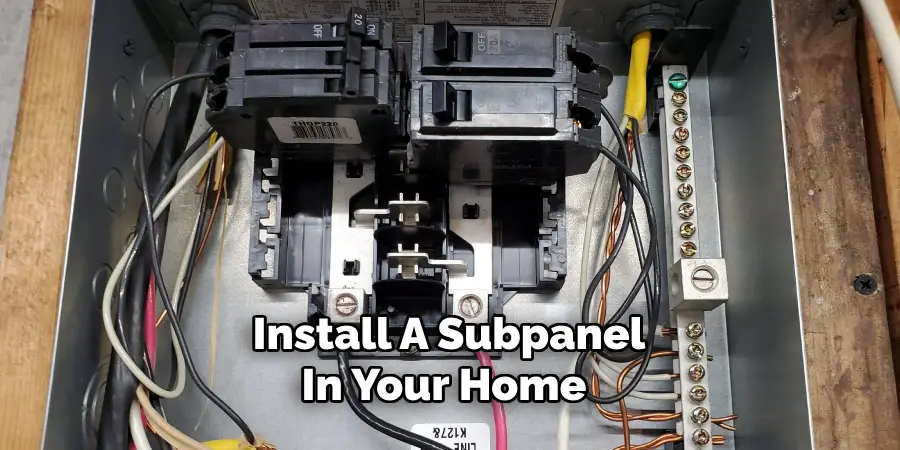
Step 4: Install the Subpanel Box
Now that the mounting bracket is securely in place, it’s time to install the subpanel box. Carefully lift the box and align it with the mounting bracket you set up. Make sure the box is level and fits snugly against the bracket. Using screws that are compatible with your subpanel, attach the box to the bracket, ensuring it is firmly secured. Be cautious not to overtighten the screws, as this could damage the box. Once secured, take a moment to inspect the installation for any misalignments or gaps that may need adjustment. At this stage, you’re laying the groundwork for safe and effective wiring that will follow in the subsequent steps.
Step 5: Run the Feeder Wires
With the subpanel box securely installed, the next step is to run the appropriate feeder wires from the main panel to the subpanel. Cut the feeder wires to the necessary length, ensuring enough slack for easy connection at both ends. Carefully route the wires through the designated cable clamps on the subpanel box, keeping the wires organized and avoiding any sharp bends that could cause damage. Secure the cables in place with the clamps to prevent movement.
Step 6: Connect the Grounding Wire
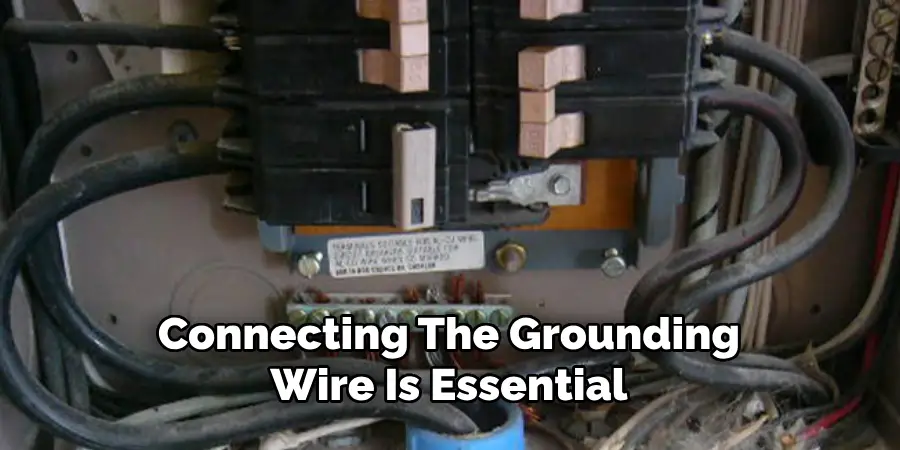
Connecting the grounding wire is essential for the safety of your electrical system. Locate the grounding bar within your subpanel and attach the grounding wire securely. Under local electrical codes, ensure that the grounding wire is connected to an appropriate grounding point, such as a grounding rod or ground grid.
This step is critical for preventing electrical faults and ensuring safety in case of a power surge.
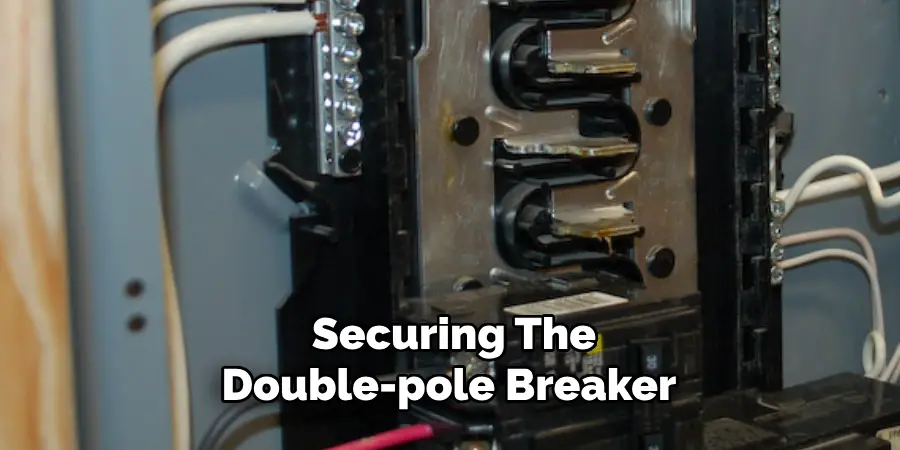
Step 7: Install the Double-Pole Breaker
Once you have successfully connected the grounding wire, the next step is to install the double-pole breaker into the subpanel. This breaker is essential as it protects the circuits connected to the subpanel by interrupting the power supply in the event of an overload or short circuit. Begin by identifying the correct mounting location within the subpanel for the double-pole breaker and ensure that the panel is free of obstructions. Gently slide the breaker into the designated bus bar slots, ensuring it is securely seated. You should hear an audible click, indicating that it is correctly installed.
Next, connect the incoming feeder wires to the corresponding terminals on the breaker, ensuring the connections are tight but not overly strained. Following the manufacturer’s specifications and color coding is crucial: typically, you will connect the black wires to one side of the breaker and the red (or second black wire) to the other. After securing all connections, double-check that there are no exposed wires and that everything is neatly arranged within the subpanel. Verifying everything at this stage will help ensure a safe and efficient setup.
Step 8: Connect the Neutral Wires
After securing the double-pole breaker, it’s time to connect the neutral wires. Locate the neutral bar inside the subpanel; all the neutral wires will converge. Carefully connect the incoming neutral wire from the main panel to the neutral bar, ensuring the connection is tight and secure. It’s essential to distinguish the neutral wires from the ground wires, as mixing them can lead to unsafe conditions. Ensure that any other neutral wires for circuits powered by the subpanel are also connected to the neutral bar, maintaining proper organization for future troubleshooting or upgrades.
Step 9: Install Circuit Breakers
With all the primary connections in place, the next step involves installing individual circuit breakers for the subpanel. Determine the number of circuits you plan to run and select the appropriate breakers based on the load requirements. Each circuit breaker should be installed into the slots designated within the subpanel, similar to the double-pole breaker. Firmly press the breakers until you hear a click, indicating they are securely seated. Then, connect the hot wires from your circuits to the corresponding terminals on each circuit breaker, ensuring the connections are secure to avoid any electrical issues down the line.
Step 10: Final Inspection and Power On
After all connections and installations are complete, it’s crucial to inspect the entire setup thoroughly. Check each connection to ensure that there are no loose wires and everything is organized within the subpanel. Confirm that your feeder wires, grounding wires, neutral wires, and circuit breakers are correctly installed as per local codes. Once you’re confident that everything is in order, it’s time to turn the power back on at the main panel. Use your voltage tester again to double-check that the subpanel is receiving power and that the breakers function correctly by toggling them on and off to ensure proper operation.
Following these ten steps, you can install a subpanel in your home or workspace. When working with electricity, it’s essential to always follow local electrical codes and safety procedures.
Conclusion
How to install a subpanel in garage is a valuable addition that enhances your electrical capacity and provides more efficient access to power for various tools and equipment.
Throughout this guide, we’ve walked through ten essential steps, from securely mounting the subpanel box to connecting all necessary wires and circuit breakers. Adhering to local electrical codes and safety practices ensures your installation is safe and reliable. With careful planning, proper execution, and a thorough inspection, you can confidently power your garage with a sub panel, ultimately improving functionality and convenience in your workspace.
Always remember, if you’re ever uncertain about any step, the best approach is to seek assistance from a qualified electrician.
You can also check it out Heat a Garage Without Electricity
I am Rick. I grew up helping my dad with his handyman service. I learned a lot from him about how to fix things, and also about how to work hard and take care of business. These days, I’m still into fixing things- only now, I’m doing it for a living.
I’m always looking for new ways to help people grow and develop. That’s why I have created this blog to share all my experience and knowledge so
that I can help people who are interested in DIY repair.