Installing a sub panel in your garage can be a practical solution to meet increasing power needs for tools, appliances, or an electric vehicle charger. A sub panel serves as an extension of your main electrical panel, providing additional circuits and simplifying the management of electrical loads in the garage.

This guide on how to install a sub panel in a garage will walk you through the essential considerations and steps to safely and effectively install a sub panel, helping you enhance the functionality of your garage’s electrical system.
Why Install a Sub Panel in Your Garage?
Adding additional circuits to your main electrical panel can be complicated and may not always be possible due to space limitations or load capacity. A sub panel provides a convenient and efficient solution for expanding your garage’s electrical system, allowing you to power multiple tools and appliances without overloading the main panel.
Additionally, installing a sub panel can help improve safety by providing dedicated circuits for high-powered tools and preventing overloaded circuits, which can cause fires.
Needed Materials
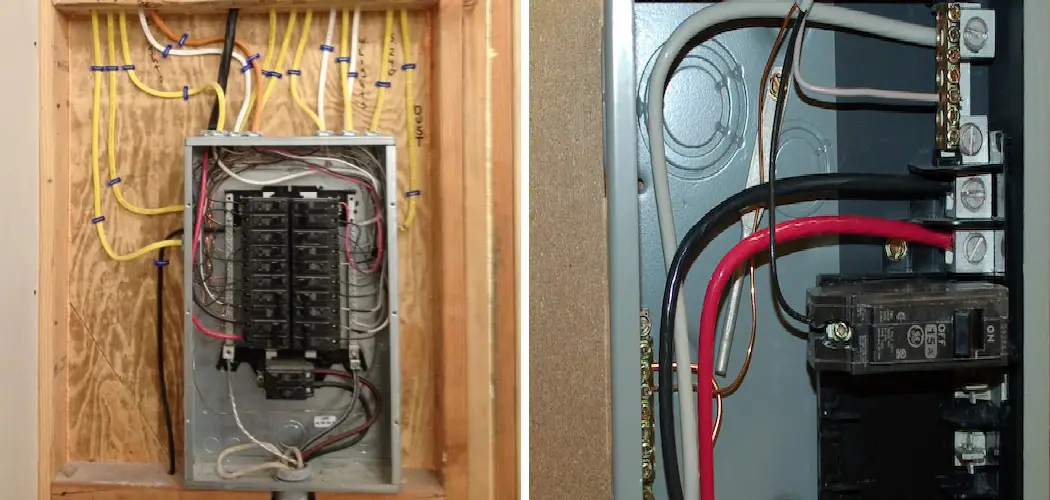
Sub Panel Box:
To install a subpanel, you will need a subpanel box. This is the main component that holds all the breakers and circuits for your additional electrical needs. The size of the sub panel box depends on how much power you need and the available space in your garage.
Breakers:
Breakers are crucial components in any electrical system as they protect the circuit from overload. When too much current flows through a circuit, the breaker trips and disconnects the power supply to prevent damage or fire hazards. Make sure to get compatible breakers that fit your sub panel box.
Wires:
Wires are essential for connecting all the components of your sub panel system. The type of wire needed depends on the amperage of your sub panel and the distance it needs to cover. Always use proper wire gauges and insulation to ensure safety and efficient electricity flow.
Grounding:
Grounding is a vital safety measure in any electrical system, including a sub panel. It involves connecting all metal components and conducting parts within the system to a ground rod or grounding electrode. This prevents the buildup of excess electricity and helps protect against electric shock.
7 Step-by-step Guidelines on How to Install a Sub Panel in a Garage
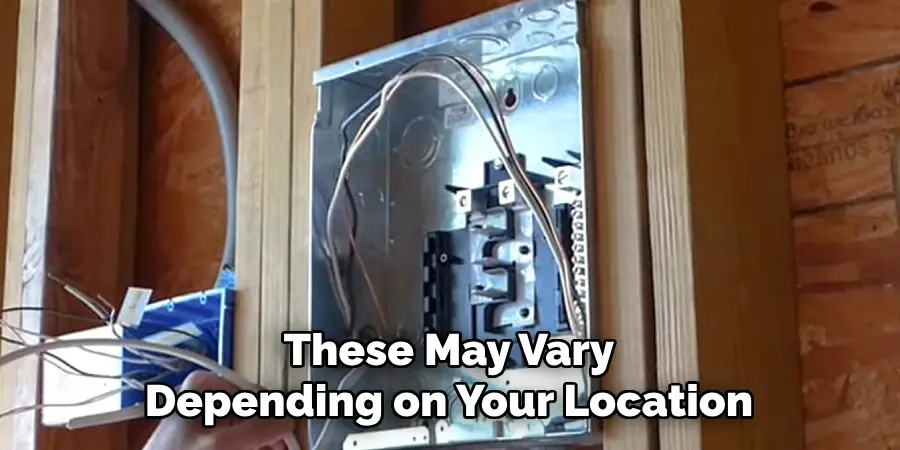
Step 1: Plan and Prepare
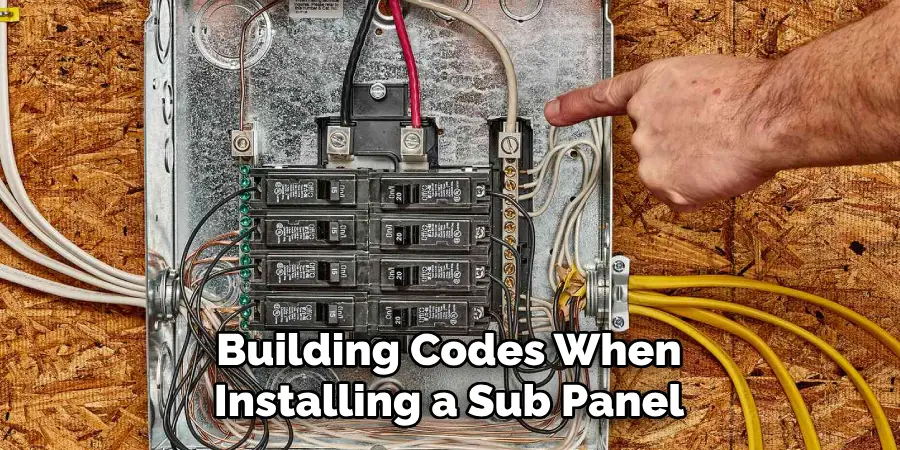
Before starting the installation process, take the time to plan and prepare adequately. Begin by determining the electrical load requirements of your garage to ensure the sub panel has the appropriate capacity. Check local electrical codes and regulations to ensure compliance, as these may vary depending on your location.
Gather all necessary tools and materials, including the sub panel, circuit breakers, wires, and any additional components specific to your setup. Make sure to turn off the main power supply to avoid any safety hazards during the installation process. Proper preparation is crucial for a smooth and efficient installation.
Step 2: Shut off Power
Before beginning the installation, ensure that the power to your main electrical panel is completely turned off. Locate the main circuit breaker, typically found at the top of the panel, and switch it to the “off” position. Use a voltage tester to confirm that no electrical current is flowing to the panel after shutting off the main breaker.
This step is critical to guarantee your safety and prevent the risk of electric shock while working on the system. Always double-check to ensure that all power sources are completely deactivated before proceeding.
Step 3: Mount the Sub Panel
Choose a suitable location to mount the sub panel, ensuring it is easily accessible and complies with local electrical codes. The sub panel should be installed on a sturdy wall or surface, with enough clearance around it for safe operation and future maintenance. Use a level to position the panel evenly and mark the mounting holes on the wall.
Secure the sub panel in place using screws or anchors that are appropriate for the wall material. Ensure the panel is firmly attached and does not wobble or shift. Once mounted, verify that the panel door opens and closes without obstruction and that there is adequate space for wiring and conduit connections.

Step 4: Connect Wires
Begin by identifying and organizing all wires that need to be connected to the sub panel. Each wire should be inspected for damage and stripped to the appropriate length for secure connections. Attach the ground wire to the grounding bus bar, ensuring a tight and clean connection. Next, connect the neutral wire to the neutral bus bar, being cautious not to overtighten screws.
Finally, securely attach the hot wires to their designated circuit breakers. Double-check all connections to ensure they are firm and properly aligned. Once all wires are connected, neatly arrange them to avoid unnecessary tangling, leaving enough slack to accommodate future adjustments or maintenance.
Step 5: Install Breakers
Carefully insert each circuit breaker into its designated slot within the panel. Align the breaker with the mounting rail and press firmly until it clicks into place. Ensure the breaker is securely attached, but avoid using excessive force.
Once installed, verify that each breaker corresponds to the correct circuit according to your wiring plan. Label each breaker appropriately to simplify future identification and maintenance. Finally, double-check the entire setup to confirm that all breakers are properly installed and aligned.
Step 6: Test Connections
After completing the installation, it is crucial to test all connections to ensure proper functionality and safety. Begin by turning on the main breaker to restore power to the panel. Use a multimeter to check the voltage at each circuit breaker and ensure the readings align with the expected values. Test each circuit by turning on the connected appliances or fixtures to confirm they are receiving power.
If any irregularities or issues are detected, turn off the main breaker immediately and recheck the wiring for potential errors. Always prioritize safety and consult a professional electrician if problems persist.
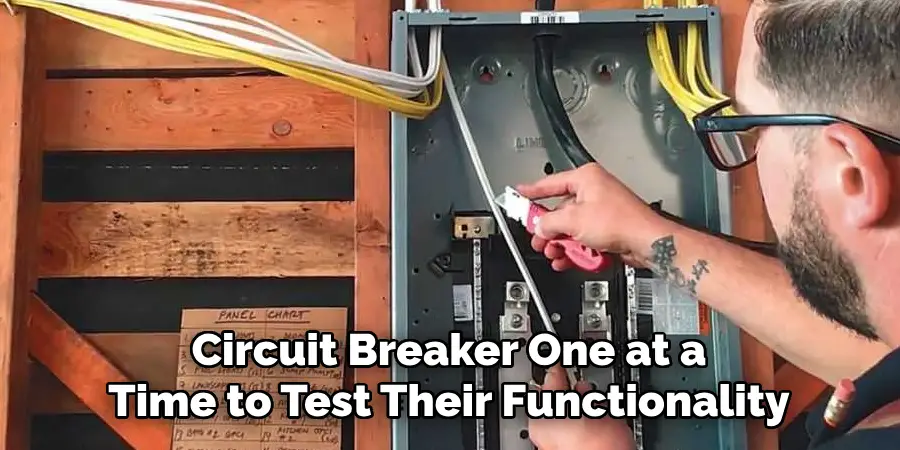
Step 7: Turn on Power
Once all connections have been checked and confirmed, turn on the main breaker in the sub panel. Then, I switch on each individual circuit breaker one at a time to test their functionality.
Following these steps on how to install a sub panel in a garage will ensure that you properly install a sub panel in your home. It is important to follow all safety precautions and consult a professional if you are not comfortable with electrical work. Remember, working with electricity can be dangerous and it is always better to err on the side of caution.
Additional Tips
- Always make sure to follow proper safety precautions when working with electricity.
- Label each breaker clearly for easy identification in case of an emergency or future maintenance.
- If you are unsure about any step in the process, it is always best to consult a professional electrician.
- Consider installing a surge protector for added protection against power surges.
- Make sure to turn off all power from the main breaker before attempting to work on the sub panel.
- Use protective gear such as gloves and safety glasses when working with electricity.
- Plan ahead and make sure you have all necessary tools and materials before beginning the installation process.
- Double-check all connections and wiring before turning the power back on.
- If unsure about any step of the installation process, do not hesitate to seek guidance from a professional electrician.
- Regularly check and maintain the sub panel to ensure it is functioning properly.
- Do not overload the sub panel by adding too many circuits or devices.
- Label all circuits and breakers in the sub panel for easy identification and troubleshooting.
- In case of any issues or malfunctions with the sub panel, immediately turn off the power and consult a professional electrician.
- Keep the area around the sub panel clear for easy access in case of emergencies.
- Consider investing in a backup generator in case of power outages.
Frequently Asked Questions
Q1: What is a Sub Panel and Why Do I Need One?
A: A sub panel, also known as a distribution panel, is an electrical panel that receives power from the main service panel and distributes it to various circuits within a building. It is necessary for homes or buildings with high energy demands or multiple levels, as it helps to prevent overloading of the main service panel.
Q2: How Do I Know if I Need a Sub Panel in My Home?
A: If you regularly experience tripped breakers or flickering lights, it may be a sign that your main service panel is overloaded and a sub panel is needed. Additionally, if you are planning on adding new appliances or expanding your home’s electrical system, a sub panel can help to accommodate the increased energy demands.
Q3: How Do I Install a Sub Panel?
A: Installing a sub panel requires knowledge of electrical wiring and should only be done by a licensed electrician. The first step is to determine the appropriate location for the sub panel, typically near the main service panel. Then, the electrician will need to run wiring from the main service panel to the sub panel and connect it to its own circuit breaker. The circuits from each outlet or appliance can then be wired into the sub panel. It is important to follow all safety and building codes when installing a sub panel.
Conclusion
Installing a sub panel can be an effective way to expand the electrical capacity of your property and accommodate additional circuits safely. However, due to the complexities and potential risks involved, it is crucial to rely on a licensed electrician to handle the process.
By adhering to safety protocols and local building codes, you can ensure a reliable and efficient electrical system that meets your needs while prioritizing safety and compliance. Thanks for reading this article on how to install a sub panel in a garage.
I am Rick. I grew up helping my dad with his handyman service. I learned a lot from him about how to fix things, and also about how to work hard and take care of business. These days, I’m still into fixing things- only now, I’m doing it for a living.
I’m always looking for new ways to help people grow and develop. That’s why I have created this blog to share all my experience and knowledge so
that I can help people who are interested in DIY repair.