Connecting the Feit Electric Smart LED Garage Light is a straightforward process that can dramatically enhance the functionality and ambiance of your garage space. Designed with advanced technology, these smart lights not only provide bright, efficient illumination but also offer features such as remote control and scheduling via your smartphone or smart home system.
In this guide on how to connect the smart feit electric smart led garage light, we will walk you through the necessary steps to properly install and connect your smart light, ensuring you can enjoy an optimized lighting experience in no time.
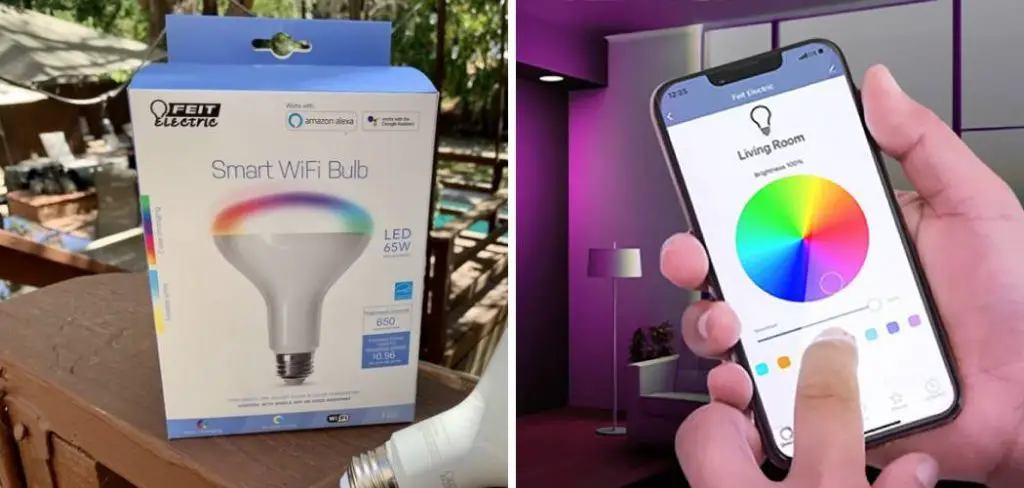
Why Choose Feit Electric Smart LED Garage Light?
Before we begin, it’s important to understand why you should choose the Feit Electric Smart LED Garage Light in the first place. These lights are not only energy-efficient and long-lasting, but they also offer a range of features that make them stand out from traditional garage lights. Some of these features include:
Remote Control:
With the use of a smartphone or smart home system, you can easily turn your Feit Electric Smart LED Garage Light on or off from anywhere, even when you’re not at home.
Scheduling:
You can program your smart light to turn on or off at specific times, allowing for convenient and energy-efficient usage.
Customization:
Feit Electric Smart LED Garage Lights offer various color temperature options, allowing you to choose the perfect lighting for your specific needs and preferences.
Needed Materials
To successfully connect your Feit Electric Smart LED Garage Light, you will need the following materials:
- The Smart Light Itself
- A Compatible Smartphone or Smart Home System
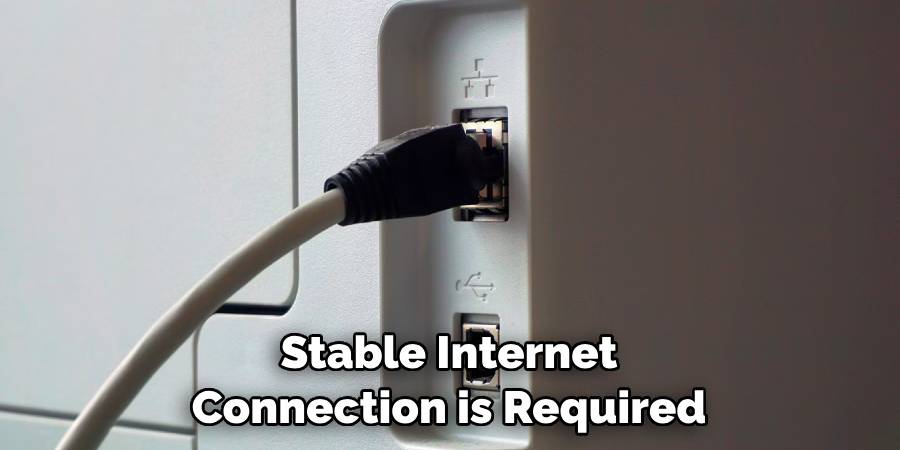
- A Stable Internet Connection
- A Ladder (if Installing the Light on a High Ceiling)
- A Screwdriver (for Mounting Purposes)
8 Step-by-step Guides on How to Connect the Smart Feit Electric Smart Led Garage Light
Step 1: Turn Off the Power
Before you begin the installation process, safety should be your top priority. Locate the circuit breaker that controls the power to your garage and switch it off. This step is crucial to prevent any electrical accidents while you work on installing the Feit Electric Smart LED Garage Light.
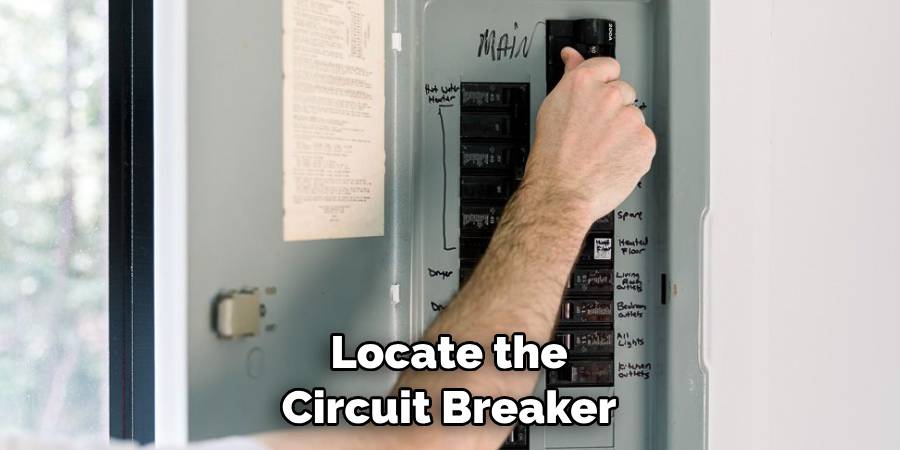
It’s also a good idea to use a voltage tester to ensure that the light fixture you will be working on is indeed powered down. Once you’ve confirmed that the electricity is off, you can proceed with the installation securely.
Step 2: Prepare the Light
If you have already purchased your Feit Electric Smart LED Garage Light, go ahead and open the package. Inside, you will find all the necessary components for installation, including the light fixture itself, mounting screws, wire connectors, and user manual.
Before proceeding to install, make sure to read through the manual thoroughly to become familiar with all parts and their functions.
Step 3: Download the App
To take full advantage of the smart features offered by your Feit Electric Smart LED Garage Light, you will need to download the Feit Electric app. This app is available for both iOS and Android devices and can be found in the Apple App Store or Google Play Store. Once you’ve located the app, tap the download button to install it on your smartphone.
After the installation is complete, open the app and create an account if you haven’t already done so. This account will allow you to connect and control your smart light directly from your mobile device, making it easier to manage your garage lighting effortlessly.
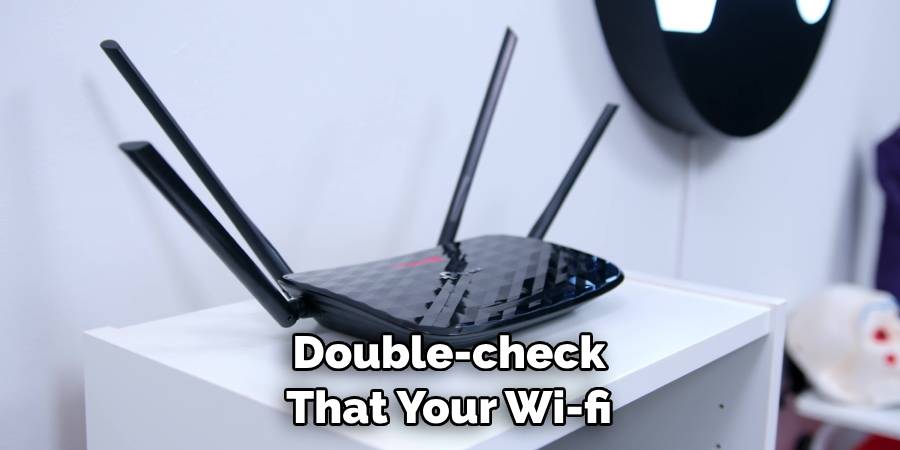
Step 4: Connect the Smart Light to Wi-Fi
To connect your Feit Electric Smart LED Garage Light to your smartphone or smart home system, you will need a stable internet connection. Begin by turning on your light and ensuring that it is in pairing mode. You can do this by following the instructions provided in the user manual. Once in pairing mode, open the Feit Electric app and follow the prompts to add a new device.
Make sure to have your home Wi-Fi network name (SSID) and password ready as you will be asked to enter these details during the setup process.
Step 5: Confirm Connection
Once you have successfully entered your Wi-Fi network credentials in the Feit Electric app, it’s time to confirm that your smart light is connected. The app will prompt you to test the connection; ensure that the Feit Electric Smart LED Garage Light is turned on. If the light blinks or changes color, it indicates that the connection process is ongoing.
After a few moments, the app should display a message confirming that the light has been successfully connected to your Wi-Fi network. If you encounter any issues during this step, double-check that your Wi-Fi is functioning correctly and that you’ve entered the correct credentials before attempting to reconnect.
Step 6: Name Your Smart Light
After confirming the successful connection of your Feit Electric Smart LED Garage Light to your Wi-Fi network, it’s time to give your light a unique name. This step is important for easily identifying your light when using the Feit Electric app or voice commands through a smart home system.
In the app, you’ll see an option to set the name; choose a name that is both descriptive and easy to remember, such as “Garage Light” or “Workshop Illumination.” Once you’ve entered the desired name, confirm your choice, and the app will update your smart light’s settings accordingly. This will allow for seamless control and customization in the future.
Step 7: Explore the App’s Features
With your smart light now connected and named, you can begin exploring the app’s features. Depending on your specific model of Feit Electric Smart LED Garage Light, you may have access to various settings such as scheduling, dimming, and color temperature adjustment.
Take some time to familiarize yourself with these options and customize them according to your needs and preferences.
Step 8: Mount the Light Fixture
After completing all previous steps, it’s finally time to mount the Feit Electric Smart LED Garage Light fixture. Use a ladder if necessary and carefully follow the instructions provided in the user manual. Make sure to use the appropriate screws and wire connectors to ensure a secure and reliable installation.
Once the light is securely mounted, turn the power back on at the circuit breaker, and your new Smart LED Garage Light will be ready to use!
Following these 8 simple steps on how to connect the smart feit electric smart led garage light, you can easily connect and start enjoying the convenience and flexibility of the Feit Electric Smart LED Garage Light in your garage or workshop. With its advanced features and easy installation process, this smart light is a perfect addition to any smart home system. So why wait? Start upgrading your garage lighting today!
Additional Features
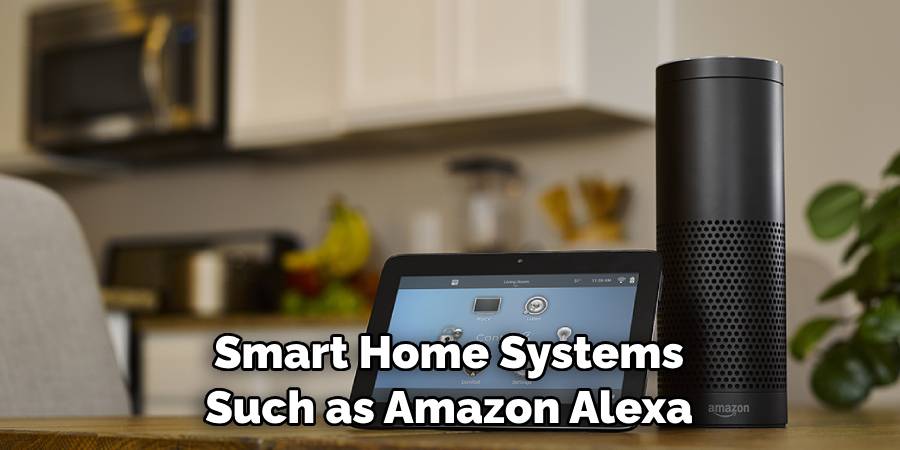
Voice Control with Smart Home Systems:
Another added convenience of the Feit Electric Smart LED Garage Light is its compatibility with popular smart home systems such as Amazon Alexa and Google Assistant. This allows for hands-free control of your light, making it even easier to use.
Energy Efficiency:
The Feit Electric Smart LED Garage Light is not only convenient but also energy-efficient. With its LED technology, it consumes less power compared to traditional light bulbs, leading to cost savings on your energy bill.
Multiple Light Control:
If you have more than one Feit Electric Smart LED Garage Light installed, you can control them all simultaneously through the app or voice commands. This makes it easier to manage and customize your garage lighting according to your needs.
Grouping Lights:
You can also group different lights within your smart home system, including the Feit Electric Smart LED Garage Light. This allows for even more convenient control, such as turning off all lights in a particular area with just one command.
Remote Access:
Did you forget to turn off the light before leaving? No problem! With remote access through the app, you can easily turn off any connected Feit Electric Smart LED Garage Light from anywhere, as long as you have internet access. This feature adds an extra layer of convenience and peace of mind to your daily routine.
Frequently Asked Questions
Q: Can I Use the Feit Electric Smart Led Garage Light With a Regular Light Switch?
A: Yes, you can turn the light on and off using a regular light switch, but for full functionality and control, it is recommended to use the app or voice commands through a compatible smart home system.
Q: How Many Feit Electric Smart Led Garage Lights Can I Connect to One App?
A: You can connect and control up to 50 lights through the same Feit Electric app. If you have more than 50 lights, you can simply use multiple apps or group them within your smart home system for easier management.
Q: Will the Light Work Without an Internet Connection?
A: No, a stable internet connection is required for the initial setup and daily use of the Feit Electric Smart LED Garage Light. However, if your internet goes out, the light will continue functioning using its last settings until the connection is restored.
Conclusion
With these simple steps on how to connect the smart feit electric smart led garage light, you can successfully connect and install your Feit Electric Smart LED Garage Light. Remember to always prioritize safety when working with electricity, and take advantage of the customization options offered by your smart light for optimal usage.
Enjoy energy-efficient lighting and convenience in managing your garage space with Feit Electric’s innovative technology! So go ahead and give it a try today! Happy installing! #garagelighting #smarthome #feit electric #energyefficient
I am Rick. I grew up helping my dad with his handyman service. I learned a lot from him about how to fix things, and also about how to work hard and take care of business. These days, I’m still into fixing things- only now, I’m doing it for a living.
I’m always looking for new ways to help people grow and develop. That’s why I have created this blog to share all my experience and knowledge so
that I can help people who are interested in DIY repair.