
Building sliding garage doors offers numerous benefits, making them an excellent choice for both functionality and style.
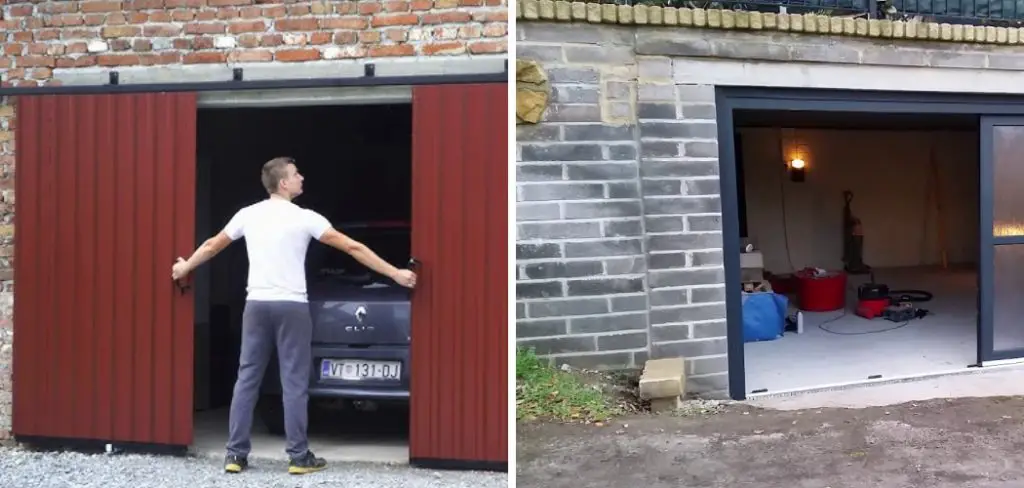
These doors are easy to operate, allowing for seamless access to your garage space. At the same time, their space-saving design is ideal for smaller areas where traditional swinging doors may be impractical. Additionally, sliding garage doors come in various styles and materials, enhancing the aesthetic appeal of your home.
This article will guide you through the essential steps on how to build sliding garage doors, starting from thorough planning and design, moving on to the selection of materials, and culminating in the installation and finishing touches. Each phase is designed to equip you with the knowledge and skills necessary to create a beautiful and functional addition to your garage, ensuring that the process is manageable and rewarding.
Planning and Designing Sliding Garage Doors
Assessing Your Needs and Space
Before embarking on the construction of sliding garage doors, it is essential to carefully assess your specific needs and the available space.
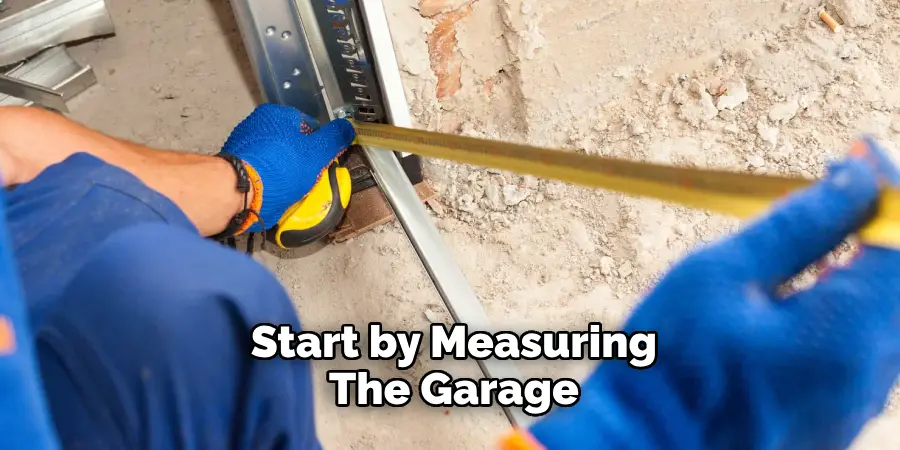
Start by measuring the garage opening accurately to determine the appropriate door size; both height and width are critical to getting right for a proper fit.
This assessment will help you avoid issues during installation. Next, consider the sliding door style that best suits your preference and space limitations. Options range from single-panel doors for smaller openings to multi-panel designs for a more dramatic appearance.
Factors such as design nuances, the materials you plan to use, and the door’s functionality, like how often it will be operated and the level of insulation required, should influence your decision. Considering these elements during the planning phase will lead to a smoother building process and a final product that meets your expectations.
Selecting Materials
Choosing materials for your sliding garage doors is pivotal in their durability, insulation, and overall aesthetics. Common material options include wood, metal, and fiberglass, each offering distinct advantages.
Wood, known for its classic appeal, can be customized with various finishes, though it requires regular maintenance to fend off moisture damage. Metal doors, often made of steel or aluminum, provide robust security and low maintenance but may necessitate insulation to address thermal efficiency.

Fiberglass doors are lightweight and resistant to dents and rust, making them an excellent choice for coastal areas, but they may lack the authentic look that wood offers. Additionally, selecting the right tracks and hardware is crucial for smooth operation.
Consider heavy-duty tracks if you install larger doors or innovative solutions like soft-close mechanisms, ensuring that the operation is efficient and user-friendly. Selecting quality materials will enhance the performance and longevity of your sliding garage doors.
Gathering Tools and Materials
Essential Tools
You’ll need a set of essential tools to successfully build sliding garage doors. Begin with a tape measure for accurate measurements, a saw for cutting door panels and track materials, and a drill for creating holes for screws and hardware installation. A level is crucial to ensure everything is properly aligned, while a screwdriver will help secure components together. Additionally, having safety gear, like goggles and gloves, will keep you safe throughout the building process.
Materials List

Gathering the right materials is key to constructing durable sliding garage doors. Start with wood, metal, or fiberglass door panels made from your chosen material. You will also need tracks and rollers to facilitate smooth movement. Don’t forget the screws for securing the door frame and hardware in place. If you plan to finish the doors, include paint or stain to achieve the desired appearance and any weatherproofing materials, like weatherstripping or caulking, for added insulation.
How to Build Sliding Garage Doors: Building the Door Panels
Cutting and Assembling Panels
To build the door panels for your sliding garage doors, start by measuring the height and width of each panel according to your specifications. Use a tape measure to ensure accuracy – double-check your measurements before proceeding.

Once confirmed, use a saw appropriate for your chosen material, such as a circular saw for wood or metal cutting saw for metal panels, to cut the panels to size. Ensure your cuts are straight and clean, as this will impact the overall appearance and fit of the doors.
Next, assemble the panels by joining them together using screws or nails, depending on the material. Consider reinforcing the corners with brackets for added stability if you’re using wood. For an added layer of strength, you can also use adhesive between the joints before securing them with fasteners. This will ensure a sturdy structure that can withstand daily use.
Finishing the Panels
Once the panels are assembled, it’s time to focus on the finishing touches. Begin by sanding the surface of each panel to create a smooth finish and eliminate any splinters or rough edges.
Use a fine-grit sandpaper and work in a circular motion, checking for any imperfections. After sanding, it’s important to clean off any dust particles to prepare the surface for painting or staining.

When it comes to applying a finish, choose either paint or stain based on your desired aesthetic. Paint offers a wide range of colors, while stains can enhance the natural wood grain.
Apply the selected finish evenly, using a brush or roller, and allow adequate drying time between coats, typically 2-4 hours. Proper finishing is essential for visual appeal and protecting the panels against moisture and UV damage, ensuring the longevity and durability of your sliding garage doors.
How to Build Sliding Garage Doors: Installing the Track System
Mounting the Top Track
To begin the installation of your sliding garage door, position the top track along the ceiling or the wall where the door will slide.
Using a tape measure, determine the correct placement and mark the screw holes with a pencil. Ensuring that the track is level is crucial, as any misalignment can lead to operational issues later. Drill pilot holes at the marked spots and use appropriate anchors if mounting onto drywall or masonry.
Once the holes are drilled, securely fasten the top track in place using screws, ensuring that it is anchored firmly to withstand the weight of the door. A level tool can help confirm that the track is straight before finalizing the installation.
Installing the Bottom Track
Next, turn your attention to the bottom track, which needs to be installed on the garage floor. Begin by measuring the distance between the two ends of the top track to ensure the bottom track aligns perfectly with it. Once you have obtained the correct length, mark where the bottom track will be secured, ensuring it parallels the top track’s alignment.

Use a level to double-check that it sits straight. After marking, drill holes for the screws and ensure to clear the area of debris for optimal adhesion. Attach the bottom track securely to the floor, using screws to anchor it firmly. Confirm that the bottom track is aligned with the top track, as this will facilitate smooth door operation.
Installing Rollers and Hardware
After the tracks are securely in place, it’s time to attach the rollers to the door panels. Install the rollers by sliding them into the pre-drilled holes on the sides of the door panels, ensuring they are evenly spaced and aligned for optimal function. Once all rollers are in place, carefully lift the door panels towards the top track and align the rollers with the track guide.
This step may require assistance to safely manage the door’s weight. Adjust the rollers as necessary to achieve a snug fit within the tracks. To ensure a smooth operation, you may need to make further adjustments.
Test the sliding mechanism by gently pulling on the door; if it does not slide smoothly, make minor adjustments to the roller height or alignment until the door moves fluidly along the track. Proper installation of rollers and hardware is essential for seamless door operation.
Hanging and Aligning the Doors
Positioning the Doors
Once the rollers are firmly attached to the door panels, it’s time to lift and hang the doors onto the tracks. Begin by having an assistant help you raise the first door panel, aligning the rollers with the top track. With careful, steady movements, slide the door’s rollers into the track, ensuring that they fit snugly and that the door is resting evenly.
Repeat this process with the second panel, making sure both panels are aligned in height and parallel. After hanging both doors, it’s essential to test their movement; gently push them to ensure they slide smoothly along the track and do not bind or catch. If there is any resistance, recheck their alignment and the engagement of the rollers within the track, adjusting as necessary.
Adjusting and Securing
Once the doors are positioned correctly, you may need to make some adjustments to achieve the best performance. Start by checking the rollers: if the doors are not sliding smoothly, you may need to raise or lower them by tightening or loosening the adjustment screws. Ensure that the top and bottom tracks are aligned and parallel to each other; any misalignment can cause operational issues. After confirming that the doors slide freely, proceed to secure them in place.
This involves tightening any screws and bolts that may hold the rollers and tracks in position, ensuring they are firmly anchored. Finally, do a thorough check for any other adjustments needed, such as ensuring that the door clearance from the ground is adequate to avoid contact. Once satisfied with the operation, your sliding garage doors should now be ready for regular use, offering both functionality and convenience.
Adding Finishing Touches
Weatherproofing and Sealing
To ensure your sliding garage doors are adequately insulated and protected from the elements, it’s crucial to seal any gaps that may allow drafts or moisture in. Start by applying weatherstripping along the edges of the doors where they meet the frame, providing a snug fit. For any larger gaps, use a high-quality caulk to seal them, ensuring they adhere well to both wood and metal surfaces. This step enhances energy efficiency and prevents potential water damage.
Final Inspection and Touch-ups
After completing the installation and sealing, thoroughly inspect the entire setup. Check that all hardware is secure and that doors slide smoothly without obstruction. Look for any paint or stain touch-ups needed on exposed surfaces. If adjustments are necessary, make them to ensure the doors operate perfectly. Taking this time for final checks ensures that both the functionality and appearance of your sliding garage doors are up to your standards.
Maintenance Tips for Sliding Garage Doors
Regular Cleaning and Inspection
Implement a routine cleaning schedule to keep your sliding garage doors functioning smoothly. Wipe down the door panels and remove any dirt or debris that may accumulate over time. Inspect the tracks for obstructions and ensure they are clear to prevent operational issues. Check for wear and tear on the rollers, hinges, and other hardware components. Catching small problems early through regular inspections can help prevent larger repairs.
Lubrication and Repairs
Proper lubrication is key to ensuring the smooth operation of your sliding garage doors. Apply a silicone-based lubricant to the rollers and tracks every few months, especially during seasonal changes. Avoid using oil-based products, as they can attract dirt and grime.
If you notice any signs of wear, such as squeaking or difficulty sliding, address them promptly. Replace worn or damaged parts as needed to maintain optimal functionality of the doors and prolong their lifespan.
Conclusion
Building sliding garage doors involves several key steps that ensure a successful outcome. Begin with thorough planning, taking accurate measurements, and selecting the right materials. Then, proceed to build the door panels and prepare the tracks for installation. Once the rollers and hardware are securely in place, hang and align the doors and make necessary adjustments to ensure smooth functionality. Finally, weatherproofing will be applied, and a final inspection will be conducted to complete the project.
For optimal performance, follow the instructions carefully and maintain your sliding garage doors regularly.
Remember, building sliding garage doors enhances your garage’s functionality and improves its overall appearance. With the right care and maintenance, you can enjoy smooth and reliable operation for years to come. By understanding how to build sliding garage doors, you’ll be rewarded with a practical and aesthetically pleasing addition to your home.
I am Rick. I grew up helping my dad with his handyman service. I learned a lot from him about how to fix things, and also about how to work hard and take care of business. These days, I’m still into fixing things- only now, I’m doing it for a living.
I’m always looking for new ways to help people grow and develop. That’s why I have created this blog to share all my experience and knowledge so
that I can help people who are interested in DIY repair.