Building hanging garage shelves can be a great addition to any garage for added storage and organization. Not only do they provide more space, but they also keep your items off the ground, making it easier to access and keeping them safe from potential damage.
The main advantage of building hanging garage shelves is that it allows for better utilization of space in a garage. Garages are often cluttered with tools, equipment, and other items that need to be stored properly. This can lead to limited floor space and make it difficult to park vehicles or maneuver around the garage. In this blog post, You will learn in detail how to build hanging garage shelves.
Step-by-step Instructions for How to Build Hanging Garage Shelves
Step 1: Inspect the Garage Space
Before you start the actual construction of your hanging garage shelves, take a good look at the space in your garage. Measure the height, width, and depth of the area where you want to hang your shelves. This will help you determine how many shelves you can fit and what size materials you will need.
Step 2: Gather Materials
Once you have a clear idea of the space and size of your shelves, gather all the necessary materials. This includes wood planks for shelves, screws, brackets, a drill, measuring tape, leveler, and safety gear like goggles and gloves.
Based on your measurements and available space, decide on the layout of your shelves. Will they be in a straight line or staggered? This will also help you determine the number of brackets and shelves needed.
Step 3: Cut Wood Planks
Using a saw, cut the wood planks to your desired length. Make sure they are all of equal size for a neat and uniform look. Take each wood plank and drill two holes on either end for the brackets to fit through. Make sure the holes are at equal distances from the edges.

Step 4: Drill Holes in Walls
Use a drill to make holes in the walls where you want to hang your shelves. These holes should be slightly smaller than the screws you will use. With the help of a drill, attach the brackets to the wood planks by fitting them through the holes you drilled earlier. Use screws to secure them in place.
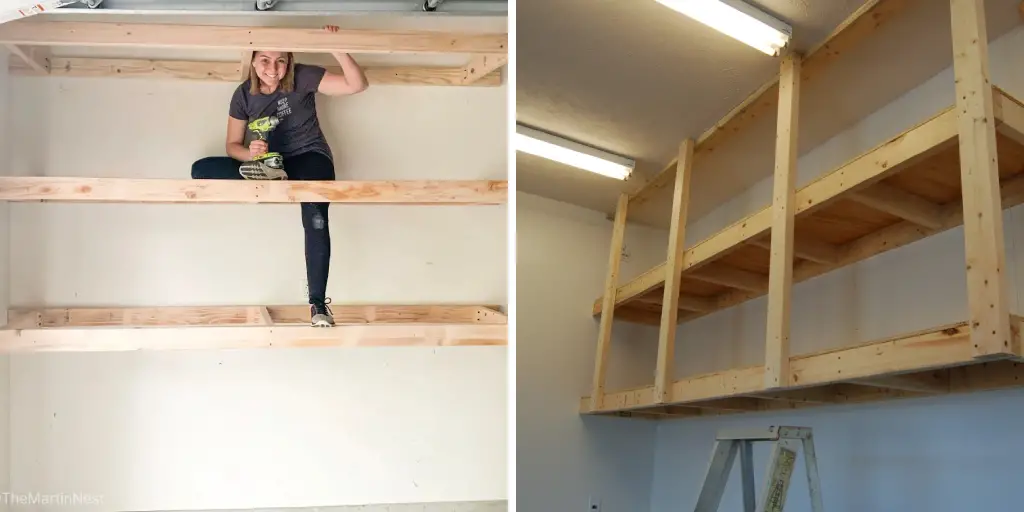
Step 5: Mount Shelves on Walls
Now it’s time to install your shelves. Place the brackets with wood planks attached on top of the holes you drilled in the walls. Make sure they are level before securing them in place with screws. To ensure the shelves can hold heavy items, consider adding additional support by attaching a wood strip along the front of each shelf. This will prevent any sagging or bending.
Step 6: Test and Adjust
Once all shelves are installed, test their sturdiness by placing some weight on them. If any adjustments need to be made, do so before placing any items on the shelves.
By following these step-by-step instructions, you can easily create hanging garage shelves that are not only functional but also aesthetically pleasing. However, it’s important to note that every garage space is different and may require some adjustments in the process.
Precautions for How to Build Hanging Garage Shelves

- Wear the appropriate safety gear. When working on any project, including to build hanging garage shelves, it is important to prioritize your safety. Make sure to wear goggles or safety glasses to protect your eyes from debris and use a dust mask if you are sanding wood.
- Use sturdy materials. When building hanging garage shelves, make sure to use strong and durable materials such as high-quality wood or metal. This will ensure that your shelves can hold the weight of heavy items and will last for a long time.
- Plan ahead. Before starting any DIY project, it is important to have a solid plan in place. This is especially true for building hanging garage shelves as they need to be securely anchored to the walls. Make sure to measure and mark the placement of your shelves accurately to avoid any mishaps.
- Use appropriate tools. Along with using sturdy materials, it is crucial to use the right tools for building hanging garage shelves. This includes a tape measure, level, drill, screws, and brackets. Using the correct tools will make the process easier and ensure that your shelves are properly constructed.
- Get help if needed. Depending on the size and weight of your shelves, it may be necessary to have someone assist you with the installation process. Don’t hesitate to ask for help if needed, as this can prevent accidents and ensure that your shelves are installed correctly.
- Follow instructions carefully. Whether you are using a pre-made shelf kit or following a DIY tutorial, make sure to read and follow the instructions carefully. This will ensure that your shelves are installed correctly and safely.
By following these safety precautions, you can successfully build hanging garage shelves that are both functional and safe. Remember to prioritize safety in all your DIY projects and to take the necessary precautions to avoid any accidents or injuries.
How High Should You Hang the Shelves for Optimal Storage Space?
The answer to this question may vary depending on your specific needs and the items you intend to store. However, there are a few general guidelines that you can follow to ensure you make the most of your hanging shelves.
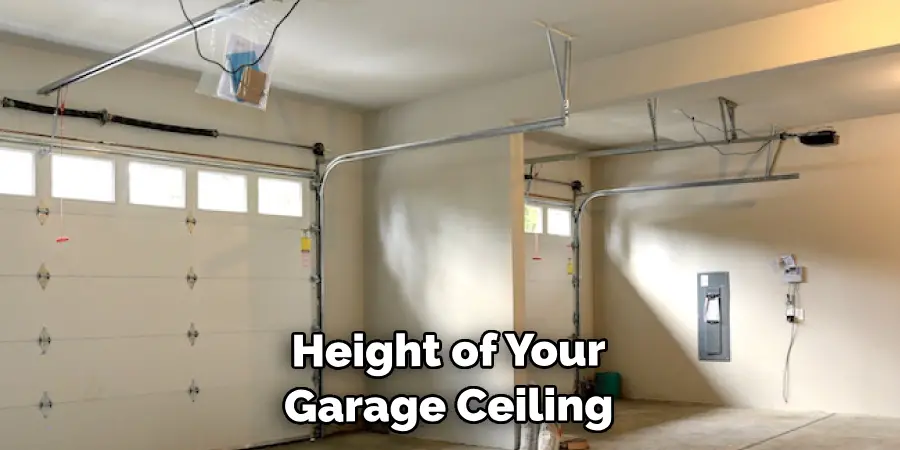
Firstly, it is important to consider the height of your garage ceiling. If you have a low ceiling, you may have limited options for how high you can hang your shelves. In this case, it is recommended to hang the shelves at least 18 inches below the ceiling to allow for enough headroom.
Next, you should take into account the height of any vehicles or large items that need to fit under the shelves. If you have a tall vehicle such as an SUV or truck, it is best to leave around 8-12 inches of clearance between the top of the vehicle and the bottom of the shelves. This will ensure that you have enough space to park your vehicle without any obstructions.
Are There Any Specific Instructions for Hanging the Shelves on Different Types of Walls?
Hanging shelves in your garage can be a great way to organize and maximize storage space. However, before you start building, it’s important to consider the type of walls you have in your garage. Different types of walls will require different methods for hanging shelves securely.
1. Drywall Walls
Most garages have drywall walls, making them one of the most common types of walls for hanging shelves. When hanging shelves on drywall, it’s important to locate the studs behind the drywall. Studs are vertical wooden beams that provide strong support for your shelves and can usually be found every 16 inches.

Use a stud finder or knock on the wall to find where the studs are located. Once you have located the studs, use heavy-duty screws to attach the shelf brackets directly into the studs for maximum support.
2. Concrete or Brick Walls
If your garage has concrete or brick walls, hanging shelves can be a bit more challenging. One option is to use masonry screws and anchors to secure your shelves directly into the wall. However, this method may not provide enough support for heavier items. Another option is to build a free-standing shelf unit that can be placed against the wall for added stability.
3. Metal Walls
Some garages may have metal walls, which can pose a challenge when it comes to hanging shelves. One solution is to use self-tapping metal screws to attach shelf brackets directly onto the metal studs in the wall. Alternatively, you can build a freestanding shelving unit and secure it to the ground for added stability.
4. Pegboard Walls
Pegboard is a popular choice for garage walls as it allows for easy hanging and rearranging of tools. When hanging shelves on pegboard walls, use shelf brackets designed specifically for pegboards. These brackets can be easily inserted into the holes in the pegboard and provide a stable base for your shelves.
Overall, when hanging shelves in your garage, it’s important to always ensure they are securely attached to the wall. Take into consideration the type of walls you have and use the appropriate method for hanging shelves to ensure they can support the weight of your items without causing damage.
Conclusion
In conclusion, building hanging garage shelves is a simple and cost-effective way to maximize storage space in your garage. By following the steps outlined in this blog, anyone can create sturdy and functional shelves that will help keep their garage organized and clutter-free.
One of the main advantages of building hanging garage shelves is that they do not take up any floor space. This is especially beneficial for those with limited garage space or those who want to park their car inside without any obstructions.
The shelves can be customized to fit any size and shape of the garage, making them a versatile storage solution. I hope this article has been beneficial for learning how to build hanging garage shelves. Make Sure the precautionary measures are followed chronologically.
I am Rick. I grew up helping my dad with his handyman service. I learned a lot from him about how to fix things, and also about how to work hard and take care of business. These days, I’m still into fixing things- only now, I’m doing it for a living.
I’m always looking for new ways to help people grow and develop. That’s why I have created this blog to share all my experience and knowledge so
that I can help people who are interested in DIY repair.