
Building a garage table is a rewarding DIY project that combines functionality and creativity. Whether you need a sturdy workbench for repairs and projects or a versatile surface for storage and organization, creating your own table allows you to customize the design to suit your specific needs.

This guide on how to build garage table will walk you through the steps, materials, and tools required to construct a durable and practical garage table that will stand the test of time.
Why Build a Garage Table?
Before we dive into the steps of building a garage table, let’s first discuss why it’s worth investing your time and effort into creating one. Here are some reasons to consider:
Customization
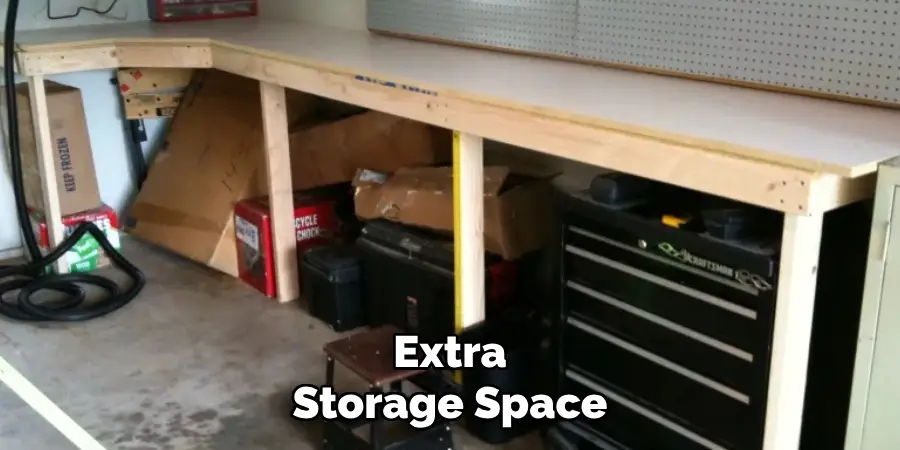
Building your own garage table allows you to tailor the design and dimensions to fit your specific space and needs. You can choose the height, width, and depth of the table, as well as add features such as shelves or drawers for extra storage.
Cost-effective
Purchasing a pre-made garage table can be costly, especially if you want one that is durable and long-lasting. By building your own, you can save money on materials and create a high-quality table for a fraction of the cost.
Personal Satisfaction
There is a sense of pride and accomplishment when you build something with your own hands. Building your own garage table allows you to showcase your skills and creativity, and it can serve as a reminder of what you are capable of achieving.
Learning Opportunity
Building a garage table is a great way to learn new skills and techniques. You can improve your carpentry skills, learn how to use power tools, and gain knowledge about different types of building materials. It can also give you the chance to problem-solve and think critically when faced with challenges during the building process.
Customization
When you build your own garage table, you have complete control over its design and functionality. You can customize it according to your specific needs and preferences. Whether you need a large work surface or extra storage space, you can tailor the table to meet your requirements.
Needed Materials
To build your own garage table, you will need the following materials:
A Sturdy Workbench or Metal Frame:
This will serve as the base for your garage table. You can purchase a pre-made workbench or build one from scratch using metal pipes and connectors. Make sure the workbench is strong enough to withstand heavy loads and can provide stability for your table.
Plywood or Durable Wood:
The plywood or wood will be used as the tabletop surface. It should be thick enough to support heavy items and sturdy enough to withstand constant use. You can also opt for a laminate or metal surface, depending on your preference.
Screws, Bolts, and Nuts:
These will be used to fasten the tabletop surface onto the base of your garage table. You will need a variety of sizes depending on the thickness of your base and tabletop materials.
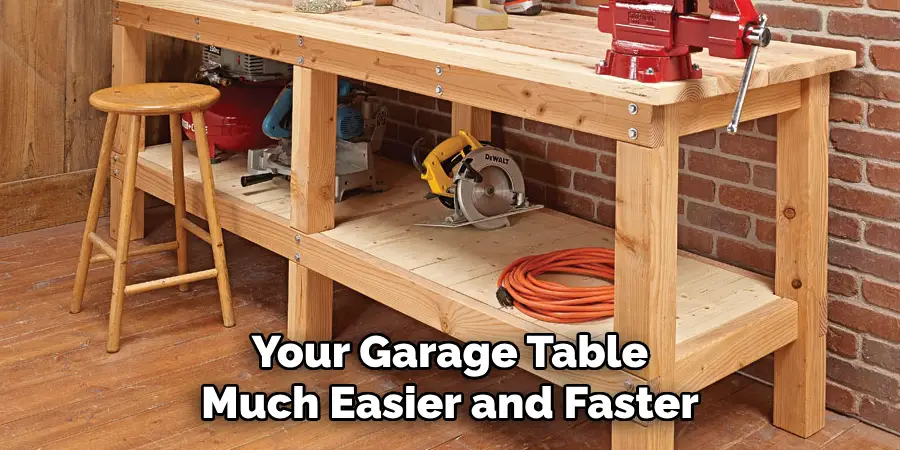
Power Drill:
A power drill will make assembling your garage table much easier and faster. Make sure to have the appropriate drill bits for your screws, bolts, and nuts.
Level:
A level will ensure that your garage table is even and stable. This will help prevent any accidents or items sliding off the table.
10 Step-by-Step Guidelines on How to Build Garage Table
Step 1: Prepare the Materials
Before you start building your garage table, gather all the necessary materials and tools. Double-check your list to ensure you have everything, including the wood or metal for the base and tabletop, screws, bolts, nuts, and any additional hardware. Lay out your tools, such as the power drill, level, and measuring tape, in an organized manner.
Having everything prepared and within reach will save you time and make the assembly process smoother. If needed, sand down any rough edges on the materials to ensure a clean and safe workspace.
Step 2: Lay Out Your Workspace
Choose a flat and stable surface where you can comfortably work on your project. Ensure the area is well-lit and has enough space to accommodate all the materials and tools you need. Clear the workspace of any clutter or unnecessary items to avoid distractions and reduce the risk of accidents.
Use a drop cloth or protective covering if you’re working indoors to prevent damage to the floor or furniture. Having a clean and organized workspace will not only enhance efficiency but also make the assembly process safer and more enjoyable.
Step 3: Assemble the Base
Start by laying out all the parts required for the base assembly and double-check them against the instructions or parts list to ensure nothing is missing. Follow the manual closely, attaching each component as specified. Use the appropriate tools, such as screwdrivers or wrenches, to secure screws, bolts, or fittings tightly in place.

Take your time to ensure all parts are aligned correctly to avoid structural instability later. If connections feel loose or uncertain, recheck the instructions and adjust accordingly. By properly assembling the base, you create a sturdy foundation for the rest of the project.
Step 4: Attach Tabletop Surface
Once the base is securely assembled, carefully position the tabletop surface onto the base. Align the pre-drilled holes on the tabletop with the corresponding mounting points on the frame. Use the provided screws or bolts to fasten the tabletop securely.
Tighten each screw or bolt evenly, ensuring the surface is level and stable. Avoid over-tightening, as this may cause damage to the tabletop or hardware. Double-check the stability of the attachment before proceeding with the next steps. A securely attached tabletop ensures both durability and safety during use.
Step 5: Attach any additional components
Once the frame and tabletop are securely attached, you can proceed to attach any additional components to your desk. This may include drawers, shelves, keyboard trays, or cable management systems.
Carefully follow the instructions provided with each component for proper attachment and placement. Use appropriate tools and hardware as needed. Ensure that all components are securely attached and stable before proceeding to use your new desk.
Step 6: Adjust height (If Applicable)
If your standing desk is adjustable in height, now is the time to adjust it to your desired level. Follow the manufacturer’s instructions for adjusting the height of your specific model.
Make sure to test out different heights and find one that is comfortable for you to stand at. Keep in mind that it is recommended to alternate between sitting and standing throughout the day for optimal ergonomic benefits.

Once you have found the right height, make sure to lock or secure the desk into place to prevent any accidental adjustments while using it.
Step 7: Organize Cables
With your new desk assembled and adjusted, now is a good time to organize any cables or cords. Use cable ties or organizers to keep them neat and tidy. This will not only improve the appearance of your workspace but also reduce tripping hazards and potential damage to your equipment.
Step 8: Add Personal Touches
Now that your standing desk is fully set up, it’s time to add personal touches. This could include photos, plants, or other decorations that will make your workspace feel more inviting and comfortable. Personalizing your space can also help boost productivity and motivation.
Step 9: Take Breaks
Remember to take breaks throughout the day, especially if you are using a standing desk for the first time. It’s important to give your body time to adjust and avoid overexertion. Consider setting a timer or using a reminder app to prompt you to take breaks and switch between sitting and standing.
Step 10: Listen to Your Body
Standing desks can offer numerous benefits, but it’s important to listen to your body and adjust accordingly. If you start to feel fatigued or experience discomfort, take a break and sit down. Standing for long periods of time can put strain on your legs, back, and feet, so it’s important to find a balance that works best for you.
Following these steps on how to build garage table can help improve your overall health and productivity while working from home. Remember to also incorporate regular exercise, healthy eating habits, and positive work-life balance into your daily routine for optimal well-being. With a well-designed standing desk and mindful self-care practices, you can create a comfortable and productive workspace that supports your physical and mental health. Happy building!
Frequently Asked Questions
Q1: Can I Use Any Type of Wood for Building a Garage Table?
A: Yes, you can use any sturdy and durable wood such as pine, oak, or maple, for your garage table. However, it is important to ensure that the wood is properly treated and finished to withstand daily wear and tear.
Q2: Do I Need Special Tools to Build a Standing Desk?
A: While having specific tools may make the process easier, you can still build a standing desk with basic tools like a saw, drill, and hammer. It is always helpful to have measuring tools and clamps on hand for accuracy.

Q3: How Long Does It Take to Build a Garage Table?
A: The time it takes to build a garage table will depend on your skill level and the complexity of the design. It can take anywhere from a few hours to a full day or more. It is important to allow enough time for measuring, cutting, assembling, and finishing the table. If you are new to woodworking, it may take longer as you learn and adjust to the process.
Q4: Can I Customize My Garage Table?
A: Yes, one of the benefits of building your own garage table is that you have full control over its design and customization. You can choose the size, material, color, and even add features like built-in storage or hooks for tools. Make sure to plan out your
Conclusion
Building your own garage table is a rewarding project that combines practicality with creativity. It allows you to tailor the table to your specific needs and preferences while gaining a sense of accomplishment from crafting something with your own hands.
By carefully planning, selecting quality materials, and taking the time needed for precise assembly, you can create a durable and functional addition to your workspace. Whether you’re a seasoned woodworker or a beginner, this project offers an excellent opportunity to develop your skills while adding value to your garage. Thanks for reading this article on how to build garage table.
I am Rick. I grew up helping my dad with his handyman service. I learned a lot from him about how to fix things, and also about how to work hard and take care of business. These days, I’m still into fixing things- only now, I’m doing it for a living.
I’m always looking for new ways to help people grow and develop. That’s why I have created this blog to share all my experience and knowledge so
that I can help people who are interested in DIY repair.