Are you looking for ways to anchor your car shelter? If so, you’ve come to the right place! In this guide, we’ll discuss different methods on how to anchor car shelter.

As a car owner, it’s important to protect your vehicle from the elements and keep it safe. A properly anchored car shelter can do just that.
Anchoring a car shelter securely is crucial for its durability and effectiveness in providing protection against various weather conditions.
Whether you’re looking to safeguard your vehicle from the hot sun, heavy rain, or snow, a well-anchored car shelter can offer peace of mind and extend the lifespan of both the shelter and the vehicle underneath.
This guide will walk you through the essential steps and considerations needed to properly anchor your car shelter to ensure it stands firm against wind and weather, providing reliable coverage for your vehicle year-round.
Why is Anchoring Important?
Before we discuss the different methods of anchoring, let’s understand why they are important. Anchoring your car shelter ensures that it stays in place even during strong winds or storms. Without proper anchoring, your car shelter can easily be blown away or toppled over, causing damage to both the shelter and your vehicle inside.
Moreover, a properly anchored car shelter also helps maintain its structural integrity. Over time, wind and weather can cause wear and tear on the shelter’s frame if it’s not securely anchored. This can lead to costly repairs or even the need to replace the shelter altogether.
Overall, anchoring your car shelter is essential for its stability, durability, and protection of your vehicle. Now, let’s explore different anchoring methods to find the best one for your specific needs.
Types of Anchors
You can use several types of anchors to secure your car shelter. The type you choose will depend on various factors such as follows:

- Soil Type: Your soil type in your area can affect the effectiveness of different anchors. For example, if you have loose or sandy soil, traditional stakes may be less effective.
- Weather Conditions: If your area frequently experiences strong winds, you need to choose a heavier and more robust anchoring method.
- Personal Preference: Some people prefer easier and quicker methods, while others prioritize durability and strength.
Here are some common types of anchors you can consider for your car shelter:
- Stakes: These are the most common and affordable type of anchor. They are suitable for softer soil types but may not be as effective in loose or sandy soils.
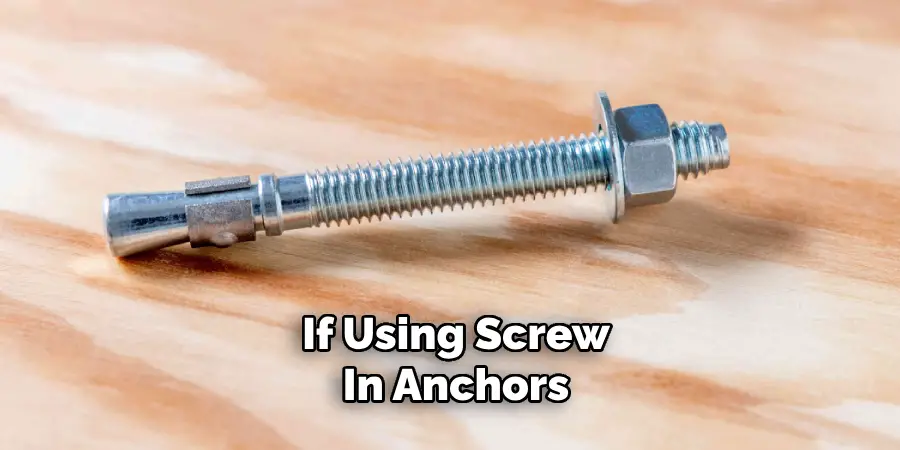
- Screw-in Anchors: These anchors provide a stronger hold, especially in windy areas. However, they require a power drill to install properly.
- Concrete Anchors: These are the most durable and long-lasting anchors but require more effort to install, as you need to mix concrete and let it dry.
- Auger Anchors: These anchors work well in both soft and hard soil types and provide a stronghold. However, they may not be suitable for rocky or frozen ground.
Now that you know the different types of anchors, let’s dive into the steps for anchoring your car shelter.
What Will You Need?
To anchor your car shelter, you will need the following materials:
- Your chosen anchors (stakes, screw-in anchors, concrete anchors, or auger anchors)
- A power drill (if using screw-in anchors)
- Concrete mix and water (if using concrete anchors)
- A hammer or mallet
- Rope or ratchet straps
Once you have all the materials, follow these steps to anchor your car shelter.
10 Easy Steps on How to Anchor Car Shelter
Step 1. Choose the Location Carefully:
Before you start the anchoring process, select the best location for your car shelter. Consider factors such as wind direction, sun exposure, and proximity to trees or buildings that could provide additional protection or hazards. Additionally, make sure the area is relatively flat and free of debris.
Step 2. Prepare the Anchors:
Prepare your chosen anchors according to the type you have selected. If you’re using stakes, ensure they are sharp and ready to penetrate the ground. For screw-in anchors, attach the correct drill bit to your power drill.
If opting for concrete anchors, prepare the concrete mix in a bucket or wheelbarrow according to the manufacturer’s instructions, ensuring it has the right consistency.
For auger anchors, ensure the blades are clean and sharp for easier insertion into the ground.
Step 3. Mark the Anchor Points:

Using measuring tape and a marker (such as spray paint or stakes), mark the points where each anchor will be placed. Ensure they are evenly distributed around the perimeter of the car shelter to provide balanced support. The exact distance between anchor points will depend on the size and design of your shelter.
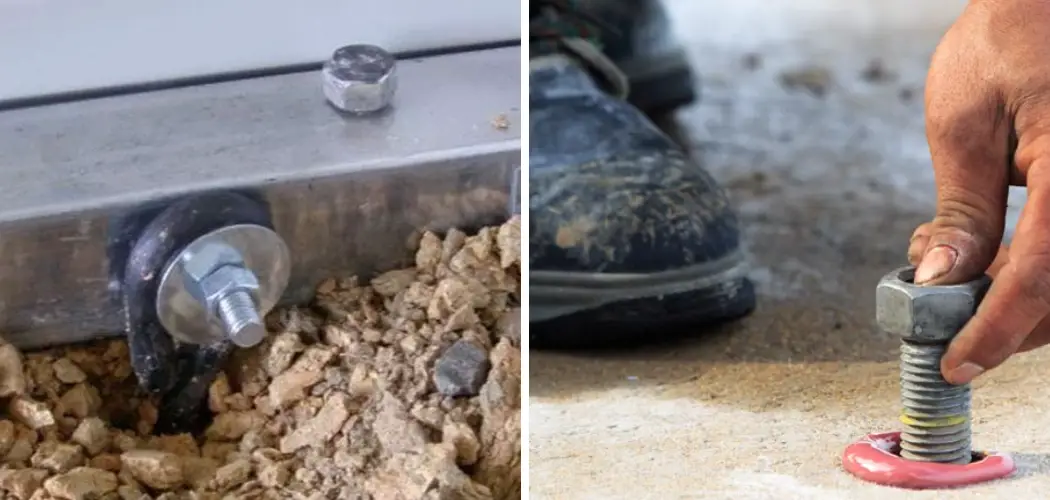
Step 4. Drive or Install the Anchors:
For stakes, use a hammer or mallet to drive them into the ground at a slight angle away from the shelter to increase stability. If using screw-in anchors, position the power drill at the marked points and drill the anchors into the ground until they are secure.
For concrete anchors, dig holes at the marked points, position the anchors, and then pour the prepared concrete into each hole, ensuring the top of the anchor is flush with the ground.
Auger anchors can be twisted into the ground manually or with the help of a bar through the eye for additional leverage.
Step 5. Attach the Shelter to the Anchors:
After all the anchors have been securely placed into the ground, it’s time to connect the car shelter to these fixed points. This step can vary depending on the type of shelter and anchors you have.
For shelters with grommet holes on the edges, use rope or ratchet straps to firmly tie each corner of the shelter to the anchors. Ensure the rope or straps are tight and secure to prevent any movement.
If your shelter has a frame that rests on the ground, you might need to use bolts or screws to attach the frame directly to concrete anchors. Check each connection point to ensure that the shelter is securely fastened to each anchor, providing maximum stability.
Step 6. Tighten and Adjust as Necessary:
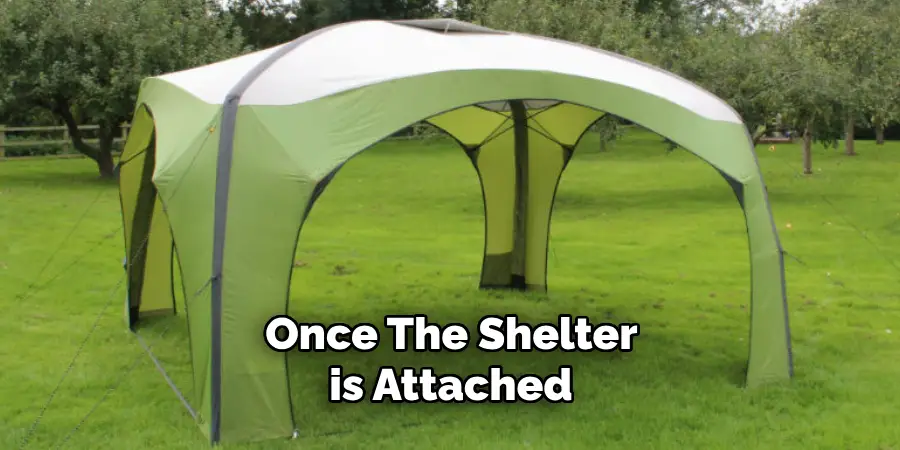
Once the shelter is attached to the anchors, go around each connection point to tighten and adjust the ropes, straps, or bolts.
There must be no slack, as this can lead to the shelter moving or fluttering in strong winds, which could weaken the anchoring over time. Make adjustments as needed to ensure the shelter is taunting and stable.
Step 7. Inspect Regularly:
Regularly inspecting your car shelter’s anchors is crucial for maintaining long-term stability and safety.
Check the anchors at least once every few months, especially after severe weather events like strong winds, heavy rain, or snow. Look for signs of movement, such as the shelter shifting position or anchors becoming loose or exposed.
Also, inspect the condition of the ropes, straps, bolts, and any part of the anchor mechanism for wear and tear. If any damage or significant wear is detected, replace the affected parts immediately to ensure the shelter remains securely anchored.
This ongoing vigilance will help extend the life of your car shelter, keeping it firm and functional throughout the seasons.
Step 8. Add Additional Support if Necessary:

Depending on the location and environmental conditions, your car shelter may require additional support to withstand elements such as strong winds or heavy snowfall. Consider adding weight bags or sandbags around the base of the shelter to further anchor it down.
Another option is to use additional bracing on the frame itself, such as cross beams or diagonal braces, which can provide extra stability against lateral movement.
Assess the shelter after installation and during regular inspections to determine if these additional measures are needed to ensure the longevity and safety of your car shelter.
Step 9. Perform Maintenance and Repairs Promptly:
Maintaining the integrity of your car shelter is essential for ensuring its longevity and stability.
Regular maintenance involves checking the condition of the fabric or material covering, the structural frame, and the anchoring system.
Look for any rips, tears, or holes in the material that need patching or replacement to prevent water, debris, or pests from entering. Inspect the frame for signs of rust, corrosion, or bending, which could weaken the structural integrity.
Any issues with the anchors, such as bending, rusting, or loosening, should be addressed immediately. Prompt repairs and consistent upkeep can prevent minor issues from escalating into major problems, safeguarding your investment and offering reliable protection for your vehicle.
Step 10. Customize for Weather-Proofing:
To ensure your car shelter withstands various weather conditions, consider customizing it further for enhanced weather-proofing. This might involve installing side panels or curtains that can be rolled down during rain, snow, or windstorms to provide additional protection for your vehicle.

For areas prone to heavy snowfall, consider a sloped roof design that allows snow to slide off easily, preventing accumulation that could weigh down and damage the shelter. In hot climates, reflective materials can be used to cover the shelter, reducing the internal temperature and protecting your vehicle from sun damage.
By following these steps, you can easily anchor your car shelter and ensure it remains stable and secure throughout the year.
5 Additional Tips and Tricks
- Leverage Heavy-Duty Anchors: Consider using heavy-duty anchors specifically designed for severe conditions for areas prone to high winds or storms. These can offer increased stability and peace of mind.
- Use a Combination of Anchoring Methods: Don’t rely on a single type of anchor. Combining different methods such as concrete footings with earth augers can provide extra security and durability to your car shelter.
- Inspect and Tighten Anchors Regularly: Over time, anchors can become loose due to soil shifting or weather conditions. Regular inspection and tightening of all anchors will ensure your shelter remains secure.
- Consider the Soil Type: The effectiveness of certain anchors largely depends on the type of soil you’re working with. For example, sandy or loose soil might require different anchoring solutions compared to dense clay soil.
- Ensure Proper Depth: When installing anchors, make sure they are driven deep enough into the ground. Depth increases stability, providing better resistance against uplift forces caused by wind.
With these additional tips and tricks, you can feel confident in anchoring your car shelter properly and effectively.
5 Things You Should Avoid When Anchoring a Car Shelter

- Overlooking Local Regulations: Before beginning installation, it’s crucial not to ignore local building codes and regulations. Failure to comply can lead to legal issues and might necessitate the removal or alteration of the shelter.
- Ignoring Manufacturer’s Instructions: Manufacturers provide specific guidelines for a reason. Skipping steps or using alternative methods risks the shelter’s stability and can also void warranties.
- Using Mismatched Anchors: Not all anchors are suitable for every situation. Using the wrong type of anchor for your soil type or shelter can lead to inadequate support and potential failure under stress.
- Neglecting Weather Considerations: Underestimating the impact of your local weather conditions on the anchoring system can lead to damage. Anchors must be chosen and installed with foresight for weather extremes, not just average conditions.
- DIY Anchoring Without Proper Tools or Skills: While saving on installation costs is tempting, improperly anchored shelters can be unsafe. If you lack the right tools or are unsure about the process, it’s best to consult with professionals or seek advice from experienced individuals.
By avoiding these common mistakes, you can ensure a successful and secure anchoring for your car shelter.
How Can You Water-Proof Your Car Shelter?
Water-proofing a car shelter is an important step in protecting your vehicle and any other items stored inside. Here are some ways to water-proof your car shelter:
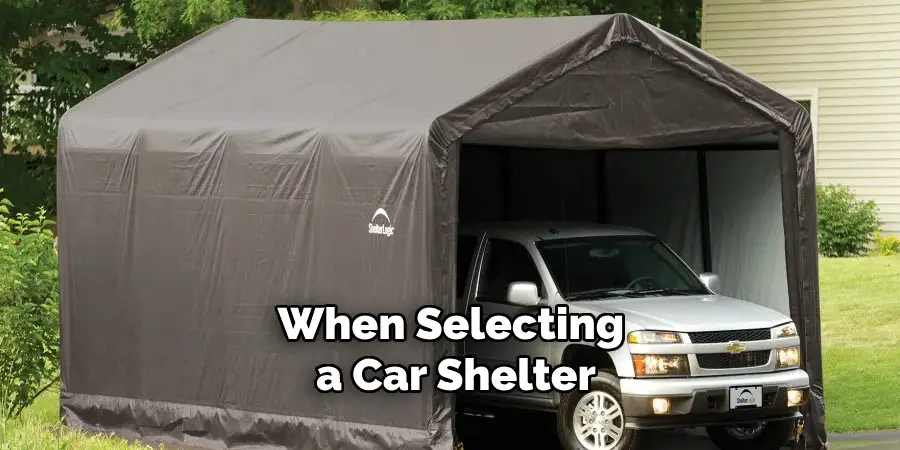
- Choose a Water-Resistant Material: When selecting a car shelter, opt for materials that are specifically designed to be waterproof or highly water-resistant. This can include features such as sealed seams and UV-resistant coatings.
- Ensure Proper Drainage: The location of your car shelter should allow for proper drainage. If necessary, you can add gutters or a sloped roof to direct water away from the shelter.
- Apply Sealants or Sprays: Various sealant products are available that can be applied to the seams and edges of your car shelter to prevent water from seeping in. You can also use waterproofing sprays on the shelter’s fabric or cover.
- Regularly Inspect and Repair: Check your car shelter regularly for signs of wear or damage, especially around seams and openings. Promptly address any issues to avoid further damage and maintain water-proofing.
- Invest in a Quality Cover: If your car shelter does not come with a cover or you need to replace an old one, make sure you invest in a high-quality, water-resistant cover that fits properly and offers adequate protection.
By taking these steps, you can ensure your car shelter is well-protected from water and other potential hazards.
What are the Causes of Car Shelter Damage?
Car shelters can be damaged by various factors, including:
- Extreme Weather Conditions: High winds, heavy snow, and harsh sunlight can all take a toll on car shelters and cause damage.
- Improper Anchoring: If a car shelter is not properly anchored, strong winds or other weather conditions can cause it to become displaced or even topple over.
- Wear and Tear: Over time, the constant exposure to weather elements can cause wear and tear on car shelters, leading to potential damage.
- Animals or Pests: Animals and pests can cause damage to a car shelter by chewing on or burrowing under its fabric or cover.
- Improper Installation or Maintenance: Poor installation or neglecting regular maintenance can also contribute to car shelter damage, making it more vulnerable to the above factors.
By understanding these potential causes of damage, you can take preventative measures and properly maintain your car shelter to prolong its lifespan. Overall, proper anchoring and regular maintenance are key in ensuring the stability and longevity of a car shelter.
What Material You Should Avoid When Anchoring?
When choosing materials for anchoring your car shelter, it’s important to avoid certain types that may not be suitable. These include:
- Lightweight Materials: Using lightweight materials such as plastic or thin metal stakes may seem convenient, but they are not strong enough to withstand high winds and can easily bend or break.
- Unstable Ground: Anchoring materials should not be used on unstable or soft ground, as they will not provide adequate support and can potentially cause damage to the shelter.
- Single Anchors: Using only one anchor for a car shelter is not recommended, as it does not distribute weight evenly and can lead to instability.
- Improperly Sized Anchors: It’s important to choose anchors that are the right size and weight for your soil type and shelter. Using incorrectly sized or weighted anchors may not provide enough support and can cause damage.
- Weak Adhesives: Avoid using weak adhesives such as glue or tape to secure your car shelter, as they will likely not withstand strong winds or other weather conditions.
By avoiding these materials and selecting suitable alternatives, you can ensure a strong and secure anchoring for your car shelter.
Conclusion
How to anchor car shelter effectively requires careful consideration of both the environmental conditions and the specific requirements of the shelter itself.
By employing a combination of anchoring methods, regularly inspecting and maintaining the structure’s stability, and adhering to local regulations and manufacturer’s guidelines, you can ensure that your car shelter remains safe and secure in a variety of weather conditions.
Avoiding common pitfalls such as neglecting local weather patterns or skimping on proper tools and materials is key to establishing a durable and reliable shelter.
Remember, the safety and longevity of your car shelter are paramount; investing time and effort into proper anchoring from the outset will save you from potential issues down the line. With these considerations in mind, you’re well on your way to protecting your vehicle effectively against the elements.
I am Rick. I grew up helping my dad with his handyman service. I learned a lot from him about how to fix things, and also about how to work hard and take care of business. These days, I’m still into fixing things- only now, I’m doing it for a living.
I’m always looking for new ways to help people grow and develop. That’s why I have created this blog to share all my experience and knowledge so
that I can help people who are interested in DIY repair.