
Side-mounted garage door springs might seem like a complicated part of your garage door system, but understanding how to adjust them can make your door function more smoothly and safely. These springs are vital components that control the tension and ensure your garage door operates effortlessly. Whether your door springs are too tight, causing the door to slam shut, or too loose, preventing the door from staying in place, learning how to adjust side-mounted garage door springs can save you time, money, and frustration.
This guide provides a clear, step-by-step process to help even beginners tackle this task with confidence. We’ll cover everything from identifying the type of spring to the tools you’ll need and safety precautions you should always follow. By the end, you’ll have a well-adjusted garage door that increases convenience and safety in your home.
Why Adjusting Side-Mounted Garage Door Springs is Important
Getting your side-mounted garage door springs adjusted properly isn’t just about convenience—it’s also about safety, durability, and efficiency. When these springs are out of alignment, they can put unnecessary stress on the door system. A door that doesn’t close smoothly could be a sign that the springs are either too tight or too loose, and this imbalance could lead to costly damages or, worse, safety hazards.
Additionally, misaligned springs can shorten the life of the entire garage door system. Overloaded motors, uneven movement, and constant wear on the tracks are all side effects of improper spring tension. Adjusting your springs promptly can prevent these issues, extend the life of your garage door, and save you from expensive repairs in the future. Furthermore, an optimally adjusted spring ensures that your door stays securely open or closed, reducing risks of accidents or injury.
By ensuring your side-mounted springs are perfectly calibrated, you’re not just maintaining your garage door—you’re investing in the safety and functionality of a key part of your home.
Step-by-Step Guide to Adjust Side-Mounted Garage Door Springs
Step 1: Identify the Spring Type
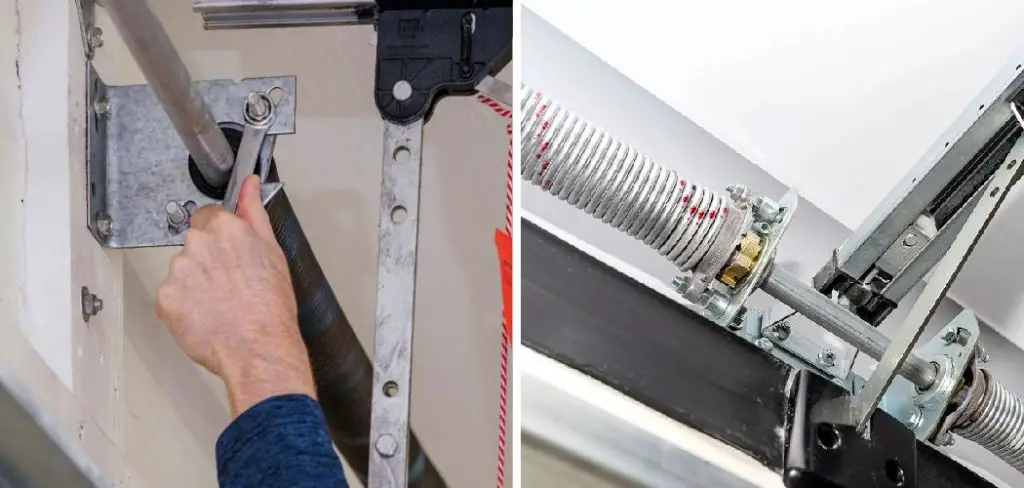
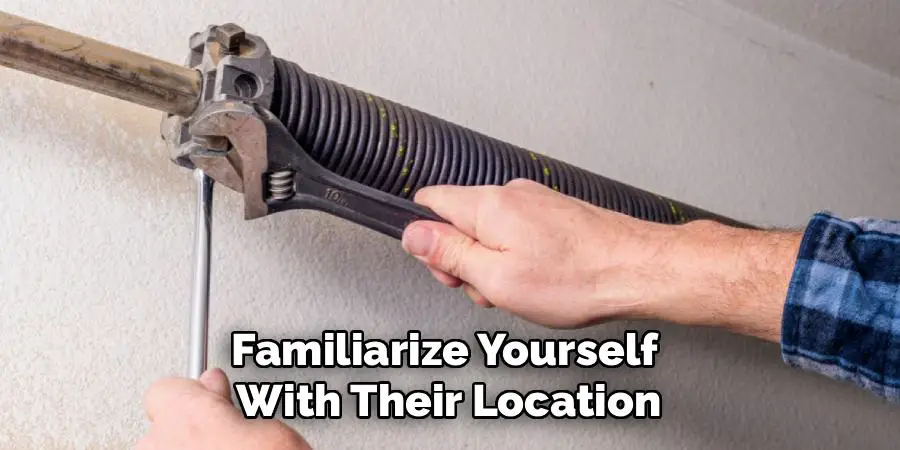
Before making adjustments, determine what kind of side-mounted springs your garage door has. Typically, these are torsion springs, which operate horizontally and manage the door’s tension. Familiarize yourself with their location, as they are mounted along the sides near the bottom of the garage door.
Ensure you visually inspect the springs for signs of damage, rust, or wear. Understanding the condition of your springs before proceeding is important, as damaged springs can snap if improperly adjusted. Always prioritize safety by gathering protective gear like gloves and goggles before starting.
Step 2: Gather the Necessary Tools
You’ll need tools like adjustable wrenches, a winding bar, vice grips, and possibly a ladder, depending on the height of your garage. A socket wrench set may also be useful if bolts need tightening. Having everything on hand avoids interruptions midway through the process.
Place your tools within reach and ensure the ladder is stable and secure. A well-organized workspace will make adjustments easier and reduce risks of accidental injuries.
Step 3: Disengage the Garage Door Opener
Disengaging the automatic opener is critical before adjusting your springs. This ensures that the door doesn’t suddenly activate while you’re working. Simply pull the emergency release cord, typically found hanging from the opener’s trolley.
After disengaging, test the door’s movement by manually opening and closing it. This will help you understand how much tension adjustment is required and ensure the springs aren’t under unnecessary pressure.
Step 4: Measure the Spring Tension
Next, determine the current tension level in your springs. If the door slams down too quickly, the springs are too loose. If the door doesn’t stay open, the springs are likely too tight.
Manual testing is simple—half-open the door and observe its movement. If it glides up or falls quickly, adjustments are necessary. Properly balanced springs allow the door to stay halfway open without any movement.
Step 5: Secure the Door in Place
To work safely, secure the garage door using vice grips or clamps. Attach these to the tracks just below the rollers to hold the door steady. This precaution is vital because ensuring the door doesn’t move while you adjust the springs can prevent accidents.
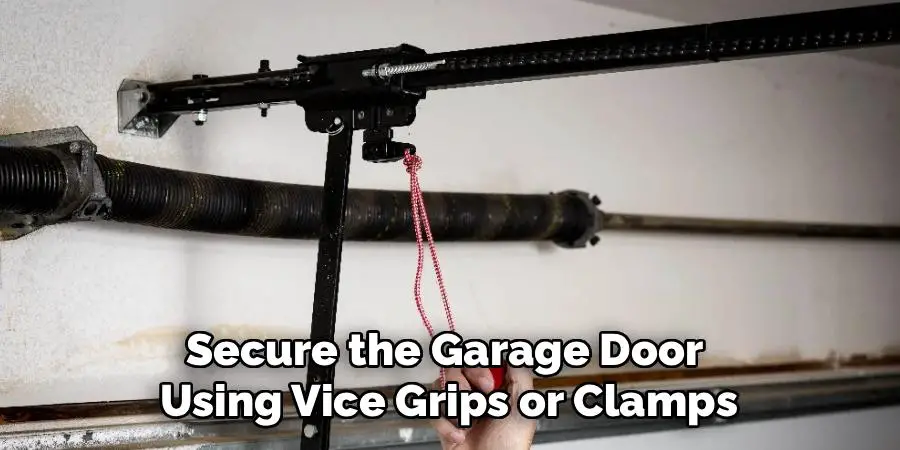
Once secured, double-check the placement of your clamps or grips—they should completely stop the door’s movement. If there’s any doubt, add a secondary clamp for extra security.
Step 6: Loosen the Adjustment Screw
Locate the adjustment screws on the spring assembly. Use your wrench or socket tool to carefully loosen them. Make sure to hold the spring firmly during this process. This step reduces spring tension momentarily so you can adjust it to the proper level. If the screws are rusted or stiff, apply a small amount of lubricant before loosening them. Always work slowly to prevent the spring from slipping unexpectedly and causing injury.
Step 7: Adjust the Spring Tension
Increase or decrease the tension according to your earlier measurements. Use a winding bar to turn the spring in the desired direction. Increasing tension involves turning the spring clockwise, while decreasing it requires counterclockwise turns. Each full rotation will make a noticeable difference, so adjust incrementally and test the door’s functionality after every rotation. Incorrect tension can result in more severe operational issues.
Step 8: Tighten the Adjustment Screw
Once the spring tension feels right, retighten the adjustment screws carefully. Ensure they are secure to prevent the spring from slipping back into its previous position after use. Double-check the screws’ tightness and inspect the spring to make sure there are no unusual bends or twists. A secure adjustment indicates that the spring will hold its new tension reliably.
Step 9: Test the Door’s Balance
Remove the clamps or vice grips and manually operate the garage door to test its balance. Open and close it several times to ensure smooth movement without jerks or sudden drops. If the door doesn’t perform as expected, revisit the adjustment process. Applying small tweaks can help achieve the perfect balance. Properly adjusted springs will result in effortless manual operation.

Step 10: Re-Engage the Garage Door Opener
After confirming the springs are adjusted correctly, re-engage your automatic garage door opener. Simply pull the emergency release cord back into its original position. Test the mechanism to ensure the door now functions seamlessly. A final inspection of the springs, tracks, and opener will help you confirm that everything is in working order. Safe and balanced springs will ensure long-term functionality and peace of mind.
Spring Adjustment Process
Adjusting the springs on a garage door requires precision and care, as springs are under significant tension. Below is a step-by-step guide to safely adjust them:
Identify the Spring Type: Determine whether your garage door has torsion springs (mounted horizontally above the door) or extension springs (located on either side of the door). Each type requires a slightly different approach for adjustment.
Gather the Necessary Tools: For torsion springs, you will need winding bars, a wrench, and possibly a socket set. For extension springs, you may need pliers and safety cables. Ensure you use tools designed for this specific task to avoid accidents.
Release Tension Safely: For torsion springs, insert a winding bar into one of the winding cone holes and carefully unwind the spring to release the tension. With extension springs, securely open the garage door to relieve tension before making adjustments.
Adjust the Tension: For torsion springs, turn the winding cone in the appropriate direction (clockwise to increase tension, counterclockwise to decrease). For extension springs, move the spring to a different hole in the track hanger to adjust tension.
Test the Adjustment: Once the spring tension is modified, manually lift and lower the garage door to ensure it moves smoothly and stays balanced. If the door does not remain open halfway, further adjustments may be required.
Secure the Springs: Tighten all bolts and hardware, ensuring the springs are securely in place. Reinstall any safety cables or additional components that were removed during the process.
Remember, adjusting garage door springs can be dangerous if not handled correctly. If you are unsure about any step, it is recommended to contact a professional to ensure the job is done safely and effectively.
Frequently Asked Questions
How often should I adjust my side-mounted garage door springs?
Typically, adjustments are required every 6–12 months. This timing can vary depending on usage and environmental conditions. If you notice your door struggling to open or close smoothly, inspect the springs sooner. Regular maintenance will prevent sudden malfunctions.
What safety precautions should I take while adjusting springs?
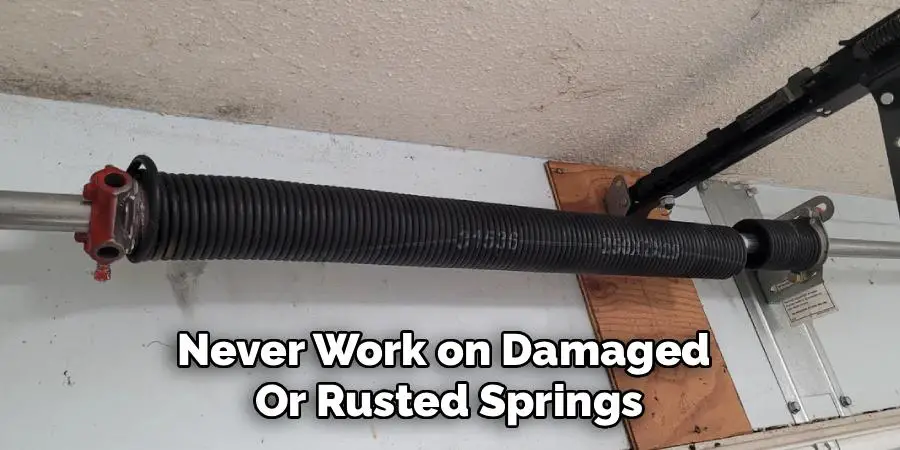
Always wear protective gear such as gloves, goggles, and sturdy shoes. Ensure the garage door is secured in place before working, and disengage the opener to prevent accidental activation. Never work on damaged or rusted springs without professional assistance.
Can I adjust side-mounted garage door springs without professional help?
Yes, if you follow a careful, step-by-step guide and prioritize safety. However, for severely damaged or complicated installations, consulting a technician is strongly recommended.
What are the signs of poorly adjusted springs?
Common indicators include uneven door movement, difficulty manually lifting the door, and frequent motor strain. Audible creaks and unsteady performance signal a problem as well.
How do I know if the springs need replacement instead of adjustment?
If the springs show visible wear, cracks, or rust, replacement is necessary. Adjustments are not sufficient for worn-out or damaged springs, as they could snap without warning.
Conclusion
Learning how to adjust side-mounted garage door springs is a task that every homeowner can benefit from. By ensuring your garage door is balanced and functional, you save yourself from costly repairs and potential safety issues. With this step-by-step guide, you’re equipped to take on the challenge confidently. Proper spring tension isn’t just about convenience—it’s essential for the longevity and safety of your garage system. Start with this guide, and enjoy the rewards of a smooth, perfectly calibrated garage door.
Regular maintenance and timely inspections can prevent issues with garage door springs. Keeping the springs lubricated and checking for wear can extend their lifespan. Prioritizing safety and addressing problems promptly ensures the door operates smoothly and reduces the risk of accidents.
I am Rick. I grew up helping my dad with his handyman service. I learned a lot from him about how to fix things, and also about how to work hard and take care of business. These days, I’m still into fixing things- only now, I’m doing it for a living.
I’m always looking for new ways to help people grow and develop. That’s why I have created this blog to share all my experience and knowledge so
that I can help people who are interested in DIY repair.