Adjusting garage door tracks is an essential maintenance task that ensures your garage door operates smoothly and safely. Over time, tracks can become misaligned due to regular use, vibrations, or changes in the door’s weight distribution. Properly aligned tracks not only prevent unnecessary wear and tear but also minimize the risk of accidents and costly repairs.
This guide on how to adjust garage door tracks will walk you through the steps to identify misalignment issues and safely adjust your garage door tracks to keep your door functioning optimally.
Safety Precautions
Before attempting to adjust your garage door tracks, it is crucial to prioritize safety. Start by disconnecting the automatic garage door opener to prevent the door from moving unexpectedly. Always wear protective gloves to avoid injuries from sharp edges on the tracks or tools.
Ensure the garage door is fully closed and stable while working to reduce the risk of it falling. Use a sturdy ladder or platform for elevated adjustments, and never attempt to repair or adjust components you’re unsure about without consulting a professional. Following these safety precautions will help you perform the task securely and effectively.
Tools and Materials Needed
- Ladder or Platform
- Protective Gloves
- Screwdriver
- Adjustable Wrench
- Pliers
- Lubricant Spray
8 Step-by-step Guides on How to Adjust Garage Door Tracks
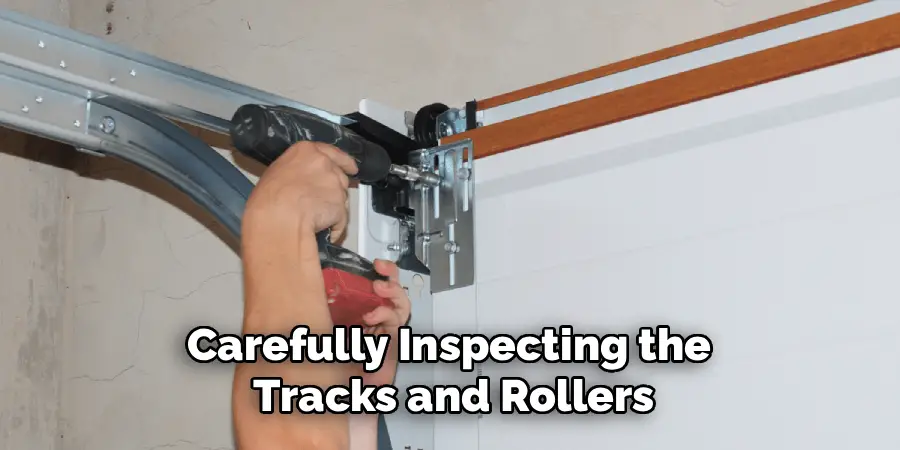
Step 1: Inspect the Tracks and Rollers
Begin by carefully inspecting the tracks and rollers for any signs of damage, debris, or obstructions. Check that the tracks are properly aligned and free of rust or dirt buildup. Clean the tracks with a damp cloth, and if you notice significant damage, consider replacing the affected parts to ensure smooth operation.
Step 2: Tighten Loose Hardware
Over time, the constant movement of your garage door can cause various components to loosen. Use a screwdriver or adjustable wrench to tighten any loose bolts, screws, or brackets you find on the tracks and door frame. Be sure to check both the vertical and horizontal tracks to make sure all hardware is secure.
Step 3: Lubricate Moving Parts
Proper lubrication is essential for the efficient operation of your garage door. Apply a lubricant spray specifically designed for garage doors to the rollers, hinges, springs, and tracks. Avoid using heavy grease, as it can attract dust and grime. Make sure to work the lubricant into the moving parts to reduce friction and prevent wear. If your garage door has a chain or screw drive opener, be sure to lubricate those as well. This should be done every six months to keep your garage door running smoothly.
Step 4: Check the Balance
An unbalanced garage door can cause unnecessary strain on the motor and lead to premature wear and tear. To test the balance of your garage door, close it and disconnect the automatic opener by pulling the release cord. Then, manually lift the door about halfway up and let go. The door should stay in place without moving up or down. If it doesn’t, adjust the tension on the springs until it is balanced.
Step 5: Inspect Cables and Springs
Regularly check the cables and springs of your garage door for any signs of wear or damage. If you notice frayed or broken cables or if the springs appear stretched out, it is important to replace them immediately. These components are under a lot of tension and can be dangerous if they break while the door is in motion.
Step 6: Lubricate Moving Parts
To keep your garage door operating smoothly, it is important to regularly lubricate all moving parts such as hinges, rollers, and tracks. Use a silicone-based lubricant on metal parts and a lithium-based grease on plastic parts. This will prevent rusting and reduce friction, allowing your garage door to open and close effortlessly.

Step 7: Test the Safety Features
Modern garage doors come equipped with safety features such as automatic reverse and infrared sensors. It is crucial to test these features regularly to ensure they are functioning properly. To test the automatic reverse, place a small object like a roll of paper towels in the path of the closing door. If the door does not automatically reverse upon hitting the object, it may need adjustment or repair. To test the infrared sensors, simply wave your hand in front of them while the door is closing. If the door does not immediately stop and reverse, you should have a professional inspect and adjust it.
Step 8: Replace Weatherstripping
Weatherstripping helps keep the elements out of your garage by creating a seal between the door and the opening. Over time, weatherstripping can become worn or damaged, allowing air and moisture to enter. This can not only affect the temperature inside your garage but also lead to potential damage to your belongings.
Following these steps on how to adjust garage door tracks, you may have noticed that the weatherstripping needs to be replaced as well. Replacing weatherstripping is a relatively simple process and can greatly improve the energy efficiency of your garage.
To replace the weatherstripping, follow these steps:
Measure the Length Needed
Use a tape measure to determine the length of weatherstripping needed for your garage door. Be sure to measure all sides of the door, including the top and bottom. It’s important to get an accurate measurement in order to properly seal the door.
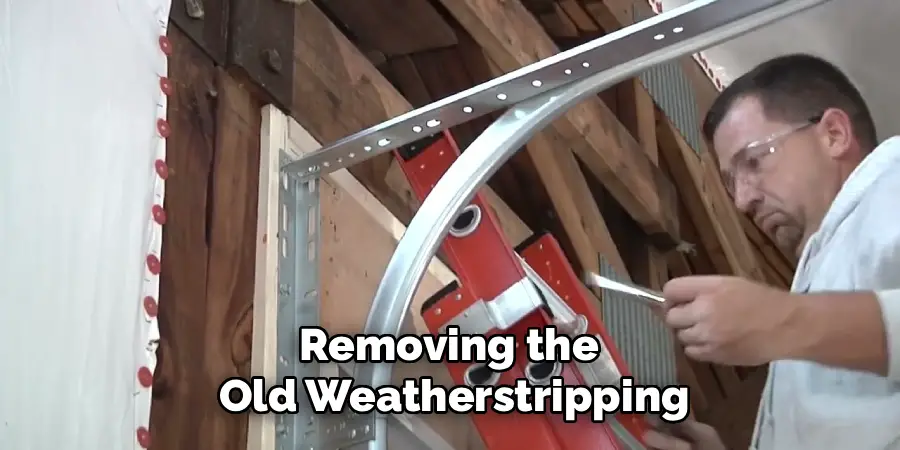
Remove Old Weatherstripping
Using a flathead screwdriver, gently pry off the old weatherstripping from the bottom of your garage door. If it is stuck on too tightly, you can use a utility knife to cut through any adhesive or caulk holding it in place.
Clean the Surface
After removing the old weatherstripping, be sure to clean any remaining residue or dirt from the surface where it was attached. This will help ensure a proper seal with the new weatherstripping.
Cut and Install New Weatherstripping
Measure the length of your garage door and cut the new weatherstripping to fit. Make sure to leave a few extra inches on each end for a secure fit. Then, starting from one end, press the weatherstripping firmly into place along the bottom edge of your garage door.
Test the Seal
Once installed, close your garage door and check for any gaps or areas where the weatherstripping may not be making contact with the ground. If necessary, adjust and reposition until you have a tight seal all around.
Maintain Regularly
To ensure that your garage door remains properly sealed, it is important to regularly inspect and replace worn weatherstripping as needed. Over time, weatherstripping can become cracked or loose, which can lead to gaps and reduced energy efficiency.
Other Uses
While its primary purpose is for garage doors, weatherstripping can also be used for other areas of your home that may need sealing such as windows and doors.
When to Call a Professional?
Frequently Asked Questions
Q1: How Often Should I Replace Weatherstripping on My Garage Door?
A: It is recommended to check your weatherstripping at least once a year and replace it if there are any signs of wear or damage. It is also a good idea to replace weatherstripping after any major storms or extreme temperature changes.
Q2: Can I Replace Weatherstripping Myself?
A: Yes, weatherstripping can be replaced as a DIY project. However, it is important to properly measure and install the new weatherstripping to ensure proper sealing and energy efficiency. The process may vary based on the type and location of your garage door, so it is recommended to refer to the manufacturer’s instructions or consult a professional if needed.
Q3: How Do I Know If My Garage Door Needs New Weatherstripping?
A: If you notice drafts or gaps around your garage door, increased noise from outside, or higher energy bills, these may be signs that your weatherstripping needs to be replaced. It is also a good idea to visually inspect the weatherstripping for any cracks, tears, or other signs of wear and tear. Worn weatherstripping can lead to decreased insulation and increased energy costs, so it’s important to replace it when necessary.
Q4: What Are the Benefits of Replacing Weatherstripping?
A: There are several benefits to replacing weatherstripping on your garage door. These include improved energy efficiency, increased protection against outside elements such as rain and wind, reduced noise levels, and improved overall insulation for your garage. By maintaining proper weatherstripping, you can also prevent potential damage to your garage door or its mechanisms due to exposure to harsh weather conditions.
When to Call a Professional?
A: While replacing weatherstripping can often be a simple DIY task, there are situations where calling a professional is the best option. If your garage door’s frame is damaged or misaligned, if the weatherstripping is difficult to access, or if you’re unsure about the proper materials or installation techniques, a professional can ensure the job is done correctly.
Additionally, if you notice persistent drafts, leaks, or uneven temperature control despite replacing the weatherstripping, it may indicate a more significant issue with your garage door that requires professional inspection and repair.
Conclusion
Properly sealing your garage door with weatherstripping is an effective way to enhance your home’s energy efficiency, protect it from the elements, and keep pests out. Regular maintenance and timely replacement of weatherstripping ensure that it continues to provide optimal performance.
By taking these simple steps on how to adjust garage door tracks, you can enjoy a more comfortable and cost-effective living environment while extending the longevity of your garage and its contents.
I am Rick. I grew up helping my dad with his handyman service. I learned a lot from him about how to fix things, and also about how to work hard and take care of business. These days, I’m still into fixing things- only now, I’m doing it for a living.
I’m always looking for new ways to help people grow and develop. That’s why I have created this blog to share all my experience and knowledge so
that I can help people who are interested in DIY repair.