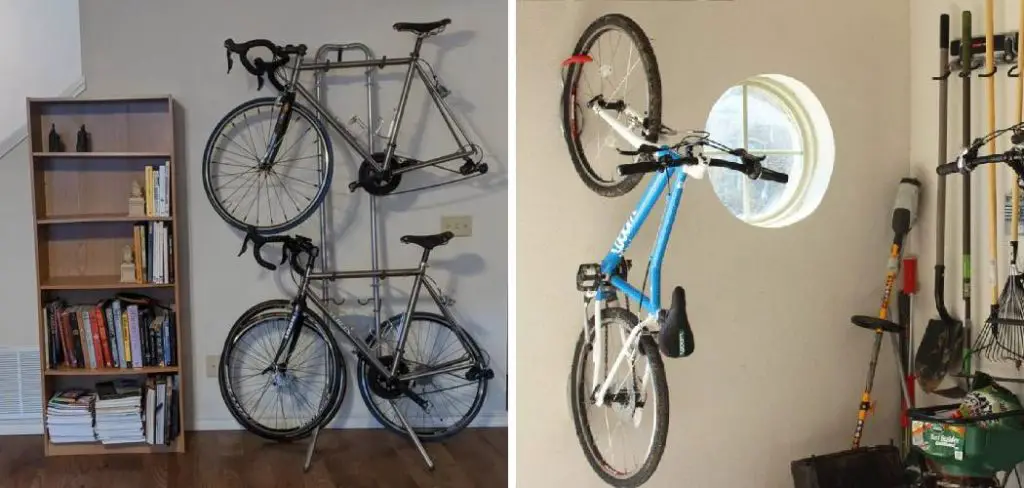
The Delta Cycle Michelangelo 2 Bike Storage Rack is an innovative solution designed to keep your bicycles organized and safely stored. Whether you’re an avid cyclist or simply looking to reclaim space in your garage or home, this vertical bike rack maximizes storage efficiency without sacrificing style.
With its sturdy construction and adjustable features, the Michelangelo 2 is suitable for various bike sizes and weights, making it a versatile addition to any space.
In this guide on how do you hang delta cycle michelangelo 2 bike storage rack, we will walk you through the steps necessary to hang and install this bike storage rack, ensuring you can enjoy a clutter-free environment while keeping your bikes easily accessible.
What is a Delta Cycle Michelangelo 2 Bike Storage Rack?
A Delta Cycle Michelangelo 2 Bike Storage Rack is a freestanding vertical bike rack designed to hold two bicycles securely in an upright position. It features a unique gravity design that eliminates the need for bolts, screws, or wall mounts, making it a convenient and portable solution for bike storage.
Apart from its functional design, the Michelangelo 2 also boasts a sleek and modern look that complements any room decor. It is made of sturdy steel with rubberized feet to protect your floors and prevent the rack from slipping.
Needed Materials
Before you begin hanging your Delta Cycle Michelangelo 2 Bike Storage Rack, make sure you have the following materials on hand:
- Delta Cycle Michelangelo 2 Bike Storage Rack (Including All Parts and Components)
- Measuring Tape or Ruler
- Pencil
- Level
- Drill (if Needed)
- Anchors and Screws (if Needed)
7 Simple Step-by-step Guidelines on How Do You Hang Delta Cycle Michelangelo 2 Bike Storage Rack
Step 1: Unpack and Assemble the Rack
Begin by carefully unpacking the Delta Cycle Michelangelo 2 Bike Storage Rack from its box, ensuring you have all the parts and components listed in the materials section. Lay everything out on a clean, flat surface to inspect for any damage or missing pieces. Once confirmed, follow the included assembly instructions to put the rack together.

This usually involves connecting the main upright sections and securing any crossbars, ensuring a snug fit. Use the level to check that the base is even, as this will ensure stability once the rack is installed.
Step 2: Choose Your Location
Selecting the right location for your Delta Cycle Michelangelo 2 Bike Storage Rack is crucial for both functionality and aesthetics. Look for a spot that provides ample space for the rack to stand without obstruction, allowing for easy access to your bicycles. Ideally, this area should be near an entrance or exit, making it convenient to grab your bike for rides. Ensure the surface is flat and stable, as this will help maintain the rack’s balance.
Additionally, consider the surrounding environment; a well-lit area can enhance visibility and safety while using the rack. Before finalizing your choice, visualize how the rack will fit into the space and ensure it complements the overall decor of the room.
Step 3: Measure and Mark the Wall
Once you’ve selected the ideal location for your Delta Cycle Michelangelo 2 Bike Storage Rack, it’s time to prepare the wall for installation. Using your measuring tape or ruler, determine the desired height at which the rack will be mounted. A typical height allows for easy access and accommodates the majority of bike sizes.
Next, use a pencil to mark this height on the wall, ensuring it’s level. If you are installing the rack against a vertical surface, use the level to ensure that your marks are straight and even. Double-check the measurements to confirm that the rack will be positioned correctly. These marks will serve as your guide during the installation process, ensuring that the bike rack is both secure and aesthetically pleasing.
Step 4: Install the Rack
Now that you have your wall marked, it’s time to install the Delta Cycle Michelangelo 2 Bike Storage Rack. Follow the manufacturer’s instructions for mounting and securing the rack. If you are attaching it to a wall, use anchors and screws to ensure stability.
Alternatively, if you’re leaning it against a surface, make sure the base is securely resting on the ground. If needed, use a drill to create pilot holes before inserting screws or anchors. Double-check that all bolts and screws are tightly fastened to prevent any accidents or damage.
Step 5: Test Stability
After securely mounting your Delta Cycle Michelangelo 2 Bike Storage Rack, it’s essential to test its stability before loading your bicycles onto it. Gently shake the rack from side to side to ensure that it remains firmly in place and does not wobble or shift. Check that all screws and anchors are tight, making any necessary adjustments for optimal stability.

Additionally, a lightweight bicycle should be placed on the rack, simulating the weight of a bicycle, to assess its balance and strength further. Only once you’re confident in the rack’s stability should you proceed to load your bikes onto it, ensuring a safe and secure setup for your bicycles.
Step 6: Load Your Bicycles
With the Delta Cycle Michelangelo 2 Bike Storage Rack securely installed and tested for stability, you can now begin to load your bicycles. Start by carefully lifting each bike and placing it onto the rack, ensuring that the frame rests securely and that the wheels fit snugly within the designated areas. It’s advisable to load the heavier bike first, as this will help maintain balance.
When positioning the bicycles, ensure that there is adequate space between them to avoid damage or scratches. Once loaded, double-check that each bike is securely held in place and that the rack remains stable under its weight. Take a moment to step back and assess the overall arrangement, ensuring it meets both functional and aesthetic expectations.
Step 7: Enjoy Your Newly Organized Space!
Congratulations! You have successfully hung and installed your Delta Cycle Michelangelo 2 Bike Storage Rack, reclaiming valuable space in your home or garage and keeping your bicycles safe and accessible.
Following these simple step-by-step guidelines on how do you hang delta cycle michelangelo 2 bike storage rack will ensure that your bike rack is secure, stable, and functional. With its convenient gravity design and modern look, the Delta Cycle Michelangelo 2 Bike Storage Rack is an excellent solution for any bike storage needs. So go ahead and enjoy your newly organized space with ease! Happy riding!
Safety Tips
Check Weight Limits:
Always adhere to the manufacturer’s weight limit for the bike rack. Overloading can compromise stability and safety.
Inspect Regularly:
Periodically inspect the rack for any signs of wear or damage. Look for loose screws, rust, or any structural weaknesses that could affect its performance.
Secure Placement:
Ensure the rack is placed on a flat, stable surface to prevent tipping or wobbling. If mounting to a wall, verify that it is securely anchored to prevent accidents.
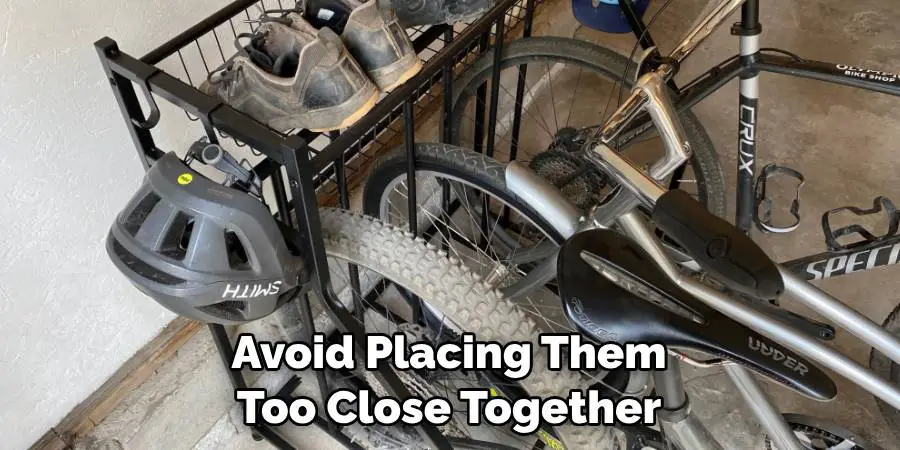
Proper Loading:
When loading your bicycles, lift them carefully and avoid placing them too close together to reduce the risk of scratching or damaging the bikes.
Teach Kids:
If children use the bike rack, educate them on proper handling and safety practices to prevent injuries while loading or unloading bikes.
Wear Safety Gear:
When using your bike, always wear appropriate safety gear, such as helmets and lights, especially when cycling in low visibility conditions.
Avoid Overcrowding:
Do not overload the bike rack with excess items, as this can lead to instability and increase the risk of accidents.
Additional Tips and Suggestions
- Consider adding rubber or foam padding to the arms and base of the rack for extra protection against scratches or damage to your bicycles.
- If you have multiple bikes, consider staggering them on the rack to maximize space and avoid handlebars getting tangled.
- Make sure to regularly check and tighten any bolts or screws as needed to maintain stability over time.
- When not in use, fold down the arm of the rack to minimize its footprint and create more open space in the room.
- For added security, consider using a bike lock to secure your bicycles to the rack, especially if storing them in a public area or shared space.
- Use this step-by-step guide as a reference, but always follow the manufacturer’s instructions for proper installation and use of the Delta Cycle Michelangelo 2 Bike Storage Rack.
- Don’t be afraid to get creative with your bike storage; you can use multiple racks or even install them on different walls for a unique display.
- Regularly clean and maintain your bike rack to ensure it remains functional and visually appealing. A damp cloth and mild soap can help remove any dirt or grime.
- Consider investing in a cover for your bike rack to protect it from weather and outdoor elements if storing it outside.
- For even more storage options, consider using additional hooks or shelves around the bike rack area to hold helmets, gear, or other biking accessories. The possibilities are endless! Happy organizing!

Conclusion
In conclusion, the Delta Cycle Michelangelo 2 Bike Storage Rack offers an effective solution for anyone looking to maximize their space while ensuring their bicycles are stored safely and accessible. By following the step-by-step guidelines on how do you hang delta cycle michelangelo 2 bike storage rack outlined here, you can not only achieve a stable and functional setup but also enhance the overall aesthetic of your home or garage.
Embracing organized bike storage not only contributes to a tidier environment but also promotes the longevity of your bicycles. Whether you are a casual rider or a biking enthusiast, this storage solution is designed to meet your needs and streamline your cycling experience. Enjoy the benefits of a well-organized space and happy biking!
I am Rick. I grew up helping my dad with his handyman service. I learned a lot from him about how to fix things, and also about how to work hard and take care of business. These days, I’m still into fixing things- only now, I’m doing it for a living.
I’m always looking for new ways to help people grow and develop. That’s why I have created this blog to share all my experience and knowledge so
that I can help people who are interested in DIY repair.