

Most garage doors leave a significant gap between the top of the opening and the ceiling — and that unused space is exactly where overhead storage, lifts, and cleaner installs could go. If your door travels horizontally across the ceiling on standard tracks, converting it to a high-lift or vertical-lift configuration can recover that space and change how your whole garage functions.

Knowing how to extend garage door tracks to ceiling height is not a simple weekend project. It involves rerouting track geometry, potentially modifying your spring and cable system, and confirming that your opener can handle the new configuration. This guide walks you through every stage of evaluation, planning, and execution — so you understand exactly what this project requires before you commit to it and know when professional help is the right call.
Why Garage Door Tracks To Ceiling Matters
Standard garage door tracks curve inward about 12 to 15 inches below the ceiling, sending the door panels horizontally into the garage interior. That horizontal travel consumes ceiling space you could use for storage racks, car lifts, or a ceiling-mounted opener on a high-clearance setup.
Extending the tracks vertically before the horizontal run — a high-lift conversion — shifts most of the door’s travel up the wall rather than into the ceiling zone. The door still travels horizontally at the top, but it does so much higher, freeing up significant overhead clearance.
The benefits go beyond storage. A high-lift configuration also looks cleaner, works well with taller vehicles, and can improve the function of certain jackshaft or side-mounted openers. Done correctly, it’s a meaningful upgrade. Done incorrectly, it creates a dangerous system under constant spring tension that can fail unexpectedly.
Step-By-Step Guide To How To Extend Garage Door Tracks To Ceiling
Step 1: Measure Your Garage Height And Available Headroom
Start by measuring the total height of your garage from the floor to the ceiling joists. Then measure the height of your garage door opening. Subtract the door height from the ceiling height — this number is your available headroom. Standard high-lift conversions require a minimum of 2 to 3 inches of headroom above the door opening, but the exact requirement depends on the track radius and how high you want to lift.
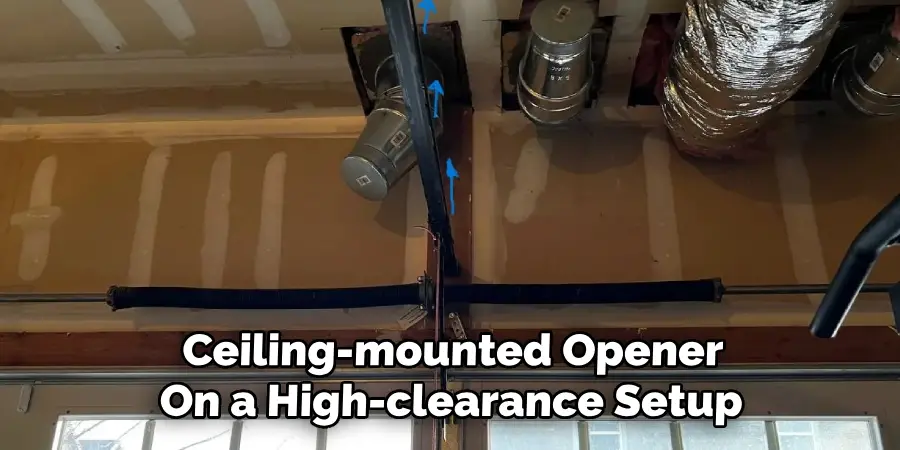
Write down your rough opening height, door height, and ceiling height before moving forward. These three numbers determine what kind of conversion is possible in your specific garage and whether the project is feasible at all without structural modifications.
Step 2: Identify Your Door Type
Not every garage door can be converted to a high-lift setup. Sectional doors with torsion springs are the most compatible. One-piece doors, doors with extension springs only, and older non-standard panel systems often cannot be converted without replacing major components.
Look at your existing spring system carefully. Torsion springs mount horizontally above the door opening on a metal shaft. Extension springs run parallel to the horizontal tracks on each side. Torsion spring systems are typically more adaptable to high-lift conversions, but both systems require adjustment when track geometry changes — and spring adjustment is not a DIY task for inexperienced hands. Springs store enormous mechanical energy and can cause severe injury if released improperly.
Step 3: Understand What A High-Lift Conversion Kit Includes
A high-lift conversion kit replaces the standard curved track sections and adds extended vertical track segments that run up the wall before transitioning to the horizontal run near the ceiling. The kit also includes new cable drums, longer lift cables, and revised hardware sized for the new geometry.
Kits are sold in different rise heights — commonly 12 inches, 24 inches, and custom heights — and must be matched to your door width, door weight, and spring system. Purchasing the wrong kit for your door’s weight rating or spring setup creates a system that won’t balance correctly. Verify the specifications with the kit manufacturer or a garage door professional before ordering anything.
Step 4: Ceiling With The Right Planning
Planning the new track layout on paper before touching any hardware prevents costly mistakes. Draw a side-view diagram of your garage wall from the floor to the ceiling. Mark the top of the door opening, the desired horizontal track height, and the path the vertical track extension will travel.

Confirm that the new horizontal track position clears any ceiling obstructions — joists, HVAC ducts, lighting, and plumbing all need to be accounted for. Also verify that your existing garage door opener has enough travel capacity for the new door height. Some openers have maximum travel limits that won’t accommodate a high-lift conversion without adjustment or replacement.
Step 5: Prepare The Wall Framing And Track Bracket Positions
High-lift track conversions require solid wall framing to support the vertical track extensions. Standard garage wall studs work for most configurations, but you may need to add horizontal blocking between studs at the points where new track brackets will mount. Mark stud locations carefully and confirm they are structurally sound before attaching hardware.
Lay out the bracket positions along the wall based on the kit’s installation guide. Track brackets typically mount every 18 to 24 inches along the vertical run. Use a level to confirm each bracket position is plumb before drilling — a vertical track that leans even slightly will cause the door to bind, track wear, and opener strain over time.
Step 6: Install The Extended Track Sections And Hardware
With brackets in place, attach the vertical track extensions to the wall brackets first, then connect them to the existing horizontal track sections using the splice hardware included in the kit. Confirm every joint is flush and tight — gaps or misaligned joints will cause rollers to catch or jump the track under load.

Reinstall the cable drums, route the new lift cables according to the kit’s diagram, and connect them to the bottom bracket of the door. Do not adjust spring tension at this stage. The spring system must be re-tensioned after all hardware is installed and the door is hanging correctly in the new track configuration. This step requires a professional unless you have specific training with torsion spring adjustment.
Frequently Asked Questions
What Is The Difference Between A High-Lift And A Vertical-Lift Conversion?
A high-lift conversion adds extended vertical track before the standard horizontal run, so the door travels up the wall higher before going horizontal. A vertical-lift conversion takes this further — the door travels entirely vertically with no horizontal section at all. Vertical-lift systems are typically used in commercial settings with very high ceilings.
Can Any Garage Door Be Converted To A High-Lift Configuration?
Most standard sectional garage doors with torsion spring systems can be converted, provided the ceiling height and headroom clearances are sufficient. Doors with extension springs, one-piece tilt-up doors, or non-standard panel sizes may not be compatible without significant additional modifications or a full door replacement. Always verify compatibility before purchasing a conversion kit.
Will My Existing Opener Work After A High-Lift Conversion?
Many standard belt-drive and chain-drive openers have limited travel range and may not function correctly with a high-lift setup. Jackshaft openers that mount to the torsion spring shaft are often better suited to high-lift configurations. Check your opener’s maximum travel specification in the owner’s manual before planning any track modification.
How Much Does A Professional High-Lift Conversion Cost?
Professional high-lift conversions typically range from $400 to $900 for labor and standard kit hardware, depending on door size, rise height, and regional labor rates. Custom heights, heavier doors, and opener compatibility upgrades add to that cost. Getting two or three quotes from licensed garage door companies gives you a realistic baseline for your specific project.
Is A Building Permit Required For This Type Of Garage Modification?
Permit requirements vary by municipality. Many jurisdictions don’t require permits for garage door hardware modifications, but some do — particularly if structural framing changes are involved. Check with your local building department before starting. Working without a required permit can create complications when selling your home or filing an insurance claim.

Conclusion
Extending your garage door tracks toward the ceiling is a meaningful upgrade that unlocks usable overhead space and modernizes how your garage functions — but it’s a project that demands honest preparation. Understanding your headroom, matching the right conversion kit to your door and spring system, preparing solid wall framing, and planning opener compatibility all come before a single track bolt gets loosened.
The careful, informed approach to how to extend garage door tracks to ceiling pays off in a safe, balanced system that performs correctly for years. Handle the structural and hardware work yourself if your skills and tools are up to it — but bring in a professional for spring adjustment. That’s not the step to learn on the job. Start with your measurements this week, and you’ll know quickly whether this project is ready to move forward.

I am Rick. I grew up helping my dad with his handyman service. I learned a lot from him about how to fix things, and also about how to work hard and take care of business. These days, I’m still into fixing things- only now, I’m doing it for a living.
I’m always looking for new ways to help people grow and develop. That’s why I have created this blog to share all my experience and knowledge so
that I can help people who are interested in DIY repair.